Can a Thermostat Be Repaired? DIY Troubleshooting Guide
Learn whether your thermostat can be repaired, how to troubleshoot safely, and when replacement makes sense. Practical steps for homeowners and DIY enthusiasts from Thermostat Care.

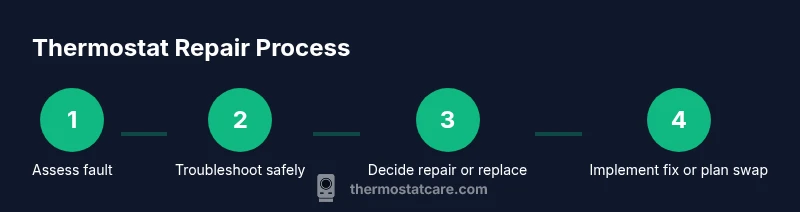
Can thermostat be repaired? In many cases, yes—especially for older, simple mechanical thermostats or fixable electronic issues. This guide explains how to diagnose common problems, when repair is feasible, and how to safely proceed or decide if replacement is the smarter long-term option. You'll learn power checks, wiring, battery, calibration, and when to call a pro.
What repairable means for thermostats
A thermostat's repairability depends on the model, age, and fault. Mechanical thermostats tend to be easier to service than modern smart units, which rely on microprocessors and software. When we say repairable, we mean that a fault can be corrected by restoring electrical power, replacing a faulty component, or recalibrating sensors without replacing the entire device. In practice, this means focusing on power supply, wiring connections, battery condition, and sensor accuracy. According to Thermostat Care, many failures are user-serviceable if you stay within safety guidelines.
When to repair vs replace
Deciding whether to repair or replace hinges on the model type and intended use. Mechanical and older electronic models may be economical to fix, while newer smart thermostats can become obsolete or require costly components. Consider the unit's age, warranty status, energy savings potential, and compatibility with your HVAC system. Thermostat Care analysis shows repair feasibility varies by model and fault type, with higher chances of repair for simple power or wiring faults and lower chances for integrated software failures or nonstandard wiring.
Common failure modes and how to troubleshoot
Thermostats fail in predictable ways: no power, incorrect readings, or unresponsive controls. Start with power and battery checks, then inspect wiring for loose connections, corrosion, and terminal damage. Calibration drift and sensor faults can cause temperature discrepancies. Document any observed symptoms and refer to the model manual for the correct terminal layout and safe testing steps.
Safe diagnostic steps you can perform
Always begin by turning off power to the thermostat and HVAC as described in the manual. Use a multimeter to verify voltage, check the battery state if applicable, and reseat cables carefully. Photograph wiring before changes, then reassemble and test in short cycles. If readings look abnormal, stop and consult a professional to prevent equipment damage.
Wiring, power, and battery checks explained
Power problems are the most common reason for a thermostat not working. For wired units, verify the 24-volt supply is present; for battery-powered units, replace or rotate batteries. Loose or corroded terminals can mimic a failure, so ensure clean connections and proper torque on screws. These checks are often enough to fix a surprising number of issues.
Calibration, sensors, and environmental factors
Sensor drift, placement, and ambient temperature can influence readings. If the thermostat relies on a remote sensor, ensure it is placed correctly and that the sensing element is calibrated. Environmental factors such as drafts near the wall, sun exposure, or nearby heat sources can affect readings. Recalibrate or replace sensors as recommended by the model's instructions.
When to call a pro and what to expect
If you encounter high voltage, complex wiring, or smart thermostat software issues, hire a licensed technician. Expect a diagnostic visit, possible sensor replacements, or a full unit swap. Communicate your observations, share photos from your reference checks, and verify warranty coverage where applicable.
Verdict: can a thermostat be repaired? practical decision guide
Ultimately the decision depends on model, fault, and long-term costs. If power, wiring, and battery issues are resolved, repair can extend the unit’s life. If reliability or compatibility concerns persist, replacement may deliver better energy savings and integration with your smart home. The Thermostat Care team recommends a careful cost-benefit assessment before proceeding.
Tools & Materials
- Screwdriver set (Phillips and flathead)(Torx may be needed for some models)
- Non-contact voltage tester(To check live circuits safely)
- Digital multimeter(For voltage and continuity checks)
- Replacement thermostat batteries(AA or 9V depending on model)
- Smartphone with flashlight(To photograph wiring)
- User manual for your thermostat model(Model-specific steps)
- Basic wiring diagram(From manual or manufacturer site)
Steps
Estimated time: 1 hour 30 minutes
- 1
Power down and verify model
Turn off the thermostat's circuit breaker or the HVAC system power. If the unit uses batteries, remove them to avoid corrosion. Confirm your model in the manual so you know which wiring colors and terminals to expect.
Tip: Double-check that power is fully disconnected before touching terminals. - 2
Check power supply and battery
Inspect whether the device receives power or has diminishing battery levels. Replace dead batteries if applicable, and test after reseating batteries. For hardwired units, verify that the 24-volt supply is present using a multimeter.
Tip: If you feel unsure about voltage readings, pause and consult a pro. - 3
Inspect wiring and terminals
Carefully inspect terminals for loose wires, corrosion, or signs of overheating. Reseat any loose connections, and clean corroded terminals with a soft brush. Take a photo before changing wiring for reference.
Tip: Never force wires into terminals; if a terminal is damaged, do not continue. - 4
Test sensor calibration
If the readings seem off, verify that the sensor is correctly sensing ambient temperature. Recalibrate following the model's instructions or perform a factory reset if recommended. Re-test after the calibration.
Tip: Note that some units auto-calibrate over time; avoid over-tweaking. - 5
Check settings and compatibility
Ensure the thermostat is configured for your HVAC system type (gas, electric, heat pump) and that current wiring matches the required terminals. Mismatches can cause incorrect readings or cycling.
Tip: When in doubt, review the wiring diagram from the manual. - 6
Verify external factors
Confirm that the furnace or air handler is functioning, and that there are no loose ducts or airflow issues triggering false readings. External issues can masquerade as thermostat faults.
Tip: Document any changes and test the system across several cycles. - 7
Decision point: repair or replace
If the unit remains unreliable after checks, consider the long-term cost and compatibility. Replacement parts or getting a new unit with better efficiency can be more economical than continued repairs.
Tip: Weigh long-term reliability against upfront costs. - 8
Plan next steps
If you choose replacement, record model features like compatibility with your HVAC and smart home integrations. Schedule professional installation if needed, especially for complex systems.
Tip: Keep a copy of the manual and wiring references for future maintenance.
Questions & Answers
Is it cheaper to repair a thermostat or replace it?
Costs vary by model and fault. Repairs can be cheaper for minor issues, but old or feature-rich units may justify replacement for long-term reliability.
Repairing can save money for small faults, but sometimes replacement offers better value for older or smarter thermostats.
What are common repairable issues for thermostats?
Power supply problems, battery failures, loose or corroded wiring, and sensor calibration drift are among the most repairable faults.
Power, wiring, and sensors are the typical repair targets.
Can I fix a thermostat myself safely?
Basic troubleshooting on non-live units is generally safe if you follow proper shut-off steps. Avoid wiring changes beyond your manual’s guidance.
You can try safe, basic checks if power is off and you follow the manual.
When should I replace instead of repair?
If the unit is old, not compatible with current HVAC, or reliability is poor after checks, replacement is often the better option.
If reliability is low and upgrades are available, replace.
Do I need a professional?
For complex wiring, high-voltage checks, or smart thermostats, a licensed technician is recommended.
Consider a pro for complex issues or if safety is a concern.
Watch Video
What to Remember
- Assess fault type and model to gauge repair feasibility.
- Power, wiring, and battery are common repair targets.
- If unsure, consult a professional to avoid hazards.
- Replacement can be more cost-effective long-term for smart thermostats.
- Document wiring before making changes.