Can You Replace a Thermostat Yourself? A Practical DIY Guide
Learn how to safely replace a thermostat yourself with a compatible model, step-by-step instructions, essential tools, and pro tips from Thermostat Care. Avoid common mistakes and know when to call a pro.

Yes, you can replace a thermostat yourself if you’re comfortable with basic electrical work and your new model is compatible with your system. This quick answer covers safety, compatibility checks, and wiring basics, plus mounting and testing the new device. If you’re unsure about wiring or a complex system, consider professional help for safety and warranty reasons.
Why Replacing a Thermostat Yourself Can Be Worth It
According to Thermostat Care, many homeowners save time and money by performing a DIY thermostat replacement when the system is simple, 24-volt, and the new unit is fully compatible with the existing wiring. A correctly chosen thermostat can improve comfort, energy savings, and control responsiveness without requiring a technician visit. This section explores the benefits, the safety boundaries, and how to decide if DIY is right for your home. You’ll learn how a well-executed swap preserves warranty terms in many cases and reduces downtime between the old unit and the new one. By understanding each step, you’ll gain confidence to troubleshoot minor issues and avoid common mistakes that lead to calling a pro later. The Thermostat Care team emphasizes that preparation—checking compatibility, shutting power off, and labeling wires—lays the groundwork for a smooth installation and reliable performance.
Is It Safe to Replace a Thermostat Yourself?
Safety is non-negotiable when touching any HVAC electrical device. A 24-volt thermostat is generally low risk, but improper wiring or power application can damage equipment or cause short circuits. Always shut off power at the circuit breaker and at the thermostat, use a non-contact voltage tester to confirm no live voltage on wires, and wear protective gear if you’re working in a tight space or near damp surfaces. If you’re replacing a heat-pump system or a multi-stage thermostat, the risk increases slightly due to additional wiring and control logic. In those cases, consider having a professional verify wiring diagrams and ensure compatibility with your outdoor unit. This caution is consistent with guidance from the Thermostat Care team, which underscores safety first and avoiding unfamiliar configurations.
How to Verify Compatibility Before Buying a New Thermostat
Compatibility is the single most important factor when replacing a thermostat yourself. Verify your system type (gas, electric, heat pump) and the control voltage (usually 24V in residential systems). Check the existing wiring (C wire presence, number of conductors, and color-coding) and confirm that the new thermostat supports your HVAC equipment, stage count, and energy-saving features. Review the manufacturer’s compatibility lists and cross-check with your current setup. If you have a two-stage or heat-pump system, ensure the thermostat offers the appropriate accompanying features and wiring options. The Thermostat Care team notes that a quick compatibility audit saves time and prevents incompatibility from causing non-functioning displays or skipped stages.
Step-by-Step Overview for Replacement (High-Level)
A successful swap follows a predictable sequence: prepare the space and gather tools, power down, remove the old unit, map wires to terminals, attach the new base, connect wires to the correct terminals, mount the display, and run through a test cycle. This overview helps you set expectations for scope and time, while also highlighting where mistakes commonly occur—like loose terminals or mismatched wire labels. Keep the old thermostat nearby for reference during labeling, and use color-coded labels or masking tape to map each wire to its terminal on the new unit. This approach minimizes confusion and supports a clean, efficient installation.
Wiring Basics: Reading Terminals and Colors
Many residential thermostats use common color codes (Red for power, White for heat, Yellow for AC, Green for fan, Blue or C for common). However, not all systems follow the same convention, especially with older wiring. Before disconnecting anything, take a high-quality photo of the existing wiring at the old thermostat. This reference helps you map each wire to the corresponding terminal on the new device. When you connect wires, ensure the terminals are clean and free of corrosion, and tighten screws firmly but not over-torqueing. If your new thermostat requires a C wire that wasn’t present, you’ll need to install one or choose a model that functions without it (note: some smart thermostats require a C wire for charging).
Mounting the New Thermostat Base and Wiring
Mount the new base level and secure it with screws, avoiding overtightening that could crack the wall plate. Route wires straight into the terminal blocks, keeping conductors neat and free of pinched insulation. Connect wires according to your mapping photo and the new unit’s labeling. If your thermostat has a compatibility jumper or specific wiring order, follow the manufacturer’s instructions precisely. When in doubt, pause the process and re-check the wiring plan. A clean, labeled layout reduces post-install troubleshooting and ensures you can quickly verify each function later.
Attaching the Display and Reconnecting Power
Once wires are secured, snap the display unit onto the base and ensure it engages with the mounting slots. Restore power at the breaker and at the thermostat if you have a fused disconnect. Turn the thermostat on and observe the display for proper boot-up, then navigate to basic functions like heating and cooling mode, fan operation, and clock settings. If anything fails to power up or if the display remains blank after powering on, double-check the wire connections and confirm the correct terminals were used. A common issue is swapped wires or a loose terminal; a quick re-seat of connections usually resolves it.
Testing, Calibration, and Tweaks After Installation
With power restored, run a short test cycle to verify heat, cool, and fan operations. Listen for unexpected noises and check the temperature readings against a separate room thermometer to confirm accuracy. Calibrate temperature offset via the thermostat’s settings if the reading seems off. Adjust schedule programming to reflect your daily routine, and enable energy-saving features such as adaptive recovery or smart scheduling if available. The goal is to confirm reliable operation across all modes and ensure the unit’s software is up to date. If you’re using a Wi-Fi-connected model, connect to the network and verify remote control functionality and app integration.
Common Mistakes and How to Avoid Them
Avoiding common pitfalls is a big part of a successful DIY installation. Do not skip labeling wires or skipping the photo reference. Never force a wire into a terminal that isn’t aligned for that conductor, as miswiring can damage equipment or cause the thermostat to misbehave. If you encounter a C wire missing, evaluate whether the new thermostat can operate without it or if you need to run an extra conductor. Finally, never resume power if you see scorch marks, damaged insulation, or a burning smell; stop and reassess the wiring or consult a professional.
Quick Maintenance Tips for Longevity
Treat your thermostat as part of the HVAC system’s control surface. Keep the unit clean, avoid mounting on direct sunlight or near heating sources, and update firmware when available. Regularly check the wiring connections behind the wall plate for looseness and corrosion signs. If you relocate, ensure the wall is dry and structurally sound to prevent future mounting issues. A well-maintained thermostat helps sustain energy efficiency and responsive climate control.
How to Decide If DIY Isn’t Right for You
If your system is older, uses gas with direct flame controls, or includes complex wiring, DIY replacement may void certain warranties or cause safety hazards. If you feel uncertain about any step, it’s safer to contact a licensed HVAC technician. The Thermostat Care team recommends accepting professional help when the project involves dangerous conditions, ambiguous wiring, or potential code violations. Your safety and system integrity come first.
Tools & Materials
- Replacement thermostat (24V, compatible with your system)(Ensure model supports your system type and wiring count)
- Screwdriver set (flathead and Phillips)(Medium-small size, magnetic tips help with tiny screws)
- Non-contact voltage tester(Confirm no live voltage before handling wires)
- Wire labels or masking tape(Label wires to terminals for accuracy)
- Smartphone or camera to photograph wiring(Document existing wiring before removal)
- Electrical tape(Seal exposed conductors and secure wire nuts if used)
- Voltage tester and multimeter (optional)(Useful for verifying voltage and continuity if needed)
- Wire caps or wire nuts(Use if any splices are required)
- Wall repair materials (if needed)(Drywall patch or patching kit if removal creates damage)
Steps
Estimated time: 45-90 minutes
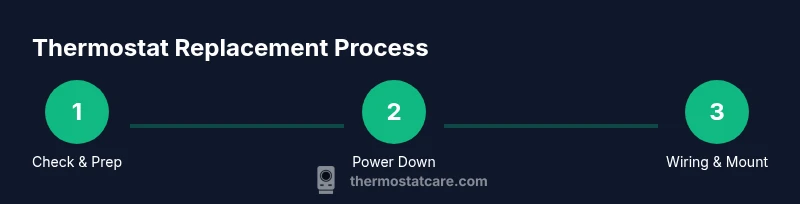
- 1
Check compatibility and prepare workspace
Review your old thermostat wiring and confirm the new model is compatible with your HVAC system. Clear the area around the thermostat, remove faceplate screws, and photograph the current wiring as a reference.
Tip: Taking a photo now saves you from guessing later. - 2
Power down the system
Turn off power at the circuit breaker and, if present, at the HVAC control panel. Wait 60 seconds to ensure the circuits are fully de-energized before proceeding.
Tip: Always verify no voltage with a tester before touching wires. - 3
Label wires and remove the old unit
Label each wire with its terminal position, then loosen and remove the wires from the old thermostat base. Gently pull the unit away from the wall while supporting the wires.
Tip: Keep wires organized to avoid mix-ups when wiring the new unit. - 4
Mount the new base plate
Attach the new thermostat base to the wall using screws and ensure it sits flat. Do not overtighten screws, which could crack the wall plate.
Tip: Use a level to ensure the base is straight for proper display alignment. - 5
Connect wires to the new terminals
Reconnect each labeled wire to the corresponding terminal on the new thermostat according to the installation guide. Double-check that the wire is fully seated and that there are no stray strands.
Tip: If a terminal isn’t used by the new model, tuck the wire back neatly with the label. - 6
Attach the display and power up
Clip or screw the display onto the base as instructed by the manufacturer. Restore power at the breaker and, if applicable, at the HVAC control panel.
Tip: Watch for a normal boot sequence and any error messages. - 7
Run basic tests and set preferences
Set the clock, language, and basic heating/cooling modes. Compare the thermostat readings with a separate thermometer to verify accuracy and adjust temperature calibration if needed.
Tip: Program a simple daily schedule to begin testing energy-saving features. - 8
Test system function across modes
Cycle through heat, cool, fan, and auto modes to ensure each operates correctly. Check for latency, noise, or shutoffs and verify app connectivity if applicable.
Tip: If something doesn’t function, re-check wiring connections to the corresponding terminals.
Questions & Answers
Can I replace a thermostat myself?
Yes, you can replace it yourself if you’re comfortable with basic electrical work and your new model is compatible with your system. Follow safety steps, labeling, and proper wiring practices to avoid issues.
Yes—if you’re comfortable with basic electrical work and the new thermostat matches your system, you can replace it yourself. Just follow safety steps and use proper wiring practices.
What safety steps are non-negotiable?
Always cut power at the breaker and use a voltage tester before touching wires. Keep the workspace dry, wear protective gear, and avoid working in damp areas to prevent shocks.
Always cut the power and test for voltage before touching wires, and work in a dry area with proper protection.
Will replacing my thermostat affect warranty?
Warranty terms vary by manufacturer and installation type. Review both your HVAC and thermostat manuals; some warranties require professional installation to remain valid.
Warranty terms vary, so check the manuals. Some warranties require professional installation to stay valid.
What if my system is a heat pump or has multiple stages?
Heat pumps and multi-stage systems often need a compatible thermostat and may require additional wiring. If unsure, consult the installation guide or a pro.
Heat pumps and multi-stage systems may need a compatible thermostat and extra wiring. If unsure, consult the guide or a pro.
How long does replacement typically take?
For most standard residential setups, plan about 45-90 minutes, depending on wiring, wall conditions, and familiarity with the process.
Most replacements take about 45 to 90 minutes, depending on wiring and setup.
What should I do if the thermostat won’t power on after installation?
Double-check the wiring connections to the terminals, ensure the breakers are on, and verify the C-wire connection if applicable. If the display remains blank, consult the manual or a professional.
Check wiring and breakers first, then verify the C-wire. If it stays blank, consult the manual or a pro.
Can I reuse old wiring or need new cables?
Reusing wiring is common if the wires and insulation are intact and match the new thermostat’s requirements. If you see damaged insulation or insufficient conductors, replace with compatible wiring.
You can reuse wiring if it’s in good shape and compatible with the new thermostat; replace damaged wires as needed.
Watch Video
What to Remember
- Identify compatibility before purchasing a new unit.
- Shut off power and label wires to prevent miswiring.
- Follow the thermostat’s wiring diagram precisely.
- Test across modes and calibrate readings for accuracy.
- Know when to seek professional help for safety or warranty concerns.