Braeburn Thermostat Not Working: Troubleshooting Guide
If your braeburn thermostat not working, this guide helps you diagnose common causes—from power issues to wiring faults—with step-by-step fixes and prevention tips.

Braeburn thermostat not working? The most likely culprits are a power issue, a tripped breaker, or a stuck sensor. First, confirm the display powers on and that the thermostat is receiving 24V from the HVAC system. If the screen is blank, perform a safe reset of the unit and check for blown fuses. If it still won’t respond, continue with diagnostic steps below.
Understanding the Braeburn Thermostat Not Working
braeburn thermostat not working is a common problem homeowners encounter when the thermostat fails to respond to settings or when the display goes dark. According to Thermostat Care, most Braeburn thermostat issues originate from power delivery or simple configuration glitches, not from a faulty furnace. Start by noting what you observe: Is the display blank, is the screen flickering, or does the thermostat fail to call for heat or cooling? Understanding the symptom will guide you to the most likely causes and the safest fixes. In many cases, the problem is a 24V power loss, a tripped circuit, or a loose wire at the thermostat or furnace control board. Document the observed behavior, including the time of day and whether the issue occurs with all modes (heat, cool, and emergency heat). This information helps you or a technician diagnose faster and reduces unnecessary troubleshooting.
Common Causes of a Non-Responsive Braeburn Thermostat
When braeburn thermostat not working, a handful of causes cover the majority of failures. Power issues (tripped breakers, blown fuses, or a failing transformer) are the leading culprits. Wiring problems—loose or damaged connections at the thermostat or furnace control board—are another frequent source. Sensor or communication faults, especially in older Braeburn models, can prevent accurate readings and proper calls for heat or cooling. Firmware incompatibilities or outdated software can also disrupt operation, particularly if you integrate the unit with a smart-home hub. Finally, an internal thermostat failure, while less common, can occur with age or manufacturing defects. Familiarize yourself with these possibilities as you troubleshoot.
Quick Checks to Do Before Digging In
Before diving into deeper fixes, perform these fast checks. Confirm the thermostat display powers up when you restore power to the system. Verify the thermostat is set to the desired mode and temperature, and test a simple heat call to see if the furnace engages. Inspect the obvious wiring at the thermostat and check for loose screws or visible damage. If you notice a blinking LED, refer to the manual for what the pattern means. If your Braeburn thermostat is connected to a smart home system, ensure the hub and app are syncing correctly. If any basic check reveals an issue, address it before proceeding to more involved steps.
Power, Grounding, and 24V Supply: How to Inspect Safely
Power issues are the leading cause of braeburn thermostat not working. Start by turning off the power to the thermostat at the service panel and, if accessible, the furnace. Use a non-contact voltage tester to confirm no live voltage is present where you will work. At the furnace, check the 24V transformer and ensure the R and C wires are intact and connected firmly. Look for signs of corrosion on terminals and confirm there is no loose wire under the screw. If the thermostat displays something intermittently, swap the 24V supply temporarily to see if the issue persists. Always reapply power carefully after inspections and avoid touching live conductors.
Wiring, Terminals, and Control Board Checks
Loose or damaged wiring is a very common reason braeburn thermostat not working. Start by removing the thermostat faceplate and inspecting each wire at both ends. Ensure the red R wire and the common C wire are securely fastened and not frayed. Check for bent or damaged terminals at the furnace control board and ensure all wire colors align with the installation diagram. If you recently replaced the thermostat, verify that the wire mapping matched the old configuration and that any jumper wires are correctly placed. Document any wiring changes for future reference. This step reduces miswiring risks that lead to continued operation failure.
Sensor Readings, Calibration, and Battery Considerations
A bad temperature sensor or miscalibrated readings can cause the thermostat to misbehave or fail to call for heat/cool. Compare the sensor reading shown by the thermostat with the actual room temperature using a reliable thermometer. If there is a persistent mismatch, recalibration or sensor replacement may be required. Some Braeburn units include battery backup or backlight indicators; if your model uses batteries, replace them with fresh, high-quality cells and ensure proper orientation. Calibrate offset settings if available in the menu, but avoid extreme offsets that can confuse the HVAC system.
Reset, Reboot, and Firmware Considerations
Software glitches can disturb communication between the thermostat and HVAC equipment. Perform a safe reset using the menu or a hardware reset method specified in the manual. After reset, re-enter your preferences, time, and schedule. If your Braeburn thermostat supports firmware updates, check for updates and apply them following the producer’s instructions. When integrating with a smart-home system, re-sync the device and verify compatibility. Firmware issues typically resolve with updates and resets.
When to Replace vs Reconnect Wiring; Professional Help
If power, wiring, or sensor checks reveal damage to conductors, or if the 24V supply tests fail to restore operation, replacing components may be the best option. Do not attempt repairs on mains-powered components beyond your comfort level. When in doubt, contacting a licensed HVAC technician ensures proper diagnosis and avoids safety hazards. A professional can verify the transformer, control board, and wiring integrity and perform a safe, code-compliant replacement if needed.
Prevention and Maintenance to Extend Life
To minimize future braeburn thermostat not working issues, perform regular checks on power wiring, keep terminals clean, and guard against corrosion. Schedule routine HVAC maintenance to ensure the furnace and air conditioner respond reliably to thermostat calls. Keep a record of your thermostat’s settings, firmware versions, and any changes to wiring. Regular power cycling during seasonal transitions can also help identify issues early and reduce downtime.
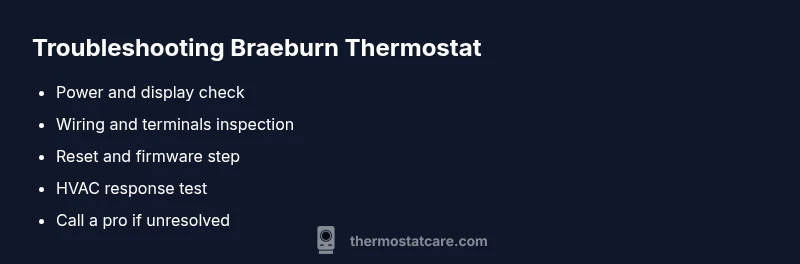
Steps
Estimated time: 60-90 minutes
- 1
Power check and display verification
Power down the system, then restore power and confirm the thermostat display powers up. Check if the unit responds to basic commands like increasing setpoint. If the display remains blank, move to step 2.
Tip: Use a non-contact tester to confirm no live voltage before touching any wires. - 2
Inspect the circuit breaker and fuses
Locate the main service panel and check the HVAC/furnace breakers. If a breaker trips or a fuse is blown, reset or replace components as required. After restoring power, test the thermostat again to see if the issue is resolved.
Tip: Avoid resetting multiple breakers at once; document any recurring trips for a technician. - 3
Check thermostat wiring at thermostat and furnace
Remove the thermostat cover and inspect connection screws for tightness. At the furnace control board, verify the R and C wires are intact and securely connected. Look for damaged insulation or discolored connectors.
Tip: Take a photo before disconnecting wires to ensure correct reassembly. - 4
Perform a safe thermostat reset
Use the thermostat menu or hardware reset (as per manual) to reboot the device. Re-enter settings, time, and any schedules after reset. This can clear memory glitches causing non-response.
Tip: Do not reset unless you’ve saved critical settings. - 5
Test HVAC response after reset
Set a call for heat and listen for the furnace ignition or blower. If the system responds, the issue may be isolated to the thermostat interface. If not, proceed to step 6.
Tip: If you hear no activity, there may be a separate furnace issue. - 6
Inspect 24V supply at the furnace
Use a multimeter to measure 24V AC between R and C terminals. A low or missing reading indicates transformer or wiring issues that require repair. If the voltage is within range, the problem may be in the thermostat side.
Tip: Only perform voltage checks with power off and proper safety precautions. - 7
Check sensor calibration and batteries
If your Braeburn model includes a sensor calibration option, ensure it reads accurately against room temperature. Replace any batteries if your model uses them and confirm orientation. Re-test with a new reading.
Tip: Use fresh batteries and verify polarity. - 8
Decide on replacement vs professional help
If all checks fail to restore operation, consider replacing the thermostat or engaging a licensed technician for a safe diagnosis and upgrade. A pro can assess wiring, transformer integrity, and control-board health.
Tip: Professional help is recommended for high-voltage or complex wiring issues.
Diagnosis: Braeburn thermostat won't power on or display blank
Possible Causes
- highPower supply issue (tripped breaker, blown fuse, or failed transformer)
- highLoose or damaged wiring at the thermostat or furnace control board
- mediumThermostat internal fault or age-related failure
- lowDisplay or microcontroller fault
Fixes
- easyReset circuit breakers/fuses and power cycle the thermostat
- easyRe-seat and tighten thermostat wires at both ends
- mediumTest and replace the 24V transformer or battery/backup power if applicable
- hardReplace the thermostat if failure persists and compatibility issues exist
Questions & Answers
What are the first steps when Braeburn thermostat isn't working?
Begin with a power check: ensure the thermostat has power, confirm 24V supply, and reset if needed. If the display remains blank, inspect wiring and breakers.
Start with power and reset, then check wiring if it stays unresponsive.
Why is my Braeburn thermostat display blank?
A blank display usually points to a power issue, blown fuse, or a loose connection at the thermostat or furnace. Inspect power sources and connectors carefully.
Blank display often means power or connection problems.
Does Braeburn thermostat require batteries?
Many Braeburn models rely on a 24V power supply; some variants may use batteries as backups. Check your model’s manual to confirm battery usage.
Most Braeburns don’t rely on batteries, but check your model.
Can I reset the Braeburn thermostat safely?
Yes. Use the menu or a hardware reset per the manual, then re-enter settings. Avoid resets if you haven’t saved critical configurations.
Yes, reset per the manual and reconfigure afterward.
When should I call a professional for braeburn thermostat issues?
If power tests fail, wiring looks damaged, or you’re uncomfortable working with electrical components, a licensed HVAC technician should diagnose and repair.
If the power checks don’t fix it or wiring looks risky, call a pro.
Will a blown fuse cause thermostat not to work?
Yes, a blown fuse or tripped breaker can deprive the thermostat of power. Address the power issue before replacing the thermostat.
Yes, a fuse or breaker can stop the thermostat from working.
Watch Video
What to Remember
- Power issues are the most common cause—start here.
- Secure all wiring and verify a solid 24V supply.
- Use resets and firmware updates to clear glitches.
- Call a pro if power or wiring tests fail or you’re unsure about safety.