How to Troubleshoot a Bad Thermostat in House Quickly
Urgent guide to diagnose and fix a bad thermostat in house. Learn safe, practical steps to identify power, wiring, or sensor issues and restore reliable comfort without unnecessary service calls. Thermostat Care recommendations.

A bad thermostat in house is usually caused by worn sensors, loose or corroded wiring, or a dead battery in smart thermostats. Start with simple checks: replace batteries, confirm the display is responsive, and ensure the thermostat is set to the correct mode. If issues persist, inspect the C-wire connections and perform a safe reset before considering replacement.
Why a Bad Thermostat in House Causes Problems
According to Thermostat Care, a bad thermostat in house often leads to erratic temperatures, oversized energy usage, and comfort gaps between rooms. In most cases the root causes are simple to diagnose: worn temperature sensors, loose or corroded wiring at the thermostat or furnace, a dead battery in smart thermostats, or a faulty C-wire that powers the device. Understanding these factors helps homeowners decide whether to swap parts or call a pro. Thermostat Care analysis shows that many problems trace to the wiring and power supply rather than the HVAC system itself, so start with the device before inspecting the furnace. By tackling the thermostat first, you can avoid unnecessary service fees and gain faster comfort. Expect early symptoms like a display that won’t respond, schedules that don’t run, or temperature readings that jump around. If you notice frequent resets or codes on the display, you’re likely dealing with a bad thermostat in house. This article keeps the focus on safe, practical steps you can perform on your own, with professional help clearly flagged when needed.
Quick Home Checks You Can Do First
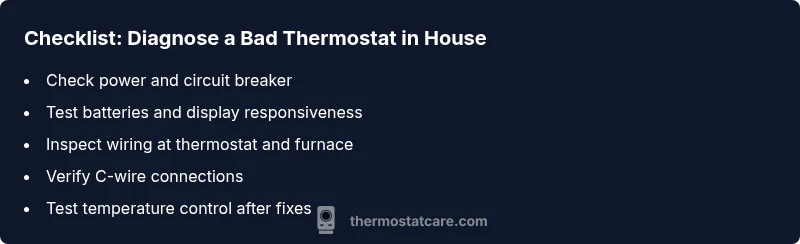
The fastest way to detect a bad thermostat in house is to perform a sequence of non-destructive checks before you call for service. Start by replacing batteries in wireless or battery-powered units and observe whether the display becomes responsive. For non-battery models, verify the thermostat is receiving power by checking the breaker and the outlet. Next, test basic controls: set a simple heating or cooling event, cycles per hour, and ensure the thermostat responds within a minute or two. If the unit uses a schedule, temporarily disable it to rule out a software glitch. Check the thermostat’s location for dusty vents, drafts near the wall, or sun exposure that may cause skewed readings. Finally, inspect visible connections at the thermostat terminals; loose wires or corrosion can mimic a dead device. If you complete these checks and the house remains uncomfortable, proceed to power and wiring diagnostics or consider professional evaluation.
Common Causes in Detail
Battery issues are a frequent culprit in a bad thermostat in house, especially for units that rely on coin-cell or rechargeable batteries. Power and wiring problems come next: a tripped breaker, an outlet that’s not delivering consistent power, or loose terminal screws can cause the thermostat to misread temperatures or drop control altogether. The C-wire, which provides a continuous 24-volt power supply for many smart thermostats, is another common failure point; improper connection or degraded insulation can create intermittent performance. Sensor drift and mounting location also matter—if the sensor is positioned to read a non-representative area (near a vent, heat source, or direct sunlight), readings will be unreliable. Finally, firmware compatibility and age can lead to quirky behavior; older models may no longer sync well with HVAC components or mobile apps. Each of these causes has a practical fix you can attempt safely, and many do not require full system replacement.
Diagnostic Pathway for the Symptom: Erratic Temperature Control
When a thermostat seems unreliable, follow a logical diagnostic flow to narrow the cause. Start with power: confirm the unit has power, reset the breaker if needed, and test battery status if applicable. If the display is responsive, proceed to inspect wiring at both ends—the thermostat terminals and the furnace control board—to ensure tight, clean connections. If wires look damaged or corroded, replace or reseat them as guided. If the problem persists, test the C-wire and confirm steady 24VAC between C and R with a multimeter if available. Finally, consider sensor placement, software updates, or compatibility issues. Document codes or strange behavior to share with a professional if you decide to consult one.
Step-by-Step Troubleshooting for the Most Common Cause
- Power-check and reset: Turn off power to the thermostat at the breaker, wait 30 seconds, then restore power. Observe if the display resumes normal operation. 2) Battery test: If the unit uses batteries, replace with fresh ones of the correct type. 3) Wiring inspection: Remove the thermostat cover and confirm terminal screws are tight; re-seat any loose wires and clean corrosion if present. 4) C-wire confirmation: Ensure the C-wire is properly connected at both the thermostat and the furnace board; look for damaged insulation. 5) Test controls: Reconnect, set to heat/cool, and monitor performance for several minutes. If issues continue, consult a professional.
Tip: Always label wires before disconnecting and take photos for reference.
Safety and When to Call a Pro
Safety first: working with electrical components can be dangerous. If you notice burning smells, melted insulation, or if you’re unsure about shutoff procedures, stop and call a licensed technician. Even when the problem seems minor, a pro can verify voltage levels, check the HVAC control board, and ensure there’s no risk to the furnace. Thermostat maintenance is a smart habit to reduce future failures, but not all issues are user-serviceable. If the thermostat is under warranty, contact the manufacturer for guidance and potential replacement options.
Prevention and Maintenance to Avoid Future Issues
Develop a routine to inspect your thermostat seasonally: clean the device, verify battery health, and keep the wall area free from dust and moisture. Use a surge protector or battery backup if power fluctuations are common in your home. Update firmware whenever available and consider scheduling professional checkups for the HVAC system to avoid cascading failures. A well-maintained thermostat reduces the chance of erratic performance and helps sustain comfort without repeated service calls.
Steps
Estimated time: 30-60 minutes
- 1
Power-check and reset
Turn off power to the thermostat at the breaker, wait 30 seconds, then restore power. Watch the display for a normal boot and try a simple temperature change to see if the device responds.
Tip: Always start with power to avoid shocks and misinterpretation of readings. - 2
Battery test (if applicable)
If your model uses batteries, replace with fresh alkaline batteries of the correct type. Confirm the display is brighter and more responsive after replacement.
Tip: Use the exact battery type recommended by the manufacturer. - 3
Wiring inspection
Carefully remove the thermostat cover and inspect the terminal screws. Tighten any loose wires and look for signs of corrosion or damaged insulation.
Tip: Take a quick photo of the wires before removing anything. - 4
C-wire check
Check that the C-wire is properly connected at both the thermostat and the furnace control board. If using a multimeter, confirm there is a steady 24VAC between C and R.
Tip: If you’re unsure about HVAC voltages, call a pro to avoid damage. - 5
Test and confirm
Reconnect power, set to heat or cool, and observe performance for several minutes. Note any codes or inconsistent behavior for reference when seeking help.
Tip: Document any codes and timings to speed up diagnosis.
Diagnosis: Temperature readings are inconsistent or the thermostat won't hold setpoint
Possible Causes
- highPower issue (outlet, breaker, or bad supply)
- highLoose or corroded wiring at the thermostat or furnace
- mediumDead or weak batteries (for battery-powered models)
- mediumC-wire not properly connected
Fixes
- easyReset the circuit breaker and ensure the outlet is delivering power to the thermostat
- easyTighten or reseat thermostat wires at both ends; clean corrosion if present
- easyReplace batteries or install a powered adapter if needed
- mediumVerify C-wire is connected and has 24VAC between C and R
Questions & Answers
What are the first signs of a bad thermostat in house?
Early signs include unresponsive buttons, nonmatching temperatures, and frequent resets. If the display is erratic, perform basic checks or consult a pro.
Look for unresponsive buttons and temperature mismatches. If you see erratic behavior, try the quick checks or contact a technician.
Can a thermostat be fixed or do I need a replacement?
Many issues are repairable, such as wiring or battery problems. If components are aged or the unit cannot hold a setting, replacement may be the best long-term option.
Often fixes work, especially with batteries or wiring. If it’s old or unreliable, swapping it out is a solid plan.
Is it safe to reset my thermostat?
Resetting is generally safe and can clear certain software glitches. Always power down first and follow manufacturer steps.
Yes, but power down first and follow the device’s reset procedure to avoid further issues.
What if my thermostat is battery-powered and blinking?
Blinking indicators often signal low power or firmware activity. Replace batteries, then perform a test run to see if the blinking stops.
If it’s blinking, try fresh batteries and test again to rule out power issues.
Should I hire a pro for a bad thermostat in house?
If you’re uncomfortable with electrical work, or if power or wiring seems involved, hire a licensed technician to avoid safety risks and ensure proper installation.
If you’re unsure about wiring or power, it’s wise to call a pro.
Watch Video
What to Remember
- Start with battery and power checks first.
- Secure all wiring connections at both ends.
- Test the C-wire if using a smart thermostat.
- Call a pro if you detect electrical or furnace-related risk.
- Regular maintenance reduces future thermostat faults.