Wiring a Thermostat Diagram: Step-by-Step Guide
Learn how to read and redraw a wiring diagram for your thermostat, map conductors to terminals, and verify safety before wiring. This Thermostat Care guide provides a practical, comprehensive approach for homeowners and DIY enthusiasts.

Map every conductor to the correct terminal using a wiring diagram, then verify power and safety before reconnecting. This concise guide covers the essentials and points you to a full step-by-step tutorial for complete accuracy. Following the diagram minimizes mistakes, boosts confidence, and helps you troubleshoot thermostat issues efficiently.
What a wiring diagram shows and why you need it
A wiring diagram for a thermostat is a precise map of conductors, terminals, and power connections. It tells you exactly where each wire should go, and it helps you plan replacements, verify compatibility, and avoid dangerous mistakes. According to Thermostat Care, a well-drawn diagram makes it easier to compare your setup with the thermostat’s requirements and communicate with others who may service the system. In practice, you’ll chart the supply voltage, the C-wire (common), heating and cooling controls, fan connections, and any auxiliary or smart features. Taking the time to understand the diagram before you touch wires dramatically reduces miswiring risk and speeds up the process. This proactive planning creates a safe, repeatable method you can reuse for upgrades or diagnostics, with clear labels and up-to-date notes for future reference.
Safety and prerequisites before you begin
Electrical work carries risk of shock or fire if done incorrectly. Always start by powering off the HVAC circuit at the breaker, then test the terminals with a non-contact voltage tester to confirm that no voltage remains. Remove the thermostat faceplate only after confirming power is off. Keep metal tools away from live conductors, and never work in wet areas. Use a grounded, properly rated power source as required by your system. If you’re uncertain about the mains or the equipment’s specifications, stop and consult a licensed electrician. The goal is to avoid damage to the thermostat, control board, or house wiring and to ensure personal safety during the mapping process.
Key symbols, lines, and connections in a thermostat diagram
Thermostat diagrams use standard symbols to show wires, terminals, and power flow. Typical diagrams include supply lines (L1, L2), a neutral or common (N or C), and grounds. Terminals on the thermostat side are labeled R (24V hot), C (common), W (heat), Y (cool), G (fan), and sometimes OB or AUX for heat pumps. A line between a terminal and a wire represents a connection; colors can vary by installation, so use the diagram as your guide. If you encounter unfamiliar symbols (like jumpers or inline resistors), refer to the manufacturer’s legend. A clean symbol set helps you verify every wire’s destination across both the old and new thermostats.
Setting up your workspace and verifying power
Prepare a clean, well-lit workspace near the wall where the thermostat is located. Remove the thermostat faceplate and gently expose the wiring, labeling each wire with tape as you disconnect. Before touching any connectors, re-check that the power is off at the breaker and the thermostat’s harness is isolated. Remove the old thermostat to access the base and mounting plate. If your system includes a furnace control board, take a quick photo of the wiring on the board to compare later with your diagram. This preparation makes mapping easier and reduces the chance of mislabeling or wire clashes. Keep the area dry and organized to prevent accidental contact with exposed conductors.
Interpreting common thermostat wiring colors and terminals
Wire colors provide helpful hints, but you should never rely on color alone. Use the wiring diagram to confirm each wire’s terminal destination. Common colors include red for power (R), white for heat (W), yellow for cooling (Y), green for fan (G), and blue or black for common (C). Some systems use orange for heat pump reversing valve (O/B) or other specialized functions. Document each wire’s color, length, and destination, then trace them to the corresponding terminals on both the old thermostat and the replacement. If any wire lacks a direct mapping, consult the diagram and manufacturer notes before making changes. A well-documented color map reduces confusion during the reassembly.
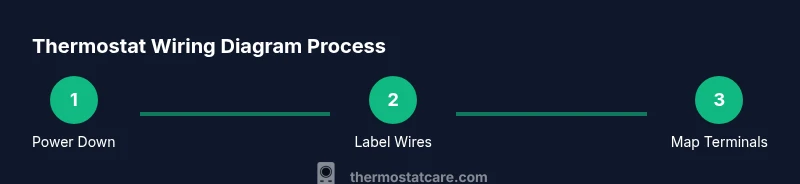
Step-by-step approach to map wires to a diagram
Step 1 — Power down and document existing wires: Confirm the circuit is off at the breaker and note each wire’s position on the existing thermostat. Step 2 — Remove the thermostat and label wires: Gently detach wires and place labeled tags to preserve orientation. Step 3 — Identify wire destinations on the old thermostat: Map each wire to R, C, W, Y, G, and other terminals as applicable. Step 4 — Double-check at the furnace control board or air handler: Ensure wiring corresponds to the control board pins and color conventions. Step 5 — Draft the wiring diagram: Create a clean schematic with terminals, conductors, and power lines. Step 6 — Verify compatibility with the new thermostat: Cross-check the new model’s terminal layout and power needs. Step 7 — Plan the wiring plan for the new unit: Decide where each wire will land on the new thermostat base. Step 8 — Reattach wires to the new thermostat: Connect carefully according to the diagram, keeping wires secure and labeled. Step 9 — Power up and test: Restore power, verify heating and cooling control, test fan operation, and confirm status indicators. Total estimated time: 45-75 minutes. Pro tip: Keep a photo of the original wiring as a reference while you draft the new diagram.
estimatedTimeWordsFrontEndOnlyEstimation
tip1
Pro tip: Take a photo of the existing wiring before disconnecting.
tip2
Label each wire with care to prevent misplacement.
tip3
Double-check the furnace/air handler connections against the diagram.
tip4
If a wire doesn’t clearly map to a terminal, stop and consult the manufacturer notes.
tip5
Use a non-contact tester to confirm no live voltage before touching conductors.
tip6
Plan the wiring plan on paper first for clarity and accuracy.
Tools & Materials
- Non-contact voltage tester(To verify power is off on the circuit before handling wires.)
- Screwdriver set (Phillips #2 and flathead)(For removing/attaching thermostat screws and wall plate.)
- Wire stripper/cusher(Expose conductors cleanly (26-14 AWG preferred) without nicking insulation.)
- Electrical tape or heat shrink(Secure and insulate exposed conductors after labeling.)
- Wire labels or masking tape(Label each wire with its terminal assignment.)
- Multimeter (optional but helpful)(For confirming continuity or voltage when diagnosing issues.)
- Replacement wires (short lengths)(Spare wire segments if re-running a lead.)
- Thermostat base and wall plate(New unit or spare base for the replacement thermostat.)
- Camera or smartphone(Capture wiring before disassembly for reference.)
Steps
Estimated time: 45-75 minutes
- 1
Power down and document existing wires
Ensure the HVAC circuit is off at the breaker. Take a clear photo of the wiring at the current thermostat and note each wire’s terminal position. This creates a reference map for your diagram and reduces errors later.
Tip: A wide-angle shot with close-ups of each terminal helps you recreate the diagram accurately. - 2
Remove thermostat faceplate and label wires
Gently remove the faceplate and separate wires. Apply labeled tags to each conductor so you know where it connects on the new unit. Keep wire lengths reasonable to avoid tangle.
Tip: Label quickly and keep labels close to the corresponding wire to prevent misplacement. - 3
Identify wire destinations on the old thermostat
Match each wire to the terminal letters (R, C, W, Y, G, etc.). If a wire’s destination isn’t obvious, map it to adjacent pins and mark it for cross-checking later.
Tip: If a wire isn’t on a standard terminal, consult the diagram or manufacturer notes. - 4
Check connections at the furnace/control board
With the system powered off, verify that the wire colors match the control board terminals. This ensures your diagram aligns with the HVAC side.
Tip: A mismatch here is a common source of post-install problems; correct before moving forward. - 5
Draft a clean wiring diagram
Draw a simple schematic with the supply, common, and each thermostat terminal. Label wires by color and terminal, and include any jumpers or options such as O/B for heat pumps.
Tip: Use straight lines and clear labels; a tidy diagram prevents mistakes during installation. - 6
Confirm compatibility with the new thermostat
Check that the new thermostat supports all connected functions (R, C, W, Y, G, O/B, AUX). If anything is unsupported, you must adapt or replace components.
Tip: If a feature is unsupported, do not force a connection; consider alternative wiring or a different model. - 7
Plan the wiring layout for the new unit
Decide where each wire lands on the new thermostat base. Ensure spare wires are available for future upgrades (common changes, new sensors, etc.).
Tip: Leave a little slack behind the wall plate to accommodate future adjustments. - 8
Reconnect wires to the new thermostat
Attach wires according to your diagram. Secure each connection and re-secure the wall plate. Keep cables organized and insulated.
Tip: Double-check that each wire sits fully under its terminal clamp to prevent loose connections. - 9
Power up and test the system
Restore power, verify heating and cooling operations, check fan control, and confirm status indicators. If anything seems off, re-refer to the diagram and re-check connections.
Tip: Test step-by-step to isolate issues quickly; don’t rush the final checks.
Questions & Answers
What is a wiring diagram for a thermostat?
A wiring diagram is a map that shows how each wire connects to thermostat terminals and the HVAC control board. It helps you plan, verify compatibility, and avoid mistakes during installation.
A wiring diagram maps wires to the thermostat and furnace, helping you plan and install safely.
Can I wire a thermostat diagram myself?
Yes, with caution and the right precautions. Ensure power is off, label wires, and follow the diagram carefully. If you’re unsure at any step, seek professional help.
Yes, you can, but make sure power is off and you follow the diagram closely.
What if wires don’t match the diagram?
If a wire doesn’t align with the diagram, stop and verify each connection against the control board and manufacturer notes. Do not force a mismatch, as it can damage components.
If a wire won’t fit the mapping, pause and recheck—don’t force it.
Why is the C-wire important?
The C-wire supplies common power to the thermostat, enabling continuous operation of digital models and smart features. Without it, some thermostats won’t power reliably.
The C-wire provides a continuous return path for power to the thermostat.
What tools help reading color-coded wires?
A good diagram plus a multimeter or voltage tester helps verify wire functions beyond color cues. Label all wires and cross-check with terminals.
Use a diagram and tester to confirm each wire’s function.
When should I call a professional?
If you encounter unfamiliar wiring schemes, a non-standard control board, or risk of shock, contact a licensed electrician or HVAC tech for safety.
If in doubt about safety or unfamiliar wiring, call a professional.
Watch Video
What to Remember
- Plan and label wires before disconnecting
- Verify power before touching conductors
- Cross-check mappings on the control board and thermostat
- Draft and save a clean diagram for future reference
- Thermostat Care recommends careful, methodical wiring practices