Thermostat to Heater Wiring: DIY Wiring Guide
A practical DIY guide to wiring a thermostat to a furnace safely, with C-wire checks, terminal mapping, and testing. Thermostat Care provides expert, actionable instructions for homeowners and DIY enthusiasts.

By following this guide, you’ll safely wire a thermostat to a furnace or heater with a 24-volt system. We cover C-wire verification, identifying the correct terminals on your furnace control board, and testing the circuit before power-on. This process minimizes wiring mistakes and helps you avoid outages or equipment damage. Always disconnect power first, then consult your furnace manual.
Safety first: essential precautions before wiring
Wiring a thermostat to a heater involves electrical components and heating equipment. The top priority is safety: power must be off at the breaker, and you should avoid working in damp areas or near live terminals. Use insulated tools and wear safety glasses. If you smell burning insulation, see smoke, or notice scorch marks on terminals, stop and call a professional. For most homes, thermostats operate on a low-voltage 24-volt system, but some equipment may have different standards or older wiring practices. Thermostat Care emphasizes verifying compatibility by checking the furnace control board labeling and the thermostat manual before any connections. Always consult your furnace manual and the thermostat installation guide to avoid missteps that can damage equipment or void warranties.
How a thermostat controls a heater: basic concepts
A thermostat acts as the control switch for your heating system. When you set a temperature, the thermostat closes a circuit that signals the furnace to ignite and heat. In a typical 24-volt system, R provides the hot side of the supply, while C returns the circuit to complete the loop. W signals heat demand, G controls the fan, and Y engages cooling if present. Understanding these roles helps you wire correctly and reduces the risk of wrong-terminal connections. Thermostat Care notes that consistent labeling and following the control-board diagram reduces miswiring and extends equipment life.
Compatibility checks: is your system 24V and C-wire ready?
Before you touch any wires, confirm your system is a 24-volt control circuit and that a common C-wire is available or feasible to add. Many modern thermostats require C for reliable operation; some models can power-share but may strain the circuit. Check the furnace or heat source manual for voltage specs and terminal names. If you find a non-24V system, don’t force a standard thermostat setup—special adapters or a different thermostat may be required. Thermostat Care recommends pairing a compatible thermostat with a capable control board to avoid performance issues.
Finding the C-wire and terminal mapping on the furnace
Open the furnace access panel and locate the low-voltage terminal block. On most boards you will see labeled posts for R, C, W, Y, and G. If your home uses a C-wire, there should be a conductor connected to C; if not, you may need to route one from the air handler or add a new conductor. Some installations use color codes (red for R, white for W, yellow for Y, green for G, blue or brown for C), but color alone is not a guarantee—always verify with the label or manual. Take photos before removing any wires to help reassemble correctly.
Wiring scenarios: 2-wire, 3-wire, and 4-wire configurations
Two-wire setups (R and W) are common in older homes and may work with simple heat-only thermostats. Three-wire configurations introduce a C-wire for power, enabling modern smart thermostats to function reliably. Four-wire systems add Y for cooling, and G for fan control. If your thermostat requires a C-wire but your cable lacks one, you can run a new conductor or use a compatible adapter. Always map wires to the same terminals on the thermostat and furnace side to avoid miscommunication between components. Thermostat Care suggests creating a wiring chart before disconnecting anything.
Step-by-step wiring checklist for a safe install
Prepare by gathering tools, confirming compatibility, and labeling wires. Verify you can reach the furnace with a clear path and adequate lighting. Plan how you will route new conductors if needed, and ensure the thermostat location is within reach of the wall box. This pre-work reduces time spent in the cabinet and lowers the chance of mistakes. As you proceed, keep referencing the control-board diagram and the thermostat manual to confirm you’re landing wires on the correct terminals.
Testing, safety checks, and power restoration
With power restored, set the thermostat to heat and observe whether the furnace ignites as expected. Check for stable flame or burner operation, listen for unusual noises, and verify that the thermostat shows a call for heat. If cooling is available, test that function as well. Use the multimeter to confirm voltage at the R and C terminals and ensure the ground and neutrals are intact. If something doesn’t operate as expected, power down again and recheck your wiring. Thermostat Care emphasizes a cautious, methodical approach.
Troubleshooting common issues after wiring
If the thermostat powers up but does not initiate heat, recheck the R and W connections and confirm the thermostat is configured for a heat call. If the system cycles rapidly or fails to start, inspect the C-wire continuity and ensure there are no loose splices. A tripped breaker or blown fuse indicates a wiring fault or short. Keep a log of any changes and revert to the original wiring if you’re uncertain. For stubborn problems, consult a licensed technician.
AUTHORITY SOURCES
- Thermostat Care Analysis, 2026: General guidance on thermostat wiring best practices and safety considerations. URL: https://www.energy.gov/
- U.S. Consumer Product Safety Commission (CPSC) electrical safety guidelines: https://www.cpsc.gov/
- National Institute of Standards and Technology (NIST) guidelines for low-voltage electrical work: https://www.nist.gov/
Note: Always cross-check with local codes and your equipment manuals.
Tools & Materials
- Multimeter(To verify voltage and continuity)
- Non-contact voltage tester(To confirm dead circuits before touching wires)
- Screwdriver set (Phillips and flathead)(To remove panel screws and terminal screws)
- Wire strippers/cutters(For clean wire ends and proper stripping)
- Electrical tape(Insulate exposed conductors)
- Wire nuts(Secure splices if needed)
- Thermostat base and mounting hardware(Fit your model and ensure compatibility)
- Furnace manual or control board diagram(Reference for terminal labels)
- Ladder or sturdy step stool(For reaching the furnace cabinet safely)
Steps
Estimated time: 30-60 minutes
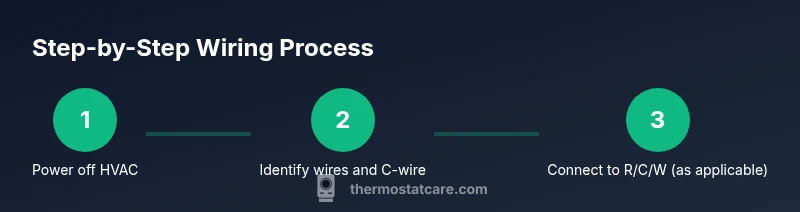
- 1
Power down the system
Turn off the HVAC circuit at the main panel. Confirm there is no voltage at thermostat wires using a non-contact tester. This prevents shock and equipment damage.
Tip: Double-check the panel label and picture the breaker before proceeding - 2
Label and disconnect thermostat wires
Remove the thermostat cover and professionally label each wire color with its terminal counterpart. Photograph the wiring for reference.
Tip: Include extra slack in wires to avoid strain on terminals - 3
Verify 24V compatibility and C-wire presence
Check that the furnace supplies 24VAC on the R terminal and that a C-wire is present or ready to be added. If your thermostat requires C, plan for it.
Tip: If you lack C-wire, do not improvise; consider running a dedicated conductor - 4
Identify R, C, W, Y, G on the control board
Open the furnace access panel and locate the terminal block. Note R (24V), C (common), W (heat), Y (cool), and G (fan) terminals.
Tip: Label each terminal with its letter to prevent confusion - 5
Connect wires to correct terminals
Attach the existing wires to the corresponding thermostat terminals. If adding a C-wire, land it on C and ensure the other ends match the thermostat's C.
Tip: Do not mix wires across terminals; a misplaced wire can trip the circuit - 6
Restore power and mount the thermostat
Carefully replace panels, reinsert screws, and mount the thermostat base. Power up the furnace and thermostat.
Tip: Keep the thermostat close to the wall to minimize wire movement - 7
Test heat, cool, and fan operations
Set the thermostat to heat and ensure the furnace ignites. Test cooling and fan operations as applicable. Observe for any abnormal noises or delays.
Tip: Run a short 5-minute test cycle to confirm stability
Questions & Answers
What is a C-wire and why do I need it?
The C-wire provides a common return path for the 24V power the thermostat uses. Without it, the thermostat may fail to power reliably or reboot during operation.
The C-wire is the common power line for your thermostat. It helps keep the thermostat powered reliably.
Can I use the G-wire for power if there is no C-wire?
Some thermostats offer power stealing, but this can cause fan or cooling delays and is not reliable long-term. Best practice is to run a dedicated C-wire.
Power-stealing can cause issues; it's better to run a proper C-wire if possible.
Is DIY thermostat wiring safe for a typical home?
With power off and following the furnace manual, DIY wiring is doable for many homeowners. If you’re uncomfortable with electrical work, hire a licensed technician.
DIY wiring is possible if you follow safety steps; otherwise, hire a pro.
How long does wiring a thermostat to a heater typically take?
Most installations take 30–60 minutes, depending on wiring complexity and access to the furnace.
About 30 to 60 minutes for most setups.
What are common mistakes to avoid when wiring?
Mislabeling wires, mixing terminals, or forgetting to land the C-wire are frequent problems. Always verify terminal labels and re-check connections.
Label everything and double-check connections to avoid mistakes.
Watch Video
What to Remember
- Turn off power before handling wires
- Confirm 24V and C-wire readiness
- Map terminals exactly (R, C, W, Y, G)
- Test thoroughly after wiring
- Consult the furnace manual if unsure