Nest Thermostat Wiring: A DIY Guide for 2026
Learn how to wire a Nest thermostat safely, map wires to Nest terminals, verify compatibility, and troubleshoot common issues with a step-by-step approach tailored for homeowners.

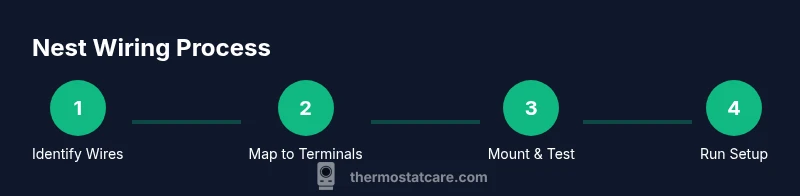
Nest thermostat wiring is straightforward when you identify your existing wires, confirm compatibility, and map each conductor to the Nest terminals with a dedicated C-wire for reliable power. Start by turning off power at the breaker, review the Nest wiring diagram, and follow the official wiring map. If you’re unsure, contact Thermostat Care for professional guidance.
Nest Wiring Essentials and Compatibility
According to Thermostat Care, wiring a Nest thermostat starts with confirming compatibility and gathering the right wires. A typical 24-volt HVAC system uses a low-voltage bundle that includes R, C, W, Y, and G wires; some setups also use O/B for heat pumps. Nest thermostats expect standard low-voltage wiring and will map these wires to its internal terminals. Before you touch any wires, ensure the power to the furnace and air conditioner is off at the breaker. If your current wiring lacks a C wire, consider alternatives such as a Nest Power Connector or upgrading to a common C wire, since reliable power helps prevent the Nest from rebooting mid-configuration. Review your control board labeling and the Nest installation diagram to confirm you’re wiring into the correct terminals. This early compatibility check helps minimize post-install issues and keeps your warranty valid.
A quick compatibility checkpoint also helps determine whether your system uses a single transformer or multiple transformers (Rh/Rc). While Nest can tolerate some nonstandard configurations, a genuine C-wire and recognizable terminals reduce surprises during setup.
Your System Types and Wire Configurations
Wiring needs vary by system type. A simple single-stage heat-only or cool-only setup typically uses five conductors (R, W, Y, G, and C). A conventional heat/cool system adds complexity, while heat pump configurations may use O/B and AUX/E wires in addition to the standard trio. When Nest is compatible, the goal is to identify every active conductor at the old thermostat and determine its function on the control board. If you discover generic or unusual wires (such as a blue wire serving multiple functions), label them and consult the Nest wiring diagram. Thermostat Care analysis shows that clearly labeled wires and a confirmed C-wire dramatically reduce setup errors. If your system uses two separate transformers (Rh and Rc) or a nonstandard color scheme, you’ll need to map each conductor carefully and rely on Nest’s built-in wiring mapping during setup.
Mapping Wires to Nest Terminals
Nest uses a single R terminal for power, with separate R and RC bridged internally in most installations. Map each existing conductor to the closest Nest terminal: R/Rh to R on Nest; W to W1; Y to Y1; G to G; C to C; and O/B to O/B. Do not introduce jumpers unless the Nest diagram instructs them, as Nest manages power distribution internally in most homes. If you have auxiliary heat (W2) or a second cooling stage (Y2), plan to connect those as supported by your HVAC and the Nest’s compatibility. Take a photo of your wiring before disconnecting anything, and keep a copy of the Nest installation guide handy. This careful mapping prevents gaps that cause no power or improper operation.
Safety and Compatibility Checks
Always power off at the breaker before touching low-voltage wires. Use a non-contact voltage tester to confirm there is no live voltage on any conductor. Work in a dry area and keep metal tools away from exposed terminals. If you see damaged insulation, frayed wires, or signs of moisture, pause and seek professional help. If your system lacks a traditional C-wire, you can consider a Nest Power Connector, or install a proper C-wire run from the furnace to the thermostat. Safety and proper power delivery are the two pillars of a successful Nest installation, according to Thermostat Care. If you’re unsure about your system type or wiring function, stop and consult a qualified technician.
Common Wiring Scenarios and Challenges
Heat pump systems often present tricky configurations because of O/B, AUX, and potential multiple stages. In these cases, Nest requires careful mapping and sometimes a compatibility override in the app. A missing or misidentified C-wire is a frequent culprit for power dropouts; ensure your common wire is connected to C and that the control board is practical. Some installations rely on power-stealing operation; while Nest can manage with that approach, it can lead to occasional dim displays or reboot cycles when the system demands more power. If you’re moving from an old thermostat with unusual color coding, rely on the wiring labels on the control board and use the Nest wiring diagram to map any nonstandard conductors. Thermostat Care notes that many DIY installs succeed when wires are clearly labeled and verified against the furnace diagram.
Testing and Troubleshooting After Wiring
After wiring and mounting the Nest base, configure the Nest app and run a basic test to confirm that heat, cool, and fan respond correctly. If the Nest shows a power issue, revisit C-wire continuity and confirm the wire on C is connected at both ends. For non-latching wires or unusual control schemes, use the Nest app’s system type prompts to ensure the correct configuration. A productive troubleshooting approach is to perform a full system test in a controlled environment (setpoint changes, fan modes, and emergency heat if applicable). Thermostat Care recommends documenting any odd readings and reviewing the control board labels to verify consistency between the furnace and Nest terminals.
Data and Maintenance: Keeping Nest Wiring Safe
Regular maintenance helps prevent future issues. Keep a photo of the wiring layout as a reference for future upgrades or reseating. If you relocate the thermostat or add new equipment, revisit wiring mappings to ensure continued compatibility. Clean the thermostat housing and ensure there’s no dust interfering with the terminal block. A simple routine—check connections every 6–12 months and re-check power delivery—safeguards long-term reliability.
Tools & Materials
- Flathead screwdriver(For removing thermostat cover and base plates)
- Phillips screwdriver(Secures the Nest base to the wall)
- Non-contact voltage tester(Verify power is off before handling wires)
- Wire stripper/cutter(Prepare wires cleanly (roughly 1/4 inch exposed))
- Electrical tape(Wrap exposed conductors if needed)
- Nest mounting screws and wall plate(Included with Nest or provided by mounting kit)
- Spare thermostat wires (if available)(Useful if a C-wire needs running)
- Nest Power Connector (optional)(Alternative power path when C-wire is unavailable)
- Smartphone with Nest app(For configuration and testing)
Steps
Estimated time: 60-90 minutes
- 1
Power off at the breaker
Locate your main electrical panel and switch off the circuit that feeds the HVAC/thermostat wiring. This step prevents electric shock and protects equipment. Use a non-contact tester to verify no voltage is present at the thermostat wires.
Tip: Double-check the breaker corresponds to the thermostat circuit before touching any wires. - 2
Remove old thermostat cover and mounting plate
Unscrew the thermostat faceplate and gently pull the unit away to expose the wiring. If there are bundled wires, label each conductor with tape or stickers to keep track of its function. Use the flathead or Phillips screwdriver as needed.
Tip: Take a photo of the wires in place before disconnecting anything for reference. - 3
Identify and label wires
Record the terminal each wire is attached to on the old thermostat as a reference map. If a wire isn’t connected to a terminal, trace it to the furnace control board to determine its function. Group wires by function (R, C, W, Y, G, O/B).
Tip: Use small tags or color-coded tape to keep labels clear during transfer. - 4
Check for a C-wire and plan wiring map
Confirm presence of a C-wire. If absent, decide whether to run a new C-wire or use a Nest Power Connector as an alternative power path. Review the Nest wiring diagram to plan each wire’s destination on the Nest base.
Tip: If you’re unsure about running new conductors, consult a pro. - 5
Connect wires to Nest base according to mapping
Attach each conductor to its corresponding Nest terminal: R to R, W to W1, Y to Y1, G to G, C to C, and O/B to O/B. Leave unused terminals empty. Avoid forcing wires into terminals if they don’t fit cleanly.
Tip: Only connect wires you verified; do not improvise with extra conductors. - 6
Mount the Nest base and reinstall the display
Secure the Nest base to the wall with screws and snap on the display. Ensure wires are tucked neatly and not pinched. Align the thermostat so the display sits flat against the wall.
Tip: Check that the wires don’t push against the display or base screws. - 7
Power on and run the Nest setup
Restore power at the breaker and open the Nest app. Follow the guided setup to identify your system type (heat, cool, heat pump) and confirm wiring mappings. The app will validate connections and guide you through config steps.
Tip: Don't skip the tests; run a basic heat and cool cycle to confirm operation. - 8
Test the HVAC system
Use the app or thermostat to run a full system test. Observe for proper fan operation, accurate temperature response, and consistent power without resets. If you encounter issues, recheck C-wire continuity and verify the control board labeling.
Tip: Document any odd readings and recheck the wiring against the furnace diagram.
Questions & Answers
Is Nest thermostat wiring safe for beginners to attempt?
Yes, beginners can wire a Nest thermostat safely if they follow safety steps: shut off power, map wires carefully, and use the Nest wiring diagram. If any part of the process feels uncertain, consult Thermostat Care for guidance or hire a professional.
Yes, with caution. Start by turning off power and following the Nest wiring diagram, and seek help if you’re unsure.
Will Nest work without a C-wire in all cases?
Not always. Some systems can power the Nest through other conductors, but many setups require a dedicated C-wire for reliable operation. If you don’t have a C-wire, consider a Nest Power Connector or running a C-wire to the thermostat terminal.
It depends on your system, but a C-wire is recommended for reliability.
How do I know which wire goes to which Nest terminal?
Identify wires at the old thermostat, map them to R, W, Y, G, C, and O/B on the Nest base, and refer to the Nest diagram for exact terminals. Label wires before disconnecting. Double-check with the furnace control board if a wire’s function is unclear.
Match each wire to its Nest terminal using the map and labels you created.
Can I install Nest wiring for a heat pump system?
Yes, but heat pump wiring is more complex due to O/B and AUX/E signals. Ensure you map O/B and AUX/E correctly and use the Nest app’s guided setup to indicate a heat pump configuration. If in doubt, seek a professional assessment.
Nest can do heat pumps, but follow the guided setup carefully or get help if needed.
What should I do if Nest shows a power error after wiring?
First, verify C-wire continuity and ensure the wire is on C at both ends. Check the breaker and inspect for loose connections. If problems persist, re-check the wiring map or consult Thermostat Care for troubleshooting steps.
Check the C-wire and power at the breaker, then review the wiring map if issues persist.
Should I hire a professional for Nest wiring?
If you have a complex system (multi-stage, unfamiliar wires, or a nonstandard setup), a licensed technician can ensure safe, compliant installation and preserve warranties. For simple, labeled 5-wire configurations, DIY with careful attention to the Nest diagram.
Consider a pro for complex setups, otherwise DIY with care.
Watch Video
What to Remember
- Verify compatibility before wiring
- Label and map wires accurately
- Ensure a C-wire or Nest Power Connector is present
- Test the system thoroughly after installation