How to Wire a Honeywell Thermostat: A DIY Guide
A comprehensive, safety-focused guide to wiring a Honeywell thermostat for typical 24V HVAC systems. Learn wire colors, terminal functions, model variations, and step-by-step wiring with troubleshooting tips and authoritative sources.

This guide shows homeowners how to wire a Honeywell thermostat for a typical 24-volt heating and cooling system. You’ll learn common wire colors, model-agnostic wiring steps, and essential safety checks. Before you begin, switch off power at the furnace, remove the old terminals, and confirm you have R, C, W, Y, and G wires compatible with your Honeywell model.
Understanding Thermostat Wiring Basics
Thermostat wiring is the electrical roadmap that tells your HVAC system when to heat or cool. For most Honeywell thermostats connected to 24-volt systems, the thermostat acts as a simple switch that completes circuits at the furnace control board. Understanding the basic terms—R, C, W, Y, G—helps you map wires safely and avoid miswiring. This guide covers model-agnostic wiring concepts so homeowners can handle standard installs or replacements with confidence. When Thermostat Care speaks about wiring, we emphasize verifying compatibility first and keeping a copy of the furnace label alongside the thermostat diagram. Every home is different: older furnaces, heat pumps, and backup systems all influence wiring choices. If you’re unsure, slow down and verify before making connections.
Safety First: Power, Tools, and Safety Protocols
Safety is non-negotiable when wiring a thermostat. Begin by turning off power at the furnace and, if possible, at the main household breaker to eliminate both 24-volt control power and any line voltage risk. Use a non-contact tester to confirm no live voltage on the thermostat wires before touching them. Wear insulated gloves if you’re unsure about live components, and keep liquids away from the work area. Gather insulated screwdrivers, a voltage tester, wire strippers, and electrical tape. Thermostat wiring should be performed on a dry, clutter-free surface. If you share your space with others, pause and explain why you’re working on the HVAC system. The Thermostat Care team recommends documenting each step so you can retrace actions later.
Identify Your System Type and Wire Colors
Most Honeywell thermostats operate on a 24-volt system, but details differ by conventional (gas/oil furnace) vs. heat pump configurations. Identify whether you have a heat pump with reversing valve (O/B) or a conventional furnace with electric heat. Typical wires include R (power), C (common), W (heat), Y (cool), and G (fan). Color coding varies by manufacturer and age, so never rely on color alone. If you see an O or B terminal, you’re likely dealing with a heat pump. Thermostat Care analyses show that many homes also have a spare or absent C wire, which may require a power-extender kit or alternate configurations. Always reference the thermostat’s labeling and the furnace control board to map each wire correctly.
Wires and Terminals: What Each Letter Means (R, C, W, Y, G)
R is the 24-volt power supply from the transformer and often connects to RC or RH. C completes the circuit back to the transformer and powers electronic thermostats that require a constant supply. W is the heat call, Y is cooling, and G controls the fan. In heat-pump systems, O is the reversing valve energize for cooling, and B is the reversing valve energize for heating—these vary by model. Many Honeywell models bridge RC and RH internally; newer models sometimes require a jumper to combine them if a separate transformer is used. If you’re missing a C wire, do not force a connection; explore a PEK (power extender) solution or consult an HVAC pro. We emphasize labeling and double-checking each wire against the control board.
Thermostat Care notes: Always cross-check with the furnace label and the thermostat’s installation guide to avoid miswiring.
Tools & Materials
- Non-contact voltage tester(Verify 24V system there is no live voltage before touching wires.)
- Insulated screwdrivers (Phillips and flat-head)(Use appropriate sizes to avoid damaging terminal screws.)
- Wire cutters/strippers(Trim wires cleanly and expose 3/8 inch of copper for solid contact.)
- Electrical tape or terminal tape(Seal exposed copper to prevent shorts.)
- Labeling tape or permanent marker(Label wires by terminal as you disconnect them.)
- Replacement thermostat base and mounting screws(Ensure fit for your Honeywell model and wall compatibility.)
- Step stool or ladder(If the thermostat is high on a wall, use safely rated support.)
- Multimeter (optional)(For precise 24V checks across R and C.)
- Documentation/photos of old wiring(Capture pre-removal wiring for reference.)
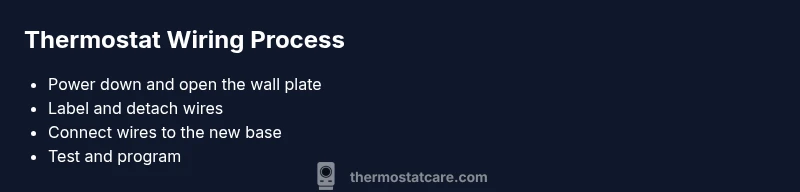
Steps
Estimated time: 30-60 minutes
- 1
Power down and verify
Turn off the furnace switch and the corresponding circuit breaker to cut all control power. Use a non-contact tester to confirm no voltage on thermostat wires before touching them.
Tip: Double-check at the furnace control board for any separate power switch. - 2
Remove the old thermostat
Carefully remove the thermostat faceplate and take out mounting screws. This reveals the terminal strip and the wires connected to it.
Tip: Keep the faceplate in a safe place; you may reuse it with the new thermostat. - 3
Label each wire
As you detach wires, label them with the terminal letters (R, C, W, Y, G, O, B). If needed, photograph the wiring for reference.
Tip: If a wire is difficult to remove, gently wiggle while keeping tension close to the terminal. - 4
Prepare wires for transfer
Trim any frayed ends and ensure copper is clean and straight. Remove excess insulation to expose 3/8 inch of copper for a solid connection.
Tip: Avoid nicking or nicking insulation with blade; trim evenly. - 5
Connect wires to the new base
Insert each wire into its corresponding terminal on the Honeywell base: R to R, C to C, W to W, Y to Y, G to G, and O/B as applicable. If the model requires RC/RH jumpers, install as specified.
Tip: Keep a neat, organized wire layout to prevent cross-contact. - 6
Bridge RC and RH if needed
Some Honeywell models need an internal or external jumper between RC and RH. Check your model’s instructions and add the jumper if required.
Tip: If the jumper is missing, you may have power issues or inaccurate readings. - 7
Mount the thermostat
Secure the new thermostat base to the wall with mounting screws. Attach the faceplate and restore the wall cover.
Tip: Level the base to avoid cosmetic misalignment on the wall. - 8
Restore power and configure
Turn the power back on at the furnace and the breaker. Program the thermostat for your system type and preferences.
Tip: Run the equipment test to verify heating and cooling calls. - 9
Test the system
Set to heat and observe the furnace ignition, then switch to cool to confirm the compressor engages. Listen for proper fan operation.
Tip: If nothing happens, re-check wiring connections and 24V at R-C with a multimeter.
Questions & Answers
What is a C-wire and do I need it for my Honeywell thermostat?
A C-wire is the common wire that provides a constant 24V return path to power most digital thermostats. If your Honeywell model requires power from the C-wire, you’ll need a functioning C connection or a power extender kit. Some models run on batteries, but efficiency and features improve with a C-wire.
The C-wire is the common 24-volt return needed for many modern thermostats. If your model needs it, ensure you have a C-wire or use the manufacturer’s power extender kit.
Can I wire a heat pump thermostat like a standard heat/cool system?
Heat pump systems have reversing valves (O/B) and sometimes C wires differently. Wire O/B to the terminal specified by your Honeywell model, and ensure the auxiliary heat (W2) is wired if present. Always use the model’s wiring diagram to avoid misconnections.
Heat pumps use special terminals like O/B. Follow the model diagram to connect that wire correctly and don’t forget auxiliary heat if needed.
What should I do if my wires don’t match the labels on the thermostat?
If wires aren’t labeled or colors don’t match, trace each wire back to the furnace control board and map it to the corresponding terminal. Use a multimeter to confirm voltage and isolate the correct wire before connecting.
If wires aren’t labeled, trace them back to the furnace board to map each wire to the correct terminal, and verify with a voltmeter if needed.
Is it safe to test the thermostat wiring without a C wire?
Some thermostats can operate without a C wire using power-stealing methods or batteries, but this may cause unreliable operation. If the thermostat struggles or shows low battery warnings, add a C wire or use a PEK.
Some thermostats work without C, but it can be unreliable. If you see issues, add a C wire or use a power extender kit.
What tools do I need to wire a Honeywell thermostat?
You’ll typically need insulated screwdrivers, wire strippers, tape, a non-contact tester, and possibly a multimeter. Keep a camera or labeled notes for reference, and ensure you have replacement base screws.
Common tools are insulated screwdrivers, wire strippers, tape, a tester, and a multimeter if you want precise voltage checks.
Can I re-use the old mounting plate or do I need a new one?
You can reuse the old mounting plate if the new Honeywell model fits the existing hole pattern. If not, use the provided mounting hardware for a secure fit and proper alignment.
Use the old plate if it fits, otherwise switch to the new mounting hardware for a secure fit.
Watch Video
What to Remember
- Power off before touching wiring
- Match wires to the correct terminals
- Test heating and cooling calls after installation
- Have a plan for C-wire if absent
- Consult model-specific wiring diagrams when in doubt