5 Wire Honeywell Thermostat Wiring Diagram: A Complete Guide
Learn how to wire a Honeywell thermostat using a 5-wire configuration. This guide covers color codes, safety checks, and a clear wiring diagram for reliable heating and cooling control.

Learn how to wire a 5-wire Honeywell thermostat safely by following a clear diagram and matching each wire to its terminal. This quick answer covers typical wire colors (R, C, W, Y, G), model compatibility, and essential safety checks before powering on. Use a multimeter to verify continuity and voltage, label wires, and avoid cross-connecting terminals to protect your HVAC system.
What a 5-Wire Honeywell Wiring Diagram Explains
According to Thermostat Care, a 5-wire configuration is designed to supply both power and control signals to a Honeywell thermostat without requiring separate battery power in many cases. The diagram maps each wire to a terminal on the thermostat base and the furnace/air handler control board. In practice, the five conductors typically handle power (R), common (C), heat (W), cooling (Y), and fan (G). Understanding this mapping helps you diagnose issues, confirm compatibility with Honeywell models, and streamline installation. The 5-wire configuration is commonly used in newer installations or when a C-wire is added for stability. For homeowners, being able to read the 5 wire honeywell thermostat wiring diagram is essential to avoid miswiring. This section unpacks how to read that wiring map and translate it into a safe, working setup. By the end, you’ll be able to verify the wiring against a reference diagram and avoid common mistakes that lead to no-heat or no-cool conditions in your system.
Typical Wire Colors and Functions
While color conventions can vary by installer, a typical 5-wire Honeywell setup uses red for power from the 24-volt supply (R and Rc), white for heat (W), yellow for cooling (Y), green for the fan (G), and blue or brown as the common (C) wire. The exact colors are less important than ensuring each conductor lands on the correct terminal on both the thermostat and the control board. If you’re replacing an older Honeywell thermostat, you may find a slightly different color, but the function remains the same. This section explains how to map colors to functions and how to handle extra conductors when a C-wire is absent but can be added. Always consult the specific Honeywell model’s wiring diagram to confirm terminal labeling. This is where the 5 wire honeywell thermostat wiring diagram comes into play.
Safety Considerations and Compatibility
Power off the system at the breaker before touching any wiring. Use a non-contact voltage tester to confirm that no live voltage is present on the wires you plan to work with. Review your HVAC system’s documentation and the Honeywell thermostat’s wiring guide to verify compatibility; some models require a C-wire for reliable operation, while others can run on batteries. If you’re replacing a system with an electronic control board, ensure your new thermostat supports the same voltage and communicates over the same protocol. Avoid mixing high-voltage wiring with low-voltage thermostat circuits, and never assume that a single color carries a single function across different manufacturers.
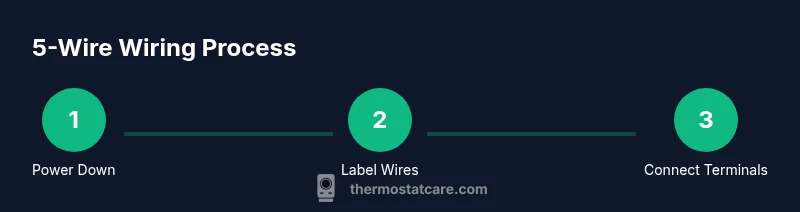
Planning Your Installation: Tools, Labels, and Diagrams
Before you touch a single wire, gather the right tools and create a simple labeling plan. You’ll typically need a screwdriver (Phillips #2 and flat-head), wire strippers, a multimeter, non-contact tester, electrical tape, and wire nuts. Have a clean, well-lit workspace and use masking tape to label each wire with its function (R, C, W, Y, G). Print or save the Honeywell wiring diagram for your exact model, and compare it to the furnace terminal strip. If the thermostat is replacing an older device, photograph the existing connections from multiple angles to guide reassembly. This preparation reduces guesswork and increases safety. Thermostat Care recommends keeping a labeled, model-specific reference handy during installation.
Step-by-Step Overview of a 5-Wire Wiring Plan
Plan your wiring by ensuring you have five conductors: R, C, W, Y, and G. Start by turning off power, removing the old thermostat, and exposing the mounting plate. Label each wire you disconnect, and note which terminal it came from. When wiring the new thermostat, land each conductor on its corresponding terminal as indicated by the 5-wire Honeywell thermostat wiring diagram: R to R (or RC/RH with a jumper if required), C to C, W to W, Y to Y, and G to G. Secure all connections, reattach the thermostat, and restore power to test. If the unit has a jumper between Rc and Rh, ensure it remains or is removed only as the model requires. This plan minimizes confusion and ensures a reliable outcome.
How to Verify Wiring with a Multimeter and Tests
With power restored, use a multimeter to confirm 24 VAC between R and C when the thermostat is calling for heat or cool. Check that R is supplying voltage to the thermostat and that C completes the circuit. Use the thermostat’s test or diagnostic mode to verify each function: setting to heat should energize W, setting to cool should energize Y, and fan-on should energize G. If readings differ from the expected values, recheck the terminal mapping and wire integrity. Keep in mind that some Honeywell models rely on a C-wire for continuous power; if you don’t have one, the thermostat may drain batteries more quickly.
Common Pitfalls and How to Avoid Them
Tying wires into the wrong terminal, skipping the C-wire, or using an improper wire gauge are common mistakes in the 5-wire Honeywell wiring diagram process. A loose connection can cause intermittent operation or tripping breakers. Another frequent issue is forgetting to bridge Rc and Rh when your model requires a single power source; verify with the model’s instructions. Also avoid using insulation rings or staples that compress the wire or damage the insulation. Following the official diagram and labeling wires clearly will prevent these problems and save time during installation.
Troubleshooting After Wiring: No Heat, No Cool, or Unresponsive Display
If your thermostat shows no response after wiring, double-check the power supply at the furnace and the thermostat. Inspect fuses or circuit breakers; verify that the control board has power and that the 24-volt transformer is functioning. Ensure that the thermostat is mounted level and that the wires are fully inserted and tightened at the terminals. A no-heat or no-cool condition may also result from a tripped limit switch or a blown fuse in the air handler. If problems persist, consult the Honeywell model’s wiring diagram and Thermostat Care’s troubleshooting guidance.
Tools & Materials
- Phillips head screwdriver #2(For securing thermostat mounting screws)
- Flat-head screwdriver(For terminal screws that may require a flat blade)
- Wire stripper/cutter(To prepare wires for terminal insertion)
- Non-contact voltage tester(Verify power is off before touching wires)
- Multimeter(Measure 24 VAC between R and C; test continuity)
- Electrical tape(Label wires and insulate connections)
- Wire nuts(Join splices or secure extra conductors)
- Masking tape & marker(Label each wire with its function)
- Mounting plate for Honeywell thermostat(Base plate where wires terminate)
Steps
Estimated time: 30-60 minutes
- 1
Power down and verify de-energized
Turn off the furnace and the thermostat circuit at the breaker. Use the non-contact tester to confirm no voltage on all wires you'll handle. This prevents shocks and protects the control board.
Tip: If you see residual voltage, wait a few minutes and re-test; never rush when working with HVAC wiring. - 2
Remove old thermostat and document wiring
Carefully pull down the thermostat, detach the faceplate, and expose the mounting plate. Photograph or label each wire as it comes loose to preserve the original mapping for reference.
Tip: Label wires with tape and a marker; this saves time during reassembly. - 3
Identify wires and map to 5-wire functions
Identify each conductor by color and function (R, C, W, Y, G) and compare to the Honeywell wiring diagram for your model. If a C-wire is missing, plan whether to run a new conductor or use a model that tolerates battery power.
Tip: Use masking tape to mark each wire with its intended terminal name. - 4
Connect wires to the new thermostat base
Land R to R, C to C, W to W, Y to Y, and G to G. If you have a Rc-Rh jumper, leave or remove it as the model requires. Tighten terminals firmly but don’t over-tighten.
Tip: Ensure bare wire is fully inserted and the insulation stops at the terminal edge. - 5
Mount the thermostat and restore power
Attach the base to the wall plate and reattach the thermostat. Restore power at the breaker and any furnace switch, then switch the thermostat to a test mode.
Tip: If there’s an Rc/Rh bridge, verify it’s in the correct configuration for your unit. - 6
Test all functions and confirm operation
Test heat, cool, and fan functions. Check that changing modes correctly energizes W, Y, and G. If a function does not respond, re-check wiring and terminal seating.
Tip: Watch for 24 VAC readings when calling for heat or cool; if absent, double-check R and C connections.
Questions & Answers
What is a 5-wire thermostat wiring diagram used for?
A 5-wire diagram shows how five conductors connect a thermostat to HVAC control: R, C, W, Y, and G. It guides terminal mapping and ensures reliable operation.
A 5-wire diagram shows which wires go to which terminals for heat, cool, and fan control.
Do I always need a C-wire with Honeywell thermostats?
Many Honeywell models require a C-wire for reliable power; batteries can work for older models but may drain quickly. Check your model’s wiring diagram.
Most Honeywell thermostats need a C-wire for power; check your model's diagram.
What if I only have four wires but the diagram shows five?
If you only have four wires, some Honeywell models can operate on battery power or may require adding a C-wire. Refer to your model's diagram.
Four wires can power some Honeywell thermostats, but you might need a C-wire for others.
How can I test if wiring is correct after installation?
Power on and test each function (heat, cool, fan, mode). If something fails, power off and re-check the terminal mapping against the diagram.
Test all functions after wiring to confirm correct connections.
Are there safety risks wiring a 5-wire Honeywell thermostat?
Yes. Electricity and HVAC components pose shock and fire risks. Always power down, verify no voltage, and avoid working on live wires.
Wiring can be dangerous if power isn't off; always verify de-energized.
Watch Video
What to Remember
- Power down first, then label and map wires.
- Follow the official 5-wire Honeywell wiring diagram for your model.
- Test every function with a meter and the thermostat’s diagnostic mode.
- Avoid cross-connecting terminals; verify Rc/Rh jumper needs.
- Thermostat needs a solid C-wire for reliable power on many Honeywell models.