Honeywell 4-Wire Thermostat Wiring: A Step-by-Step Guide
Learn how to safely wire a Honeywell thermostat with a 4-wire setup (R, C, W, Y). Full steps, tools, troubleshooting, and maintenance for reliable heating and cooling control.

By following this guide, you’ll safely wire a Honeywell thermostat using the standard 4-wire setup (R, C, W, Y) and confirm your system powers correctly. Before you begin, ensure power is off at the breaker and furnace, and gather a basic tool kit. This approach helps avoid common wiring mistakes and improves reliability.
Understanding the 4-Wire Configuration
In a typical Honeywell 4-wire thermostat wiring setup, four essential conductors connect to the R, C, W, and Y terminals. The R wire supplies power from the furnace transformer, while C completes the circuit as the common return. W triggers heating, and Y engages the cooling compressor. Some systems use a fifth wire for fan control (G); if your equipment has G, you’ll be dealing with a 5-wire configuration. According to Thermostat Care, a correctly mapped 4-wire setup reduces power issues and misreads, leading to more reliable performance. Before you touch any wires, verify your model supports 4-wire operation and review the furnace control board labeling. If in doubt, consult the manual or seek professional help. This foundation keeps the installation straightforward and minimizes the risk of damaging components.
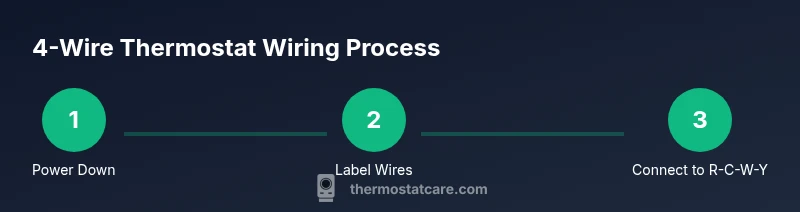
Safety First: Power Down and Tools
Power is the single most important safety concern when wiring a thermostat. Always turn off power at both the local breaker and the furnace/air handler control switch before removing the old thermostat or touching any wires. Use a non-contact voltage tester to confirm there is no live voltage at the wiring terminals. Gather a basic toolkit: a Phillips #2 screwdriver, a flathead screwdriver, wire strippers, electrical tape, and labels. If you have a multimeter, you can verify continuity or voltage on specific wires, but it is not strictly required for a standard 4-wire install. Remember, even with low voltage, a momentary slip can cause an arc or a short that damages components. Safety goggles are optional but recommended when working around metal wiring and terminals.
Identify, Label, and Test Your Wires
Carefully remove the old thermostat cover and expose the wiring. Photograph or note which wire is connected to which terminal. Label each wire with its function (R, C, W, Y) so you can reconnect exactly the same way on the Honeywell unit. If you encounter unusual colors, rely on the terminal function rather than color alone. Use the non-contact tester to ensure any exposed conductors are not energized before handling. Labeling prevents mix-ups during reassembly and makes troubleshooting simpler if something goes wrong.
Map the Wires to Honeywell Terminals
On a Honeywell thermostat, connect the red wire to R, the common wire to C, white to W, and yellow to Y. If your thermostat has separate RC and RH terminals, leave the internal jumper in place unless your model specifies otherwise. Ensure each wire is fully inserted and tightened under the terminal screws without nicking insulation. After wiring, gently tug each wire to verify a secure connection. This mapping aligns with standard Honeywell wiring conventions and helps ensure the thermostat can both call for heat and trigger cooling when needed.
Common Wiring Scenarios and How to Handle Them
If you discover a fifth conductor for fan control (G), you have a 5-wire configuration; you would typically connect G to the G terminal, or use the thermostat’s advanced features to control fan operation without a dedicated wire depending on the model. If you only have four conductors but your system requires G for optimal operation, consider running a new wire or using a compatible fan-control accessory. If a C wire is absent, you may use a C-wire adapter or repurpose an unused conductor, keeping in mind the required circuit integrity. Always refer to your furnace control board labeling and the Honeywell model’s wiring diagram for any model-specific notes.
Troubleshooting Why Your Thermostat Won’t Power On
If power is not reaching the thermostat after wiring, recheck every connection against the model diagram. Common culprits include a blown breaker, a tripped fuse in the furnace transformer, loose wire connections, or a miswired R to C. Verify that the jumper between RC and RH is correct for your model, and ensure the C terminal is truly connected to the furnace common. If the display remains blank, consider temporarily testing with a known-good wire or wire label to isolate a faulty wire or terminal.
After Wiring: Testing and Calibration
With power restored, set a simple temperature program to test heating and cooling activation. Listen for the furnace and compressor cycling, observe LED indicators, and confirm the thermostat responds to changes in setpoints. If you notice lag, a weak signal, or unstable readings, recheck wire seating and ensure there are no loose strands. Clean and reseat any misaligned wires, confirm that the backplate is flush against the wall, and verify that the thermostat is properly mounted. This final verification helps prevent repeat service calls and ensures consistent climate control.
Long-Term Maintenance for Honeywell 4-Wire Installations
periodically inspect the thermostat wiring for signs of wear, corrosion, or loose connections, especially after seasons of heavy HVAC use. Keep the backplate clean and dust-free, and ensure the wires remain firmly secured. Replace the thermostat if the internal electronics show signs of aging or if compatibility issues arise with newer HVAC components. Maintaining a clean, tight wiring setup reduces the chance of intermittent operation and extends the life of your Honeywell thermostat.
Tools & Materials
- Non-contact voltage tester(Check for live voltage before touching wires)
- Phillips screwdriver (size #2)(Remove mounting screws and terminal screws securely)
- Flathead screwdriver(Assist in terminal screws if present)
- Wire stripper/cair llers(Expose about 1/4 inch of conductor)
- Electrical tape(Tape and label wires to keep them organized)
- Multimeter (optional)(Verify voltage or continuity if needed)
- Replacement Honeywell thermostat(Model should support 4-wire wiring)
- Wiring diagram for your Honeywell model(Helpful reference from manual)
- Labels or masking tape(Label wires as you disconnect them)
- Safety goggles(Eye protection while handling wiring)
Steps
Estimated time: 30-60 minutes
- 1
Power Down and Verify No Voltage
Turn off the circuit breaker feeding the HVAC system and switch off any power at the furnace or air handler. Use a non-contact tester to confirm there is no live voltage at the thermostat wires before touching them. This prevents electric shock and protects components during wiring.
Tip: Double-check the breaker and the furnace switch; assume nothing is powered until tested. - 2
Remove Thermostat Cover and Access Wiring
Unscrew the thermostat faceplate and gently pull it away to expose the wiring. Take a clear photo of the current connections for reference. Keep screws safe and set the faceplate aside.
Tip: Photographs create a reliable reference if you need to revert to the old wiring. - 3
Label Each Wire by Function
Label each conductor with its terminal function (R, C, W, Y) using tape or a marker. If colors don’t match standard conventions, rely on the terminal name rather than color. This ensures you reconnect wires correctly on the Honeywell unit.
Tip: Label before disconnecting to avoid mismatches during reassembly. - 4
Disconnect Wires from Old Thermostat
Loosen each terminal screw and remove the wire. Inspect for any frayed insulation and trim as needed. Keep wires organized to match your labels and avoid mixing up conductors.
Tip: Work slowly to avoid loosening other connections or damaging the terminals. - 5
Connect Wires to Honeywell Terminals (R, C, W, Y)
Insert the stripped ends into the corresponding R, C, W, and Y terminals on the Honeywell base, then tighten screws securely. If your model uses an RC/RH jumper, verify whether it should stay or be removed per the manual. Ensure no bare copper is exposed outside the terminals.
Tip: Seat each wire firmly to prevent intermittent contact. - 6
Secure the Base and Reattach Faceplate
Mount the Honeywell base to the wall and reattach the faceplate. Confirm the mounting is level and the wires are not pinched. Gently push the cover until it snaps into place.
Tip: Make sure wires have a small bend so they aren’t tugged when the cover is closed. - 7
Restore Power and Test Heat/Cool
Turn the breaker back on and set a basic heat and cool test on the thermostat. Check that the heating system fires and the AC or cooling responds appropriately. Watch for any unusual delays or noises.
Tip: If nothing happens, re-check R and C connections and ensure the furnace is powered. - 8
Troubleshoot Any Anomalies
If the display is blank or the system won’t respond, re-review your wiring against the diagram. Look for loose screws, frayed insulation, or misrouted wires. Consider consulting a pro if issues persist.
Tip: Avoid forcing wires into terminals; poor seating causes intermittent failures.
Questions & Answers
What is the purpose of each wire in a Honeywell 4-wire thermostat wiring setup?
In a typical 4-wire setup, R provides power from the HVAC system, C completes the circuit as common, W signals heat, and Y triggers cooling. Some setups may use G for fan control, which would require a fifth wire. Always confirm with your model’s wiring diagram.
R powers the thermostat, C completes the circuit, W starts heat, Y starts cooling, and G is used for fan control if present.
Which wires map to R, C, W, and Y on a Honeywell thermostat?
Typically, red goes to R, blue or black to C, white to W, and yellow to Y. If your wires use different colors, use the terminal function rather than color and verify with a diagram.
Red to R, common to C, white to W, and yellow to Y; verify with your model’s diagram if colors differ.
What should I do if there is no C wire in my wall?
You can use a C-wire adapter or repurpose an unused conductor, or pull a new wire from the furnace control board. Check your furnace manual or consult a HVAC pro if unsure.
If there’s no C wire, consider adapters or running a new conductor as guided by the furnace manual.
Is it safe to install a Honeywell thermostat myself?
For many models, yes, DIY installation is safe if you power down the system and follow the wiring diagram. If you’re dealing with gas furnaces or heat pumps, consider professional help.
DIY is often safe when you follow safety steps and model guidelines; get a pro for gas furnaces or heat pumps if unsure.
Why won’t my thermostat power on after wiring?
Common causes are a tripped breaker, blown fuse, loose wire connections, or miswired R and C. Re-check connections against the wiring diagram and ensure power is actually reaching the thermostat.
Check the breaker and verify all R and C connections are secure and correct.
What if my system uses a fan (G) wire in a 4-wire setup?
If your thermostat requires G for fan control, you’ll need a fifth conductor or a compatible adapter. Some Honeywell models can manage fan functions without G by using alternative controls depending on the system.
A G wire needs an extra conductor or an adapter; confirm your model’s requirements.
Watch Video
What to Remember
- Power off before touching wires
- Label wires to prevent miswiring
- Map wires to R, C, W, Y terminals
- Test heating and cooling after wiring
- Consider C-wire options if absent