What to Do with an Old Nest Thermostat: A Practical Disposal Guide
Learn how to safely retire your old Nest thermostat, recycle electronics, and reuse parts while protecting your home and environment. Practical steps, safety tips, and reuse ideas.

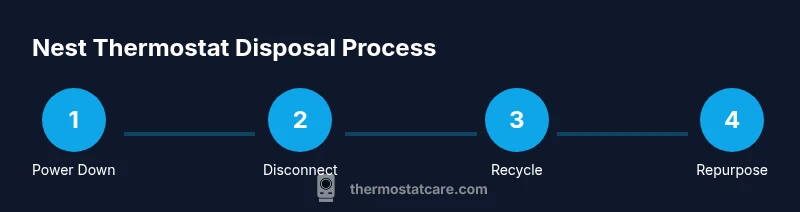
With an old Nest thermostat, your goal is safe removal, proper disposal, and options for reuse. This quick answer outlines the best paths: power down the system, carefully remove the device, and choose recycling, donation, or repurposing where possible. Thermostat Care recommends starting with local electronics recycling programs to minimize environmental impact.
Why handle old Nest thermostat responsibly
Understanding what to do with old nest thermostat helps homeowners reduce electronic waste and keep their HVAC systems safe. The Thermostat Care team emphasizes that proper disposal protects indoor air quality and prevents hazardous materials from entering landfills. A Nest thermostat contains electronics and small components that should be recycled through approved programs rather than tossed in curbside trash. By choosing responsible options, you help conserve resources, protect the environment, and potentially support donation programs that refurbish devices for communities in need. In this guide you’ll see practical pathways for retirement, from recycling to repurposing, all designed to be safe for your home network and HVAC configuration. Keeping a mindful approach also helps you stay compliant with local e-waste rules and supplier recommendations. It’s worth noting that your primary goal is to avoid damaging any HVAC wiring or power sources while handling the unit. If you’re unsure, consult the quick-start steps and local guidelines first.
What you should know before starting
Before you touch the Nest thermostat, confirm that the system is powered down at the breaker and that you understand your HVAC setup. Take a few minutes to photograph the backplate wiring and terminals for reference. Make sure you have a clean workspace, a place to store screws, and a plan for reuse or recycling. If your Nest was part of a smart-home routine, review any automations that reference the device so you can update routines after removal. With electronics disposal, always check local rules about e-waste and electronics recycling. Some jurisdictions require brown-bag disposal for certain components, while others offer curbside recycling or mail-back programs. The aim is to minimize risk and maximize recoverable materials—copper, plastics, and metals—while keeping you and your family safe.
Remove the Nest thermostat safely: step-by-step overview
The removal process begins with power isolation to prevent any shorts or shocks. Carefully detach the decorative faceplate and disconnect the wiring from the terminal block. Label each wire if you intend to reuse the thermostat in another system or simply document where it was connected. Remove the mounting plate and set all hardware into a labeled container. This block provides a high-level flow; the following steps walk you through each action with clear, actionable guidance to minimize risk and ensure clean disposal.
Handling the mounting plate, screws, and wires
With the device detached, inspect the mounting plate and screws. Place screws in a labeled bag and keep them with the mounting plate for possible reuse. If wires remain connected to the terminal block, loosen them one by one, noting the color and terminal name. Use the photo reference you captured earlier to re-create or document the wiring. If you suspect any damage or if the wires feel brittle, stop and reassess. This step reduces confusion during disposal or reuse and protects against accidental reassembly in a non-compatible HVAC configuration.
Recycling electronics: local options and tips
Electronics recycling programs vary by region, but many accept thermostats for specialty recycling due to their electronic components and packaging. Check your city or county’s waste management site for electronics recycling events, drop-off locations, or mail-back programs. If you can, remove the Nest module and base separately to streamline processing, and avoid mixing it with household batteries unless the program specifically accepts them. Always wipe any personal data or account associations from the device if possible before recycling.
Donating or repurposing a used Nest thermostat
Donating a functional thermostat to a local charity, school, or maker space can extend its life and benefit others. Some refurbish-and-donate programs will verify that the device is working and provide a clean, cosmetic, and functional assessment before placement. If the device isn’t usable, consider donating the mounting hardware, backplates, or non-electronic components. For DIY ideas, repurpose the mounting plate as a generic wall cover or use the faceplate for craft projects—just ensure safety and avoid exposing live wiring.
Upgrading and reusing components in other projects
If you’re comfortable with electronics, you can reuse the mounting plate for a different wall device or repurpose the faceplate in a home automation project. Some homeowners repurpose the Nest’s wiring in non-HVAC applications where low-voltage wiring is appropriate, but only with proper electrical knowledge and adherence to local codes. If you lack confidence, it’s safer to retain the wiring diagram and bring the device to a certified recycler rather than attempting risky repurposing. The key is to avoid live connections and maintain clean, organized wiring.
Safety and working with HVAC systems
Always treat any thermostat removal as a potential electrical task; never work on live circuits. If your system uses high-voltage or unfamiliar wiring, halt the process and contact a licensed HVAC technician. Wear safety glasses and use insulated tools to minimize the risk of short circuits. If you observe scorched insulation, melted plastic, or damaged wire insulation, stop immediately and seek professional help. Ensuring safety protects your HVAC equipment and your home’s electrical system from issues that could lead to costly repairs.
Quick-start checklist after removal
- Power down the circuit and HVAC system at the breaker.
- Remove the faceplate, label wires, and photograph connections.
- Disconnect wires from terminals and detach the mounting plate.
- Decide on recycling, donation, or reuse; prepare the device accordingly.
- Store screws and hardware in labeled containers and keep the device out of reach of children and pets until disposal or donation occurs.
Tools & Materials
- Phillips head screwdriver (size #2)(For most Nest wall plates)
- Flathead screwdriver(Optional for stubborn screws)
- Voltage tester(Use if you’re unsure about wiring; current-limiting safety check)
- Labeling materials (masking tape, marker)(Label wires before detaching to document connections)
- Camera or smartphone(Photograph wiring for reference during reassembly or disposal)
- Small container or bag for screws(Keep hardware organized for reuse or recycling)
- Recycling label or mail-back kit (if available)(Check local electronics recycling programs)
Steps
Estimated time: Estimated total time: 40-70 minutes
- 1
Power down and verify off
Switch off the HVAC system at the main breaker and confirm the thermostat display is completely dark. This prevents any electricity from reaching the thermostat during removal. If you have a smart-home hub, resign any automations referencing the Nest during this process.
Tip: Double-check the breaker in the main panel to ensure no power is flowing. - 2
Remove the faceplate
Gently pull the faceplate away from the wall to reveal mounting screws and wiring. Place the plate somewhere safe to prevent bending or chipping the plastic. If the plate is sticky, use a mild cleaning wipe before setting it aside.
Tip: Keep track of any small screws in a labeled container for easy reassembly or recycling. - 3
Document wire connections
Take a photo of the back with the wires connected to terminal labels. If you plan to reuse the thermostat, this image will guide reattachment. Note color-coded wires and which terminal each was connected to.
Tip: Label each wire with its terminal name to avoid confusion later. - 4
Disconnect wires from terminals
Loosen and remove wires one at a time from their terminals. Gently hold the wire near the sheath, not the copper itself, to prevent breakage. Place wires into a small bag or container for safe handling.
Tip: If a wire is stubborn, use the screwdriver to loosen the terminal firmly—avoid yanking. - 5
Remove the mounting plate
Unscrew the mounting plate from the wall. Keep screws on hand for possible future reuse and store the plate separately. Inspect for any wall damage or paint chips around the mounting area.
Tip: If the wall is damaged, you may need touch-up paint before resealing the area. - 6
Prepare for disposal or reuse
Decide whether to recycle, donate, or repurpose. If recycling, place the Nest module in a compliant packaging; if donating, ensure it’s clean and functional. For reuse, label and store all pieces together.
Tip: Check local programs for any mail-back options to simplify disposal. - 7
Pack and label hardware
Place screws and small components in a labeled bag. Attach the label to your disposal package or recycling box. Include a note about contents and a contact if you’re using a mail-back kit.
Tip: Clear labeling helps avoid confusion at the recycler or donation site. - 8
Arrange for recycling or donation
Take the components to the selected program or place the package in your scheduled pickup. If using a mail-back service, follow their packaging guidelines to avoid delays.
Tip: Always obtain a receipt or confirmation for electronics disposal. - 9
Confirm HVAC safety post-removal
After removal, ensure the HVAC system remains functional by rechecking control settings on the wall and in the home app. If you bought a new thermostat, set it up according to the manufacturer’s instructions.
Tip: If the system behaves oddly after removal, contact a professional to verify wiring integrity.
Questions & Answers
Do I need to disconnect power before removing the Nest thermostat?
Yes. Always turn off the HVAC breaker and verify the device is unpowered before touching wiring to prevent shocks or damage.
Yes. Make sure the breaker is off and the thermostat is not powered before you start.
Can I recycle the Nest thermostat with other electronics?
Most components can be recycled through local electronics recycling programs. Check for mail-back options if available in your area.
Yes, recycle through local electronics programs or mail-back services when possible.
Is it okay to donate a used Nest thermostat?
Only donate if the device is confirmed working and is compatible with another HVAC system. Wipe data if possible and follow the program’s guidelines.
Only donate if it's working and allowed by the program; wipe data first.
Will removing the thermostat affect my HVAC warranty?
Removing a thermostat in itself does not void the HVAC warranty, but improper handling could. Follow manufacturer steps or hire a pro if in doubt.
Removing the thermostat won’t automatically void warranties, but improper handling can cause issues.
What if the thermostat is part of a smart-home routine?
Update or disable automations that reference the old Nest to avoid unexpected HVAC behavior after removal.
Update your automations so they don’t reference the old thermostat.
Watch Video
What to Remember
- Power down before touching wiring
- Use official recycling channels for electronics
- Label and photograph connections for reuse
- Choose donation when possible to extend device life
- Consult professionals for safety if unsure