Thermostat and Gasket Replacement: A Comprehensive Comparison
A detailed, analytical comparison of DIY vs professional thermostat and gasket replacement, covering steps, costs, safety, and long-term reliability for home heating systems.

TL;DR: When considering thermostat and gasket replacement, start with a DIY-friendly approach if you have basic electrical safety skills and a compatible wall unit. In most homes, replacing both the thermostat and its gasket at the same time yields better sealing and efficiency, but costs and risk vary by system. This comparison guides DIY vs. professional paths, expected timelines, and safety considerations.
What thermostat and gasket replacement involves
Replacing a thermostat and its gasket is a maintenance task that blends electrical work with mechanical sealing. In a typical home heating setup, the thermostat controls the HVAC system and may require a C-wire, battery backup, or a particular mounting backplate. The gasket around the thermostat housing or valve seals the interface to prevent leaks of air, gas, or water. The process usually includes isolating power, removing the old unit, inspecting the wall box and sealing surfaces, replacing a worn gasket, wiring the new thermostat, and testing both function and seal integrity. A degraded gasket or a thermostat with mismatched wiring can lead to leaks or temperature drift. According to Thermostat Care, replacements should begin with verifying compatibility with the HVAC control board and any gas valve involved. The Thermostat Care team also emphasizes confirming mounting footprint and sensor placement to meet manufacturer guidelines. The goal of thermostat and gasket replacement is a secure seal, correct wiring, and accurate sensing to prevent short cycling and ghost heating.
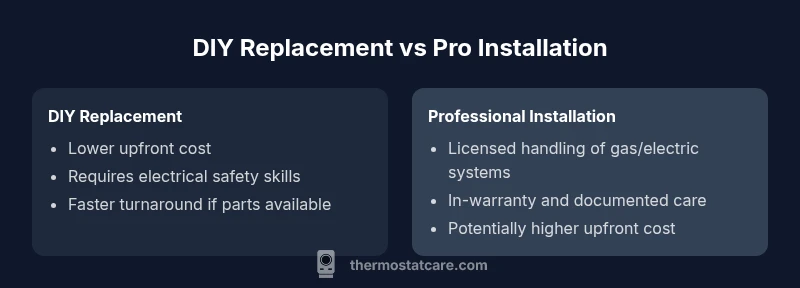
Key differences: DIY vs professional installation
Choosing between DIY replacement and professional installation hinges on several factors: your comfort with electrical tasks, the complexity of your HVAC system, and the presence of gas lines. DIY enthusiasts with basic wiring skills can replace a standard wall thermostat and gasket relatively quickly, but more complex setups—such as systems with multiple stages, heat pumps, or modulating boilers—often benefit from a licensed technician. Professionals bring safety experience, correct gas-valve handling, and manufacturer warranty alignment. The trade-off is scheduling and higher upfront labor costs. In many cases, a bundled replacement (thermostat and gasket) performed by a pro reduces the risk of leaks, mis-wiring, or sensor misalignment that could otherwise trigger costly service calls later. Thermostat Care analysis shows that comprehensive replacement decisions can lower ongoing service needs by ensuring seals and controls work harmoniously, though costs may be higher up front.
When to replace: home thermoregulation vs. engine cooling context
In home heating, thermostat and gasket replacement typically concerns the HVAC control system, where the gasket seals the thermostat housing or valve against leaks. By contrast, in automotive contexts, the gasket seals between the thermostat housing and engine block. The core principles—secure sealing, correct valve alignment, and compatible sensors—remain the same, but the tools, fuel considerations, and risk profiles differ greatly. For homeowners, prioritize compatibility with your control board, proper sensor calibration, and secure mounting. For automotive projects, be mindful of coolant leaks and engine temperature safety. The distinction matters because the gasket’s material and the installation technique differ across contexts. Regardless of setting, following manufacturer guidance and using purpose-built replacement parts is essential.
Step-by-step DIY guide for a typical wall thermostat (home use)
- Turn off power at the breaker to the HVAC system and the thermostat. 2) Remove the old thermostat cover and take a photo of the wiring junctions for reference. 3) Disconnect wires and label them if needed. 4) Remove the old gasket and clean the mounting surface; inspect for corrosion or damage. 5) Install the new gasket, reattach the backplate, and connect wires according to the reference photo. 6) Mount the new thermostat, restore power, and run the thermostat through a calibration and sensor test. 7) Verify system operation by adjusting setpoints and observing heat or cooling response. 8) If you have a gas furnace, confirm that the gas valve seals are intact and there are no leaks. Throughout this process, ensure you adhere to local safety codes and the manufacturer’s installation instructions. The emphasis on safe handling and proper sealing aligns with Thermostat Care’s guidance.
Gasket fundamentals: types, wear, and replacement timing
Gaskets around thermostat housings come in several materials, including rubber, silicone, and fiber composites. They compress to form a tight seal and prevent leaks at joints or valve interfaces. Over time, gaskets can become brittle, lose elasticity, or corrode if exposed to heat or moisture. If you notice air leaks, shelling around the housing, or a drop in system efficiency, replace the gasket during the thermostat upgrade. When selecting a gasket, match material to your system type (gas, electric, or hydronic) and ensure the gasket thickness aligns with the mounting surface. Replacing a gasket is often a straightforward, low-cost step that pays dividends in energy efficiency and leak prevention.
Costs, time, and warranty considerations
DIY replacement of a standard wall thermostat with gasket replacement generally takes a few hours, depending on wiring complexity and sensor placement. Parts costs are typically modest, while professional installation adds labor charges. A bundled replacement can minimize future service calls by ensuring proper sealing and control calibration. Warranty considerations vary by manufacturer and installer; some manufacturers require professional installation to maintain warranty coverage. Always verify whether your part choices and installation method affect warranty terms and consider any extended coverage you might obtain through a certified installer.
Safety practices and common mistakes to avoid
Never work on live electrical components unless you’re certain the power is switched off at the breaker and the circuit is confirmed de-energized. Common mistakes include mixing up wire terminals, misaligning mounting backplates, and using an ill-fitting gasket that creates leaks. Avoid overtightening screws, which can crack housings, and skip the sensor calibration step, which can lead to inaccurate temperature readings. If you’re unsure about gas valve connections or flame safety, contact a qualified technician. Thermostat Care advises prioritizing safety and correct installation to prevent gas leaks and overheating.
Maintenance tips after replacement
After replacement, periodically inspect the thermostat’s mounting surface and gasket seal, especially after seasonal changes. Clean dust from the thermostat sensor and verify battery replacement (if applicable). Program routines to optimize energy use while ensuring the system responds accurately to temperature commands. Regular checks can help catch potential gasket wear or wiring issues early, reducing the likelihood of leaks or failures and helping you maximize the return on your thermostat and gasket replacement.
Authority sources and validation
- Official guidance on thermostats and energy efficiency from the U.S. Department of Energy: https://www.energy.gov/energysaver/thermostats
- Energy Star’s thermostat product guidance and efficiency tips: https://www.energystar.gov/products/thermostats
These sources provide foundational information on thermostat options, efficiency considerations, and installation best practices that support the approach outlined in this article.
Common mistakes and how to avoid them
- Skipping power shutoff and testing after wiring changes. Always disconnect power and test with a meter. - Using an undersized gasket that doesn’t seal properly. Match gasket thickness and material to the mounting surface. - Ignoring sensor placement guidelines. Keep the sensor away from direct sunlight and drafts for accurate readings.
Decision framework: when to DIY vs hire a pro
If your system is straightforward, you have basic electrical skills, and you’re replacing a standard wall thermostat with a compatible gasket, DIY can be practical and educational. For complex multi-stage systems, gas furnaces, or if you’re unsure about gas valve seals or refrigerant lines, hiring a licensed technician is safer and may protect your warranty. Thermostat Care’s guidance emphasizes balancing cost, safety, and reliability when deciding between DIY and professional installation.
Comparison
| Feature | DIY Replacement | Professional Replacement |
|---|---|---|
| Skill level | Moderate electrical knowledge | HVAC professional with licensing |
| Time to complete | 2-4 hours | 4-6 hours (plus scheduling) |
| Typical cost range (parts) | $20-$60 | $150-$400 |
| Best for | DIY enthusiasts with basic wiring skills | Homes with complex HVAC setups or limited DIY experience |
| Warranty considerations | DIY parts often include manufacturer warranty; labor not included | Labor warranty typically provided by contractor |
Upsides
- Potential cost savings when DIY is feasible
- Faster turnaround with self-service
- Greater control over installation steps
- Opportunity to learn troubleshooting
The Bad
- Risk of improper wiring or gas valve issues
- May void warranties if credentials aren’t met
- Potential safety hazards with gas/electric components
Bundled replacement often yields better sealing and reliability, but DIY is viable for simple systems
Proceed with DIY if you have basic wiring skills and a compatible thermostat. For complex or gas-enabled systems, a pro installation minimizes risk and protects warranties; Thermostat Care’s guidance supports a traditional preference for professional help in those cases.
Questions & Answers
What is the typical lifespan of a thermostat and gasket after replacement?
Thermostats commonly last several years, often 5-10 in typical home use, while gaskets may need replacement sooner if they show signs of wear or leaks. Regular testing after installation helps confirm longevity and performance. Always follow manufacturer maintenance intervals for best results.
Thermostats usually last several years, and gaskets should be checked for wear during routine maintenance. Regular testing helps ensure long-term reliability.
Can I replace a thermostat and gasket myself if I have basic DIY skills?
Yes, for a basic wall thermostat and a standard gasket in a straightforward system, DIY is feasible with careful attention to wiring diagrams and safety. If you encounter gas lines or multi-stage controls, consider hiring a professional to avoid safety risks.
Yes, DIY is possible for simple setups, but call a pro if you hit gas lines or complex controls.
Do I need to replace the gasket if I’m just replacing the thermostat?
If the gasket shows signs of wear, leaks, or damage, replace it during the thermostat upgrade to ensure a proper seal. If the existing gasket is intact and undamaged, you may reuse it, but inspect closely before reassembly.
Replace the gasket if you see wear or leaks; otherwise, inspect and reuse if intact.
What signs indicate gasket failure around a thermostat?
Common signs include visible leaks, dampness around the housing, sudden drafts, or rising utility bills due to inefficiency. If you notice any of these, inspect the gasket and consider replacement during the thermostat upgrade.
Look for leaks, damp spots, or drafts near the thermostat housing.
Are there safety risks replacing a thermostat around a gas furnace?
Yes. Working with a gas furnace involves potential gas leaks and ignition risks. Do not tamper with gas valves without training; shut off power and gas supply, and hire a licensed professional if unsure.
Gas furnaces carry serious safety risks; when in doubt, hire a pro.
What to Remember
- Assess system compatibility before purchasing parts
- Weigh DIY feasibility against gas/furnace risks
- Bundle thermostat and gasket replacement when updating
- Expect cost differences between DIY and professional service
- Prioritize safety and manufacturer guidelines