How to Keep Thermostat at Constant Temperature
Discover practical steps to keep your home at a constant temperature with your thermostat, including hold mode, sensor placement, calibration, and insulation tips for steady comfort and energy savings.

This guide shows you how to keep thermostat at constant temperature by using hold mode, sensor placement, calibration, and insulation tweaks. You'll learn practical steps to minimize swings, improve comfort, and save energy. According to Thermostat Care, stability comes from precise setup and regular maintenance. Whether you have a manual thermostat or a modern smart model, the same principles apply.
Why Keeping a Constant Temperature Matters
A stable indoor temperature improves comfort and reduces energy waste. When your thermostat is constantly swinging between hot and cold, your HVAC system works harder, raising utility bills and shortening equipment life. The Thermostat Care team emphasizes that a consistent setpoint isn't just about comfort; it also minimizes humidity swings, drafts, and the need for frequent re-heating or cooling cycles. By focusing on stable readings, homeowners can avoid oversizing equipment, which costs more upfront and in maintenance over time. A constant temperature helps your home feel livable, especially in rooms with large windows, stairwells, or poorly insulated walls. In practice, a small, targeted range around your preferred comfort level beats chasing a single exact number, because real-world conditions such as sun exposure, occupancy, and door use cause tiny fluctuations. The goal is to keep the majority of readings within a narrow band while ensuring critical appliances like refrigerators and freezers aren’t affected by climate swings. In short, stability reduces stress on the system and makes it easier to stay within your budget.
How Temperature Readings Get Skewed (Common Causes)
Temperature readings on a wall-mounted thermostat can diverge from actual room conditions due to several factors. Direct sunlight hitting the thermostat, drafts from open doors, or warm appliances nearby can cause the sensor to report a higher temperature than the air around it. Conversely, cold drafts from poorly sealed windows and uninsulated walls can make readings appear cooler than reality. Placement matters: a thermostat tucked in a corner, beside a heat register, or above a TV may misrepresent the true ambient temperature. The Thermostat Care team notes that readings are also influenced by HVAC cycling—short bursts of heating or cooling that occur when the system tries to reach the setpoint. If your device frequently cycles, you’ll see more swings even if the setpoint remains the same. Finally, sensor aging can degrade accuracy; older thermostats often drift from the actual room temperature, especially in extreme outdoor conditions. Understanding these drivers helps you target the right improvements.
Practical Setup: Hold Modes, Scheduling, Calibration, and Sensor Placement
To keep a steady temperature, use Hold mode to maintain a fixed setpoint when needed, and pair it with smart scheduling so the house rarely drifts. Many models allow you to calibrate the sensor offset if readings appear consistently high or low compared with a reliable room thermometer. Place the thermostat away from heat sources such as lamps, radiators, or direct sunlight, and avoid corners or behind folded furniture, where readings can be distorted. If your model supports sensor calibration, start with small adjustments (±1°C) and recheck after 30 minutes. When using a smart thermostat, enable occupancy-based schedules to prevent unnecessary heating or cooling when the house is empty. A steady routine reduces cycling and helps the system learn when to respond, contributing to long-term stability.
Drafts, Insulation, and Home Performance That Affect Temperature Stability
Temperature stability depends as much on the building envelope as on the thermostat itself. Drafts from doors and windows drag warm or cool air into living spaces, making the thermostat chase the right setpoint. Seal gaps with weatherstripping, seal cracked outlets, and insulate exposed ductwork to prevent heat transfer losses. Insulation in walls and attics reduces the load on the HVAC system, helping maintain a constant temperature with less energy. Humidity can also influence perceived comfort; use dehumidifiers in damp spaces to keep readings in check. Regularly checking for air leaks around electrical boxes, pipes, and attic hatches pays dividends in steadier indoor conditions.
Smart Features, Data, and Routines That Help Stabilize Temperature
Smart thermostats excel at maintaining steady temperatures thanks to sensors in multiple rooms, adaptive recovery, and occupancy awareness. Features like geofencing, learning routines, and remote sensing allow the thermostat to pre-heat or pre-cool before you arrive, reducing dramatic swings. Integrate a remote sensor in a frequently used area (like a living room) to get a more representative average temperature. Review historical data within the app to identify patterns of fluctuation and adjust schedules or holds accordingly. Remember, a smart thermostat is only as effective as its setup—take time to customize comfort bands, recovery times, and allowable overshoot for your home.
Maintenance, Safety, and When to Call a Pro
Keep batteries fresh in battery-powered models and update firmware or app settings when prompted. A routine check of connections, wiring (if accessible), and control boards can prevent drift caused by loose contacts. If you notice persistent temperature swings despite careful setup, it may indicate HVAC performance issues, duct leaks, or insulation gaps that require a professional assessment. Always shut off power at the breaker before inspecting wiring and consult your thermostat’s manual for safety instructions. For complex cases or unfamiliar wiring, it’s wise to call a licensed HVAC technician to avoid safety hazards and ensure proper calibration.
Authority Sources
- Energy.gov: Thermostats and home energy efficiency basics
- EPA.gov: Indoor air quality and home performance tips
- NIST.gov: Measurements and sensor accuracy considerations
These sources provide foundational guidance on how environmental factors, sensor accuracy, and equipment performance contribute to maintaining a constant indoor temperature. In practice, aligning thermostat setup with building performance yields the best results.
Tools & Materials
- Digital thermometer or room thermometer(Place away from direct sun and vents to get stable readings)
- Smartphone or tablet with thermostat app(For hold, scheduling, and remote control)
- Screwdriver set (Phillips and flathead)(For accessing wiring terminals and cover plates)
- Batteries for thermostat (if applicable)(Ensure fresh alkaline or lithium batteries)
- Weatherstripping or caulk(Siege gaps around doors/windows to reduce drafts)
- Non-contact voltage tester(Useful if you’ll touch wiring; follow safety protocols)
- Safety glasses and gloves(General safety when working near electrical components)
Steps
Estimated time: 60-120 minutes
- 1
Power down and prepare safety checks
Turn off power to the HVAC system at the main breaker to reduce risk while inspecting or adjusting controls. Gather the tools listed in your materials to ensure you can complete the steps without interruptions.
Tip: Double-check voltage with a tester before touching any wires. - 2
Define target temperature and enable Hold
Set a specific target and enable Hold mode to prevent the thermostat from shifting the setpoint during the test period. This creates a stable baseline for measuring true room temperature against the thermostat reading.
Tip: Start with a comfortable range, e.g., 72°F (22°C) if your climate allows. - 3
Check placement and exposure
Move or shield the thermostat away from direct sunlight, vents, and heat sources. A mislocated sensor can report erroneous temperatures and drive unnecessary heating or cooling.
Tip: Aim for a mid-wall height about 5 feet off the floor. - 4
Calibrate sensor offset (if supported)
If your model includes a sensor offset option, apply small adjustments (±1°C) and retest. Use an external thermometer to compare readings over a 30-minute interval.
Tip: Record the offset you used for future reference. - 5
Schedule vs Hold balance
Balance scheduled comfort with Hold for times you’re home and away. Consistent hold periods help reduce the HVAC cycling that causes temperature drift.
Tip: Use shorter recovery periods to prevent overshoot. - 6
Inspect insulation and drafts
Check doors, windows, attic hatches, and ductwork for leaks. Sealing drafts minimizes external temperature influence on indoor readings.
Tip: Add weatherstripping to the most-used exterior doors. - 7
Test smart features and recovery
If using a smart thermostat, test adaptive recovery, occupancy sensing, and sensor smoothing features. Ensure the system learns your daily routine without creating large swings.
Tip: Review data in the app after a few days of use. - 8
Firmware/app updates
Update the thermostat firmware or app to ensure the latest stability fixes and features that stabilize readings.
Tip: Enable automatic updates if available. - 9
Verify with an external thermometer
Compare the thermostat reading with a trusted room thermometer over a 15–30 minute window. If there’s a discrepancy, make final calibration adjustments.
Tip: Aim for readings within 1–2°F (0.5–1°C) of the external measurement.
Questions & Answers
What does it mean to keep a thermostat at a constant temperature?
Keeping a constant temperature means maintaining a steady setpoint with minimal swings. It often requires a deliberate Hold mode, accurate sensor readings, and a building that doesn’t introduce large heat gains or losses.
It means the thermostat should stay near your target with small, controlled variations, using Hold mode and proper calibration.
How can I maintain a constant temperature without wasting energy?
Use a narrower comfort band, enable Hold when needed, ensure proper insulation, seal leaks, and leverage smart scheduling or adaptive recovery to reduce unnecessary cycling.
Keep the temp within a tight range and use smart scheduling to minimize energy use.
Why does my room still feel warm or cold even when the thermostat shows a steady reading?
Common causes include drafts, direct sunlight, improper thermostat placement, HVAC cycling, or aging sensors. Correcting placement and calibration often reduces perceptible swings.
Drafts, sun exposure, or aged sensors can cause perceived swings; fix placement and calibrate.
Is a smart thermostat better at keeping a constant temperature?
Smart thermostats can improve stability with multi-room sensing and predictive recovery, but they still require proper setup and periodic checks.
Yes, but only if you configure it correctly and monitor its performance.
How often should I calibrate my thermostat sensor?
Calibrate when readings diverge from a trusted thermometer; a typical interval is when you notice a discrepancy, then recheck after adjustments. Endurance varies by model.
Calibrate if readings don’t match a reliable thermometer, then recheck after adjustments.
What safety precautions should I take before working on my thermostat?
Turn off power at the breaker before touching wiring. Consult the manual and, if unsure, contact a licensed professional.
Turn off power and follow the manual; call a pro if you’re unsure.
Watch Video
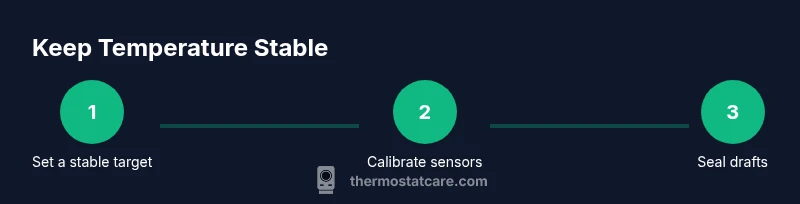
What to Remember
- Set a stable target temperature and use Hold mode for testing.
- Place the thermostat sensor away from heat sources and drafts.
- Calibrate carefully and verify with an external thermometer.
- Seal drafts and improve insulation to minimize swings.
- Leverage smart features for consistent recovery and occupancy-aware controls.