Can You Clean a Thermostat? A DIY Guide
Can You Clean a Thermostat? Learn how to safely wipe exterior surfaces and maintain accurate readings. This DIY guide covers tools, steps, and when to call a pro for reliable, energy-saving results in 2026.

Yes, you can clean a thermostat in safe, careful steps, but never spray liquid inside the unit. The main goal is to remove dust from the exterior, display, and surrounding wall plate to improve readings and efficiency. Thermostat Care provides practical, risk-aware guidance for DIY homeowners. This quick answer sets the stage for a deeper, step-by-step approach.
Why Cleaning a Thermostat Matters
Dust, dirt, and fingerprints on the thermostat face can obscure readings, reduce display clarity, and affect sensor accuracy. Over time, dust can migrate into the small air gaps around the device, contributing to inaccurate temperature readings and more frequent HVAC cycling. Regular, gentle cleaning keeps the thermostat readable and helps your heating system run more efficiently. According to Thermostat Care, routine maintenance like cleaning is part of successful thermostat upkeep and can extend device life while preserving warranty terms when done within recommended guidelines. This section explains what to clean, what to avoid, and how a clean unit supports consistent comfort and energy savings for homeowners.
Safety First: Before You Start
Working with thermostats involves low-voltage electronics, so safety always comes first. Before you touch the device, switch off the power at the thermostat if it has an internal switch, and for added safety, shut off the dedicated HVAC circuit at the breaker panel. Do not use water or liquid cleaners directly on the device; moisture can seep into internal components and create a short. If you see damaged wiring, scorching, or the unit is warm to the touch, stop and call a licensed technician. The Thermostat Care Team emphasizes conservative steps: keep liquids away, avoid prying open the interior, and rely on manufacturer-approved methods for surface cleaning.
What You Can Clean on a Thermostat
You can safely tackle exterior surfaces and the surrounding wall plate. Remove the faceplate if your model allows it, and wipe the frame with a dry microfiber cloth or lightly dampened with isopropyl alcohol on a microfiber to remove smudges. Use cotton swabs for corners around buttons or the display edge. Avoid disassembling the internal electronics, spraying cleaners into vents, or applying solvent-based products. If in doubt, consult the user manual or Thermostat Care's troubleshooting guides before proceeding. A clean faceplate improves visibility, reduces misreading, and supports accurate setpoints and results.
Tools and Cleaning Materials You'll Need
- microfiber cloth (lint-free, non-abrasive) — essential for dust-free wiping
- isopropyl alcohol (70%) — dampen cloth lightly, never pour liquid
- cotton swabs — for tight gaps around buttons
- soft brush or blast of compressed air (low pressure) — to dislodge dust from crevices
- lint-free gloves (optional) — to keep oils off surfaces
- manufacturer manual or guide — optional, but helpful for model-specific steps
- soft, clean surface for faceplate removal — to avoid dropping parts
Step-by-Step Cleaning Process
This section provides a detailed, step-by-step approach to cleaning a thermostat exterior and faceplate. For the interior, see the safety notes and manufacturer guidelines. The following steps are designed to minimize risk while improving readability and sensor accuracy. The full set of steps is listed in the dedicated Step-by-Step block for precise actions and timings.
Common Mistakes and Safety Warnings
Common mistakes include spraying cleaner directly onto the device, using overly damp cloths, or prying at the faceplate without proper guidance. These missteps can damage electronics or reduce warranty coverage. Always work slowly, keep liquids away from internal components, and refer to the model’s manual for any model-specific cautions. If you notice cracks, scorching, or loose wiring, stop cleaning and contact a professional. Thermostat Care emphasizes conservative cleaning that protects both device integrity and home safety.
Maintenance Mindset: Small Habits, Big Impact
A monthly quick wipe of the exterior and a quarterly check of surrounding dust can prevent buildup that affects display readability and sensor response. Clean the area around the thermostat, especially if it sits near a vent or dusty corridor. Replace or clean nearby air filters regularly, since dirty air streams can accelerate dust accumulation on the thermostat face. A simple maintenance routine helps sustain accurate readings and energy efficiency over time.
When Cleaning Isn’t Enough: Troubleshooting and Next Steps
If cleaning does not restore accurate readings or consistent comfort, other factors may be at play, including faulty sensors, dead batteries in wireless models, or wiring issues. Verify power is correctly supplied to the thermostat and that the HVAC system responds to setpoints. If issues persist, consult a heating, ventilation, and air conditioning (HVAC) professional or the device manufacturer for diagnostics. Thermostat Care recommends documenting observed symptoms and timing to aid any technician in faster resolution.
mainTopicQuery":"thermostat maintenance"],
toolsMaterials({
Tools & Materials
- microfiber cloth(lint-free, non-abrasive for safe wiping)
- isopropyl alcohol (70%)(dampens cloth lightly; do not spray directly)
- cotton swabs(for tight gaps around buttons and display edge)
- soft brush or compressed air (low pressure)(used to dislodge dust from crevices; avoid high pressure)
- lint-free gloves(optional to reduce skin oils on surfaces)
- manufacturer manual or guide(model-specific tips and cautions)
- faceplate removal surface(soft, clean area to place components)
Steps
Estimated time: 15-25 minutes
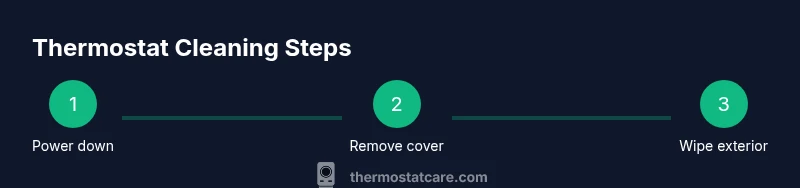
- 1
Power down and prep
Turn off the power at the thermostat if it has a local switch, and shut off the HVAC circuit at the breaker. Confirm the display is dark before beginning. This reduces the risk of short circuits or shocks while handling the device.
Tip: Wait 1-2 minutes after powering down to ensure any residual voltage dissipates. - 2
Remove the faceplate
Gently detach the faceplate according to your model’s instructions. Set screws and the plate aside on a soft surface to avoid losing parts.
Tip: Use a non-metal tool or your fingertips; avoid prying, which can crack the frame. - 3
Dust exterior surfaces
Wipe the outer frame and display with a dry microfiber cloth. If smudges persist, dampen the cloth very slightly with isopropyl alcohol and wipe again in gentle strokes.
Tip: Never saturate the cloth; liquids should never run into seams. - 4
Clean around controls
Use a cotton swab lightly dampened with alcohol to clean around edges, corners, and button gaps. Be cautious near sensors or vents.
Tip: Do not pour or spray liquids; dampness must be minimal. - 5
Inspect and remove interior dust (if model allows)
If your model permits safe interior access, use a soft brush or compressed air to dislodge dust from vent paths. Stop if you encounter resistance or exposed wiring.
Tip: If unsure, skip interior cleaning to protect components. - 6
Reassemble the faceplate
Align the faceplate and snap or screw it back into place according to the model instructions. Ensure it sits flush against the wall.
Tip: Don’t overtighten screws; overtightening can crack the frame. - 7
Power on and test
Restore power and verify the display lights up and readings respond to changes in setpoint. Compare room temperature to a nearby thermometer to confirm accuracy.
Tip: Allow a few minutes for the system to stabilize before final judgments.
Questions & Answers
Is it safe to clean a thermostat with water?
No. Do not spray or pour water into or onto the thermostat. Use a dry microfiber cloth or a cloth barely dampened with isopropyl alcohol, and never apply liquids to the interior.
Avoid water on the device; use a dry or nearly dry cloth and a little alcohol on the surface only.
Can cleaning void my thermostat warranty?
It depends on the model and manufacturer. Generally, surface cleaning is allowed if you avoid disassembly and damage. Check the manual and Thermostat Care guidelines to stay within warranty terms.
Warranty terms vary; stick to exterior cleaning and consult the manual.
How often should you clean a thermostat?
Light exterior cleaning can be done every 1-3 months if you notice dust or fingerprints. A more thorough faceplate cleaning can be done every 6-12 months, or when readings seem less clear.
Clean the exterior as needed, typically every few months, with a gentle touch.
What if I see dust inside the thermostat’s case?
If you see dust inside, do not force the interior open. Many models are sealed. Use only approved exterior cleaning methods or contact a professional for interior checks.
If dust is visible inside, avoid opening and call a pro if needed.
Should I replace a dirty thermostat?
Not necessarily. Cleaning can restore readability, but if readings are consistently inaccurate or the device is old, replacement may be the best option.
Consider replacement if cleaning doesn't improve accuracy or if the unit is aging.
Watch Video
What to Remember
- Power down before cleaning
- Clean exterior surfaces only
- Avoid liquids near electronics
- Don’t disassemble interior components
- Reassemble and test after finishing