Braeburn Thermostat Battery Replacement: Step-by-Step Guide
Learn how to safely replace the battery in your Braeburn thermostat with expert guidance from Thermostat Care. Step-by-step instructions, safety tips, and troubleshooting to keep your system running smoothly.

Replacing the battery in a Braeburn thermostat restores accurate readings and reliable scheduling. Start by turning off the thermostat, locating the battery compartment, and inserting the correct battery type as indicated in the manual. This quick DIY task can usually be completed in minutes with basic tools.
Why Braeburn Thermostat Battery Replacement Matters
According to Thermostat Care, the battery in a Braeburn thermostat powers essential sensors, wireless communication, and display functions. When the battery is weak or depleted, the thermostat may misread temperatures, miss scheduled programs, or fail to wake the display. For homeowners, keeping the Braeburn thermostat battery in good condition translates to more accurate comfort control and energy savings. Regular checks are especially important in homes with older batteries or models that rely on battery power for essential features. A quick battery replacement can prevent larger HVAC issues and ensure your system responds as intended to temperature changes.
Understanding the importance of a healthy Braeburn thermostat battery helps you avoid false readings and inconvenient outages. This section will guide you through identifying battery types, safety steps, and the practical actions needed to perform a replacement confidently.
Note: Regular maintenance, including battery checks, is part of responsible thermostat care and should be incorporated into your seasonal home maintenance routine.
Understanding Battery Types for Braeburn Thermostats
Braeburn thermostats commonly use standard batteries, with many models relying on AA alkaline cells or comparable equivalents. Some newer Braeburn units may operate with AAA batteries or include rechargeable options via a power accessory. The exact type and orientation are model-specific, so always consult your Braeburn manual before purchasing components. If your unit displays a low-battery icon or a dim screen, verify that you’re using the correct battery type and that the contacts are clean and free of corrosion. Using the wrong chemistry can reduce performance or damage contacts, so matching the spec is essential for optimal operation.
When selecting batteries, choose fresh, high-quality alkaline cells or the recommended alternative. Avoid mixing old and new cells or mixing chemistries in the same compartment, as this can cause leakage or poor contact. After replacement, monitor the thermostat for stable operation over the next several cycles.
Safety and Handling When Replacing Batteries
Power down the thermostat and, if possible, disconnect it from any power source before beginning. Handle batteries with clean, dry hands and avoid touching the terminals with metal objects. Work in a dry environment to prevent short circuits. If the thermostat is mounted in a location where the door or panel is tight, use a plastic prying tool rather than metal to avoid scratching plastic clips. If you notice corrosion or leaking, discard the battery and use a fresh one, ensuring proper disposal according to local guidelines.
Safety should always come first; if the device is located in a high or hard-to-reach area, consider seeking assistance rather than risking a fall. Thermostat care steps emphasize that a cautious approach minimizes damage to the unit and reduces the risk of shocks or shorts during the replacement.
Location and Access: Finding the Battery Compartment
Most Braeburn thermostats conceal the battery compartment behind a removable cover near the bottom edge of the device. Gently pry the cover with a small plastic tool or a fingernail to reveal the battery slots. If your model uses a trim plate, remove it carefully to access the battery compartment. Some designs require removing a back panel or using a coin to release a retention latch. Take a moment to note the orientation of the existing battery before removal, as incorrect placement is a common cause of immediate power issues.
If you struggle to locate the compartment, consult the manual’s diagrams or Braeburn’s online support resources. A quick visual check usually reveals the panel’s location and the correct replacement procedure for your specific model.
How to Replace the Braeburn Thermostat Battery (Overview)
With the compartment open and the old battery removed, insert the new battery in the same orientation as the previous one, ensuring contact points align with the terminals. Close the compartment securely, reattach any covers or trim plates, and restore power to the unit. After replacement, verify that the display lights up and that the thermostat registers the current temperature accurately. Some models may require a short re‑pair or re‑link to the home network or HVAC system—check your manual for model-specific steps.
If the device does not power on after a fresh battery, double-check the orientation and ensure the battery isn’t dead from the factory. By following the precise orientation and ensuring clean contacts, you’ll reduce the likelihood of a non-start issue in the initial power-on sequence.
Post-Replacement Checks: Confirming Normal Operation
After replacing the battery, observe the thermostat for a few cycles to confirm consistent temperature readings, clock accuracy, and program adherence. Check the display brightness and ensure that the scheduling features operate as expected. If your Braeburn thermostat is connected to a smart home system, verify that the device re-syncs correctly and that any automations or scenes still function as intended. Keep an eye on energy usage reports if your system tracks consumption, as a properly functioning battery can influence efficiency.
Document the date of replacement so you can track battery life over time and know when a future replacement is due. If you notice persistent issues after replacement, consult the troubleshooting guide or contact support to avoid misdiagnosis.
Troubleshooting Common Battery Replacement Issues
If replacement doesn’t fix performance, verify that you used the correct battery type and that the polarity is correct. Corroded terminals or a loose battery connection can create intermittent power loss. Clean contacts gently with a dry cloth and reseat the battery to ensure solid contact. In some cases, a faulty door switch or retention mechanism could prevent the unit from recognizing a new battery; if so, the issue may be unrelated to the battery itself and require professional guidance.
Inspecting the power source and ensuring clean contacts are common steps in troubleshooting battery-related symptoms. If you observe error codes or flashing indicators, refer to the user manual because many codes are model-specific and can help pinpoint the root cause.
Maintenance Tips to Extend Battery Life
Keep spare batteries of the correct type on hand to minimize downtime. Store them in a cool, dry place away from direct sunlight and moisture. Regularly inspect the battery contacts for corrosion and lightly clean them if needed. Consider scheduling a semiannual check of all critical safety components in your thermostat, including battery status and display clarity. Proper storage and proactive replacement reduce the risk of unexpected outages and ensure your heating and cooling system runs efficiently.
By integrating battery maintenance into your routine, you can avoid disruptions during peak seasons and maintain consistent comfort in your home.
When to Seek Professional Help
If battery replacement seems overly difficult due to the model’s access design or you encounter stubborn panels, professional assistance may be the safer option. A trained technician can handle difficult access points, re‑pairing, and potential circuitry concerns with minimal risk. If your Braeburn thermostat is integrated with a complex HVAC system or a home automation hub, professional support can ensure proper integration and preserve warranty protections where applicable.
Thermostat Care recommends consulting official Braeburn support resources or a licensed technician if you encounter complications beyond standard battery replacement. A prompt professional assessment can prevent further issues and restore reliable performance.
Tools & Materials
- Replacement battery(Check model manual for exact type (usually AA alkaline or AAA). Ensure freshness and match to model spec.)
- Owner’s manual(Reference for battery type, orientation, and re-synchronization steps.)
- Small screwdriver (Phillips #1 or flathead)(Optional for stubborn covers or removing trim plates.)
- Dry cloth or contact cleaner(Gently clean battery contacts if buildup is present.)
Steps
Estimated time: 10-20 minutes
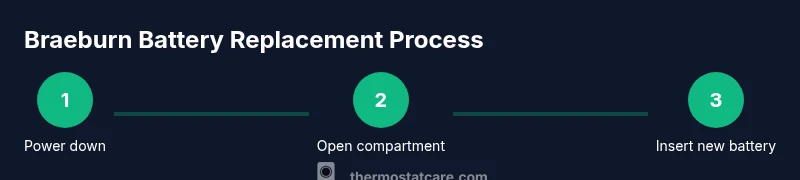
- 1
Power down and access the battery compartment
Power off the thermostat and, if possible, disconnect it from power. Gently remove the cover or trim plate to reveal the battery area. Take note of how the current battery is seated.
Tip: Use a plastic prying tool to avoid scratching surfaces and ensure a clean access point. - 2
Remove the old battery
Carefully lift the old battery out, noting its orientation. Do not touch exposed terminals with metal objects.
Tip: If the battery is stuck, wiggle gently—not force, to avoid damaging the contacts. - 3
Check battery type and orientation
Verify the replacement battery matches the model’s specifications and align the positive and negative ends as indicated by the existing battery or diagram.
Tip: Double-check polarity before inserting to prevent immediate power issues. - 4
Insert the new battery
Insert the new battery firmly into the compartment, ensuring full contact with the terminals. Replace the cover securely.
Tip: If the cover won’t snap in place, re-seat the battery or inspect for obstructions. - 5
Power on and perform a quick test
Restore power and observe the display. Confirm that the temperature readout is accurate and that a scheduled program runs as expected.
Tip: Watch for the battery icon to disappear and the screen to brighten within a few seconds. - 6
Re-sync with HVAC or smart hub (if needed)
If your Braeburn model requires pairing, follow the manual’s re-link steps to re-connect to the thermostat or home automation system.
Tip: Keep the manual handy; re-sync steps are model-specific and critical for proper operation.
Questions & Answers
Do I need to power off the thermostat before replacing the battery?
Yes. Power off the thermostat to prevent shorts, then remove the cover and replace the battery. If the unit is integrated with a power source, follow the manual’s safety guidance.
Yes—power off the thermostat and then replace the battery to avoid shorts.
What battery type does Braeburn thermostat typically use?
Most Braeburn thermostats use standard AA or AAA batteries. Always check your specific model’s manual for the exact type and orientation.
Most Braeburn thermostats use AA or AAA batteries; check your model’s manual.
What should I do if the display remains dim after battery replacement?
Recheck battery orientation and clean any corrosion on the terminals. If the display remains dim, the issue may be unrelated to the battery and could require further troubleshooting.
If the display is dim after replacement, recheck orientation and contacts; if it stays dim, seek further troubleshooting.
How often should I replace Braeburn thermostat batteries?
Battery life varies by usage and model. Replace when you see a low-battery indicator or when readings start to drift. Regular checks help maintain performance.
Replace when you see a low-battery indicator or if readings drift.
Can I replace the battery while the thermostat is connected to HVAC?
Yes, if your model supports it. If not, power down before replacement to avoid shorts. Always follow the manual’s safety guidance.
You can replace while powered if the manual says it’s safe; otherwise, power down first.
What if I can’t find the battery compartment?
Consult the manual or Braeburn support. Some models hide the compartment behind a trim plate or require removing a back panel.
If you can’t find it, check the manual or contact Braeburn support.
Watch Video
What to Remember
- Identify the correct battery type before opening
- Power down and handle components with care
- Insert battery with correct orientation
- Test after replacement and re-sync if required
- Keep spares and follow the manual for model-specific steps