How to Know If Nest Thermostat Is Compatible
Learn how to determine if your HVAC system, wiring, and power setup work with a Nest thermostat. This step-by-step guide covers common configurations, compatibility checks, and practical fixes to help you upgrade confidently.

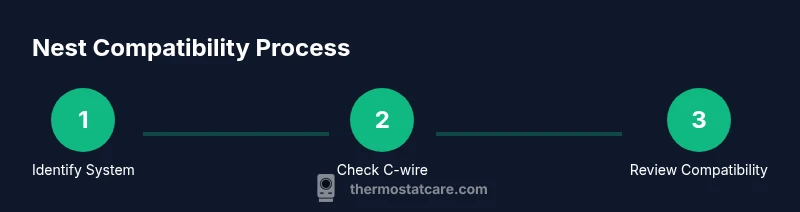
According to Thermostat Care, you can determine Nest thermostat compatibility in minutes by checking three things: your HVAC system type, the presence of a common C-wire, and the thermostat’s power needs. This quick guide outlines exact checks (models, wiring, and heat sources) so you know if a Nest thermostat will work before you buy. No guessing, just a clear yes or no.
Why Knowing How to Know If Nest Thermostat Is Compatible Matters
For homeowners, the question isn't just whether Nest looks good on the wall—it’s whether it will actually work with your system. Knowing how to know if nest thermostat is compatible helps you avoid disappointment, power issues, or a thermostat that can’t charge. According to Thermostat Care, compatibility hinges on three practical checks: your HVAC system type, the presence of a common C-wire, and the thermostat’s power requirements. If any of these aren’t right, the Nest may fail to charge, misread temperatures, or disconnect during operation. In this guide, we walk through the typical setups, common misconfigurations, and the simple steps you can take to verify compatibility without costly upgrades. You’ll learn to identify whether your home’s 24-volt control signals and wiring match Nest’s needs, how heat sources (gas, electric, or heat pump) influence compatibility, and what to do if you discover gaps. Whether you’re upgrading an old system or installing a thermostat in a new build, a quick sanity check now can save time and money later.
Key Factors That Determine Compatibility
To decide if Nest is a fit for your home, you need to evaluate several core factors. The most important are your HVAC system type (gas furnace, electric furnace, heat pump, or condenser-only systems), the presence of a common C-wire, and the thermostat’s power method (24 VAC power with an external transformer versus power-stealing). Nest requires a stable 24-volt control signal and sufficient power to charge its internal battery; without these, the thermostat may show yellow warning lights, reboot, or fail to charge in cold weather. Other considerations include whether you have a multi-stage system, a heat-only or cool-only setup, and whether your wiring uses older terminal configurations. If you’re unsure, check your current thermostat’s labeling or take a quick photo of the wiring. In practice, most standard split systems with a C-wire are compatible, while older, non-24V controls or unconventional power configurations often require a wiring upgrade or a different thermostat model. By assessing these factors, you’ll have a clear baseline for compatibility before you buy.
How to Check Your HVAC System and Thermostat Wiring
The most reliable way to confirm compatibility is a hands-on check of your wiring and system type. Start by turning off power to the thermostat circuit at the breaker panel to avoid shocks. Remove the faceplate and photograph the wiring on the thermostat terminals; note wire colors and which terminal each wire is attached to. Look inside the furnace or air handler for the control board: a 24VAC transformer, R and C terminals, and any multi-stage wiring. If a C-wire is present, test its continuity using a multimeter; you should see a stable 24VAC reading between R and C when the system is idle. If you don’t have a dedicated C-wire, Nest offers alternate power methods in newer configurations, but this often requires a common wire adapter or wiring changes. Finally, compare what you found with Nest’s official compatibility chart and your HVAC documentation. If anything doesn’t match, consider consulting a professional or choosing a Nest model designed for power-stealing setups.
Data You Need to Compare Before Buying
Gather the following details to compare against Nest’s compatibility requirements: the exact thermostat model you currently use, your HVAC system type (gas, electric, heat pump, or dual-fuel), whether you have a C-wire and its wire gauge, the transformer type (24VAC preferred), and whether your system uses multi-stage heating or cooling. Document the wire colors and terminal labels (R, C, W1, Y1, G, O/B). Note the presence of a common system control board that provides a consistent 24VAC signal. If you have a heat pump, confirm whether auxiliary heat is present and whether Nest supports your heat source’s reversing valve. Finally, print or save a link to the official Nest compatibility page so you can cross-check in real time.
Real-World Scenarios and Quick Fixes
Most homes with a standard furnace and central air with a C-wire are ready for Nest without modification. If you have a gas furnace with central AC and a C-wire, Nest is typically compatible. If you have a heat pump with a C-wire and conventional controls, Nest is usually compatible as well, but pay attention to the O/B wire function and heat-pump-specific settings. If your system lacks a C-wire, you may still use Nest with power-sharing features or a C-wire adapter, but this can complicate installation and performance. In older non-24VAC systems, Nest compatibility is unlikely without wiring upgrades. For those on electric baseboard heat or millivolt systems, a different thermostat solution may be necessary. When in doubt, refer to Nest’s official compatibility list and consult a licensed technician for a safe assessment.
Quick Pre-Purchase Checklist
- Check for a 24VAC transformer and C-wire presence.
- Verify your current thermostat wiring matches Nest labels (R, C, W, Y, G).
- Confirm your system type supports Nest’s features (heat pump, multi-stage, etc.).
- Review Nest’s official compatibility guide for your specific model.
- Consider a professional installation if wiring changes are required.
- Back up any custom schedules or zones before upgrading.
- Ensure you have the right Nest model for your system (learning vs. basic) to maximize energy savings and comfort.
Tools & Materials
- Non-contact voltage tester(Verify power is off before wiring)
- Multimeter(Test for 24VAC between R and C)
- Screwdriver set (Phillips #2 and flathead)(Open thermostat and access wiring)
- Notepad and pen(Record wire colors and terminals)
- Camera or smartphone(Capture wiring photos for reference)
- Ladder or stable step stool(Access wall-mounted units safely)
Steps
Estimated time: 20-40 minutes
- 1
Identify your current thermostat and HVAC type
Locate the model number on your existing thermostat and note the HVAC type (gas, electric, heat pump, or combination). This step establishes whether your system is within Nest’s supported categories. If you’re replacing a non-smart thermostat, also record any unique features that could affect compatibility.
Tip: Take a clear photo of the wiring diagram inside the thermostat housing for quick reference. - 2
Check for a C-wire and power source
Examine whether a dedicated C-wire exists and if your system uses a 24VAC transformer. Use a multimeter to confirm a stable 24VAC reading between R and C when idle. If no C-wire is present, review Nest’s power options and potential adapters before proceeding.
Tip: Label wires as you disconnect them to avoid misplacement during reassembly. - 3
Verify compatibility with Nest's official list
Cross-check your exact model and wiring configuration against the Nest compatibility page. Look for notes on heat pump, multi-stage, or power-sharing limitations that may apply to your setup. This step saves you from installing a unit that won’t charge or control your system properly.
Tip: Bookmark the official compatibility page for quick reference during installation. - 4
Test a live 24VAC reading safely
With power off, connect probes to R and C to test the circuit once power is restored briefly to verify the 24VAC signal. If readings are unstable or absent, power-off and reassess wiring or consider a professional evaluation. This ensures you won’t brick the thermostat by incorrect wiring.
Tip: Keep hands dry and use insulated tools to prevent shocks. - 5
Plan for wiring upgrades if needed
If you lack a C-wire or have a non-24VAC control, decide whether to run a new wire, use a common-wire adapter, or choose a Nest model designed for alternative power methods. Upgrading may require professional help to avoid HVAC damage or warranty issues.
Tip: If you’re unsure about running new wires, schedule a professional installation.
Questions & Answers
Is Nest compatible with older HVAC systems?
Compatibility depends on 24VAC control signals and wiring. Some older systems without a C-wire may still work with adapters or specific Nest models, but many require upgrades. Always verify with the official compatibility list before purchasing.
Nest compatibility on older systems varies; check the official list and consider a wiring upgrade if needed.
Do I need a C-wire to use Nest?
A C-wire is often required for reliable charging of the Nest. If your system lacks a C-wire, you may be able to use a power connector or adapter, but results vary by model and system configuration.
Most setups benefit from a C-wire; if missing, review Nest power options before upgrading.
Can Nest work with a heat pump without a C-wire?
Yes, some Nest configurations support heat pumps without a dedicated C-wire, but this can limit charging and features. Always verify against the Nest compatibility chart for your exact heat-pump setup.
Possible with certain configurations, but check official guidance for your model.
What should I do if my wiring doesn’t match Nest labels?
Document current wiring, compare with Nest labels, and consider a professional install. Do not force mismatched wires onto Nest terminals, as this can cause improper operation or damage.
If wires don’t line up with Nest labels, get a professional to help.
How can I upgrade wiring safely?
Plan the upgrade with a licensed HVAC technician. Upgrading may involve running new wires or adding a C-wire adapter, which should be done with proper safety protocols and manufacturer guidance.
Wiring upgrades should be handled by a pro to avoid safety risks.
Watch Video
What to Remember
- Check C-wire presence first and foremost.
- Confirm a stable 24VAC transformer supply.
- Use Nest’s official compatibility guide as your baseline.
- Plan professional help if wiring upgrades are needed.