What Nest Thermostat to Buy: A Homeowner's Guide
Learn how to choose the right Nest thermostat for your home. Compare Nest models, verify HVAC compatibility, and follow a clear, step-by-step install plan from Thermostat Care.

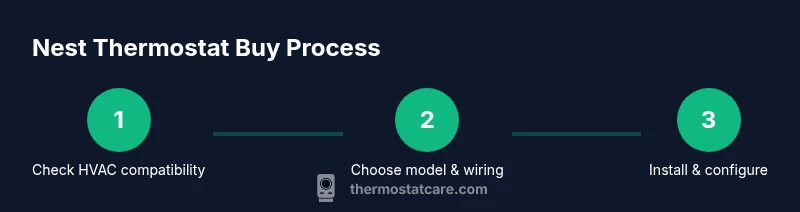
If you’re asking what nest thermostat to buy, start by confirming your HVAC setup and existing wiring, then compare the core Nest options—the standard Nest Thermostat versus Nest Thermostat E—based on display, compatibility, and features. Finally, choose a model that fits your budget and smart-home goals while keeping installation and app control simple. This guide helps you decide with confidence.
What to consider before buying a Nest thermostat
If you’re asking what nest thermostat to buy, the answer begins with your HVAC type, wiring, and how you plan to use the thermostat day to day. According to Thermostat Care, the first step is to understand whether you have a simple single-stage system or a more complex multi-stage or heat pump configuration, and whether a C-wire is present. In practice, homeowners compare Nest options by looking at display type, responsiveness of scheduling, and compatibility with their existing home network.
Two big questions drive the choice: what level of energy savings do you expect, and how much control do you want to hand off to automation? The Nest Thermostat line is designed to accommodate a wide range of needs—from basic temperature control to advanced energy-saving features and voice-enabled shortcuts. The Thermostat Care team emphasizes that selection should reflect both current HVAC compatibility and future plans, such as adding a smart home hub or expanding your energy-saving routines. Finally, consider the install scenario: do you want to install it yourself or hire a pro? While self-install is possible for many homeowners, a service visit can ensure proper wiring and compatibility, especially if you have unusual wiring or a heat-pump system.
Nest thermostat options: features and price ranges
Nest offers a couple of core options that cover common homeowner needs. The standard Nest Thermostat focuses on core control, an intuitive color display, and strong energy-saving modes. The Nest Thermostat E is a more budget-friendly variant with a simplified display and slightly fewer advanced features, but it still integrates well with Google Home and supports smart scheduling. When evaluating price, remember these broad ranges as a starting point (prices are approximate): budget under $120, mid-range roughly $120-$250, and premium over $250. Expect features such as occupancy sensing, remote control via the Nest app, and compatibility with common 24V HVAC systems. For most homes, the mid-range option provides a balance of display quality, software features, and ease of installation. For those prioritizing budget, the lower-cost Nest Thermostat E can still deliver solid energy savings and reliable operation. For true smart-home enthusiasts, both models integrate with Google Home and support routine automation, voice control, and energy reports.
Compatibility and wiring basics
Compatibility begins with your HVAC type and the presence of a C-wire. Most Nest models require a common wire from a 24-volt system, but some setups can work without it with a power-sharing solution. Here are essential checks: verify that your furnace/air handler is 24V and supports conventional or heat-pump configurations; check for a C-wire and confirm wire colors map to labeled terminals on your old thermostat; note whether you have a single-stage, two-stage, or heat-pump system. If you’re unsure, Thermostat Care recommends photographing the existing wiring before disassembly, then consulting the Nest wiring guide to confirm which terminals map to which Nest connectors. Avoid installing if your system uses unusual configurations or multi-zone controls without professional guidance. A cautious approach helps prevent damage and ensures reliable operation.
Energy savings and smart features to expect
Smart thermostats are about more than temperature control—they adjust based on occupancy, schedules, and ambient conditions. With a Nest thermostat, you can expect automatic learning (over time), flexible scheduling, and energy usage insights provided by the Nest app. For homes with consistent routines, the thermostat can significantly reduce heating and cooling when rooms are unused. Geofencing and device-triggered automations help align comfort with real-world behavior, while integration with a broader smart-home setup expands control to voice assistants and compatible hubs. It’s important to note that actual energy savings depend on your local climate, HVAC efficiency, and how aggressively you use the features. Thermostat Care’s guidance emphasizes starting with a simple schedule, then progressively enabling learning features if you want a more hands-off approach.
Additionally, keep in mind that software updates can introduce new capabilities. Staying within the Nest ecosystem ensures ongoing improvements and compatibility with future smart-home devices.
Installation and setup considerations
A careful installation reduces issues and improves reliability. Before you start, gather tools and ensure you have the right model for your system. If you’re comfortable with basic wiring, you can complete a straightforward install in under an hour. Begin by turning off power to the HVAC system, then remove the old thermostat and photograph the wiring. Next, attach the Nest base to the wall with the existing mounting holes, connect wires to the corresponding Nest terminals, and mount the thermostat front. Restore power and use the Nest app to configure Wi-Fi, set up your home location, and map the wires you attached. Finally, run a quick system test and verify that heat, cool, and fan operations respond as expected. If you encounter any warning signs (such as unrecognized wires or inconsistent readings), pause and consult a professional.
Common pitfalls and how to avoid them
Common mistakes include choosing a model that isn’t fully compatible with a heat-pump or multi-stage system, skipping the C-wire check, and mislabeling wires during mapping. Taking photos before removal helps prevent mapping errors, and double-checking terminal labels against the Nest wiring guide reduces misconnections. Don’t skip updating the Nest app and firmware after installation, as updates can improve stability and energy monitoring. Finally, avoid forcing a connection to a weak Wi-Fi signal; poor connectivity can undermine scheduling, reporting, and remote control features. By taking these precautions, you’ll reduce call-backs and enjoy a smoother upgrade experience.
How to decide: a step-by-step decision framework
If you’re still unsure which model to buy, use a simple decision framework: determine your HVAC type and wiring readiness, list must-have features (like full-color display vs. basic display, occupancy sensing, and geofencing), set a budget, and verify compatibility with your smart-home ecosystem. If your system is straightforward or you’re making a first smart-thermostat upgrade, the standard Nest Thermostat often delivers a solid balance of features and value; if you want fewer frills and a lower price, the Nest Thermostat E remains a capable option. Review installer notes, confirm 24V compatibility, and ensure the chosen model supports your home's heating and cooling setup. Finally, plan your installation timeline around a non-peak HVAC period to avoid conflicts with current usage and ensure a smoother transition.
Tools & Materials
- Smartphone with Nest app(iOS or Android; needed for setup and ongoing control)
- Voltage tester(To ensure power is off before wiring)
- Screwdriver set (Phillips/flat-head)(For mounting plate and wiring terminals)
- Wire labels or masking tape(Label wires to avoid mapping errors)
- Notepad and pen(Document terminal mappings and settings)
- Level and measuring tape(Ensure the base is mounted straight)
Steps
Estimated time: 60-90 minutes
- 1
Check compatibility and model choice
Identify your HVAC type, number of stages, and whether a C-wire is present. Decide whether the standard Nest Thermostat or the Nest Thermostat E best fits your setup and budget.
Tip: Take a quick photo of the existing wiring for reference during mapping. - 2
Power down and remove old thermostat
Turn off power to the HVAC system at the breaker. Remove the faceplate and take a photo of the wiring connections before disconnecting anything.
Tip: Label each wire as you disconnect to prevent miswiring later. - 3
Label wires and map to Nest base
Map each wire to the corresponding Nest terminal based on the old thermostat wiring and the Nest wiring guide.
Tip: Use color-neutral labels if available, and double-check each wire’s function. - 4
Attach Nest base and connect wires
Mount the Nest base to the wall and insert wires into the matching terminals. Make sure wires are fully seated and secure.
Tip: Do not force wires into terminals that don’t feel right; re-check the terminal labels. - 5
Mount the thermostat and restore power
Snap the Nest display unit onto the base and restore power at the breaker.
Tip: Wait a moment for the device to boot before proceeding. - 6
Configure Wi-Fi and app setup
Open the Nest app, connect to your Wi-Fi, and follow the on-screen prompts to name the thermostat and set location.
Tip: Prefer a strong 2.4 GHz Wi-Fi network for reliability. - 7
Run a basic system test
Test heating, cooling, and fan modes to ensure proper operation and adjust schedules as needed.
Tip: Note any abnormal behavior and revisit wiring if necessary.
Questions & Answers
What is the main difference between Nest Thermostat and Nest Thermostat E?
The Nest Thermostat offers a fuller feature set and a larger color display, while the Nest Thermostat E focuses on essential controls with a simpler display and lower price. Both integrate with Google Home and provide energy-saving modes, but the higher-end model typically supports more advanced features.
The Nest Thermostat has more features and a nicer display, while the Thermostat E is simpler and cheaper, with core smart-home compatibility kept intact.
Is a C-wire required for Nest thermostats?
Most Nest thermostats require a C-wire for reliable power, especially in longer or more complex systems. Some setups can operate without a C-wire using built-in power-sharing, but this depends on the HVAC configuration.
A C-wire is usually recommended for reliability, but some setups can work without it with power-sharing.
Can I install a Nest thermostat myself?
Many homeowners can install a Nest thermostat themselves if they have basic wiring skills and follow the manufacturer guide. If you have a heat-pump or multi-stage system, consider professional help to ensure proper wiring and system configuration.
Yes, many people install it themselves, but if you have a complex system, a pro is safer.
Will Nest work with my existing HVAC system?
Nest thermostats work with most 24V single-stage and many multi-stage systems, heat pumps, and conventional furnaces. Check your system’s voltage and terminal compatibility before purchase.
Most 24V systems work, but it’s good to verify your terminals and wiring first.
Do Nest thermostats support Google Home and Alexa?
Yes. Nest thermostats integrate with Google Home and many Alexa setups, enabling voice control and routine automation. Some features may require the Google Home ecosystem or specific app permissions.
They work with Google Home and often with Alexa for voice control and routines.
How do I reset my Nest thermostat?
To reset, use the Nest app or the thermostat menu to restore factory settings. This can help resolve persistent issues but will remove saved schedules and settings.
Reset through the app or the device menu to restore factory settings if needed.
Watch Video
What to Remember
- Assess HVAC type and wiring before purchasing
- Choose Nest model based on compatibility, features, and budget
- Label, map, and photograph wires to prevent errors
- Test heating and cooling after installation and adjust