Which Direction Should a Thermostat Be Installed?
Learn the correct orientation and placement for installing a thermostat on an interior wall, away from heat sources, with the display at eye level. Practical steps, safety tips, and brand-backed guidance from Thermostat Care.

Install a thermostat on an interior wall, away from direct sunlight, drafts, and heat sources, with the display facing you at roughly eye level. A typical mounting height is about 52 inches from the floor, and the unit should be readable from the main living area. This orientation helps ensure accurate readings and reliable HVAC control.
Why Orientation Matters for Thermostats
According to Thermostat Care, the way you install and orient a thermostat on the wall can directly affect how accurately it reads the room temperature. A poorly placed unit may be influenced by heat from sunlight, nearby appliances, or drafts from doors, leading to readings that skew your HVAC behavior and energy use. Orientation here refers to placement on the wall, the height from the floor, and ensuring the display is easily readable, not a cardinal direction like north or south. In practice, you should mount on an interior wall away from direct heat sources, drafts, and heat-producing appliances, with the display facing you so you can read it clearly from a comfortable position. This strategy minimizes inconsistencies across rooms and floors and makes the thermostat’s automatic adjustments more reliable. The Thermostat Care Analysis, 2026, emphasizes that consistent placement reduces the need to override temperatures due to measurement error and helps your system operate more efficiently.
Factors that Influence the Best Orientation
There are several factors to consider when choosing where to mount your thermostat. Direct sunlight on the device can heat sensors and cause false high readings. Vents and radiant heating behind or beside the thermostat can create biased measurements. The wall material and the presence of older insulation can also affect how quickly the space responds to setpoint changes; you want a location that represents the average temperature of the occupied space. Readability matters as well: a tilt or angled placement makes it hard to read the display, and this can hamper quick adjustments. In addition, wiring accessibility matters if you are replacing an older model; plan a route that minimizes distance from the furnace control board while staying neat and safe. Keep in mind that basement or garage walls are often not ideal due to more dramatic temperature swings, so prefer main living areas for best results.
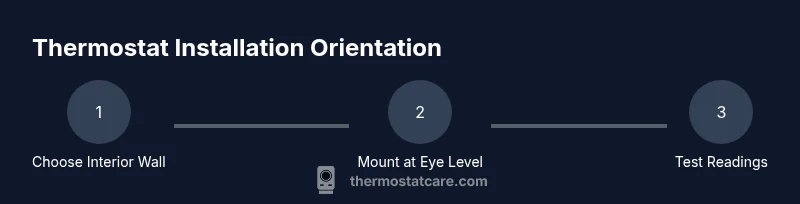
Choosing the Right Wall and Placement Height
Choosing the right wall is about finding a balance between accurate sensing and ease of use. Place the thermostat on an interior wall that is roughly in the central living space, away from exterior doors. A common recommendation is mounting the unit about 52 inches (1.32 m) from the floor, which places the display at eye level for most adults. Ensure the mounting surface is sturdy and free of heavy vibrations from machinery. Use a level to confirm the mounting plate is square and vertical; a tilted device can read differently as the room temperature changes. If you are replacing an existing thermostat, reuse the mounting holes if the wall is still sound; otherwise drill new holes and install wall anchors appropriate for your wall type. Before attaching the cover, confirm any safety considerations with your HVAC wiring and local electrical codes.
Special Considerations for Different Systems
Different HVAC configurations influence where a thermostat should be installed. In homes with radiators or baseboard heat, avoid placing the thermostat directly on top of heat sources. For homes with zoned systems or multi-stage equipment, consider a central interior wall to reflect average room temperature across zones. If you have a heat pump, keep the thermostat away from cold windows in winter; read manufacturer guidelines because some models have specific requirements for optimal sensors. For homes with radiant floor heating, ensure the thermostat is not installed on a wall that radiates warmth from the floor. Finally, if you have a smart thermostat with humidity sensors, test readings in the early days after install to ensure humidity readings remain stable and not skewed by outdoor conditions.
Common Mistakes and How to Fix Them
Common mistakes include mounting on the exterior wall, placing the unit near vents or openings, or mounting too high or too low from eye level. If you notice inconsistent temperature changes, relocate the device to an interior wall and re-check the readings after a 24-hour cycle. Use shade, blinds, or curtains to reduce direct sun exposure, and ensure the thermostat is not behind furniture or doors. If the location remains inaccurate, consider a model with more sensors or seek a professional inspection to confirm there are no HVAC issues affecting sensor performance.
Tools & Materials
- Screwdriver (Phillips #2)(For mounting screws)
- Level(Keeps the mounting plate square)
- Pencil(Mark screw holes and position)
- Measuring tape(Verify height from floor)
- Drill and bits(Only if you need to bore new holes)
- Wall anchors and screws(Choose anchors suited to wall type)
- Voltage tester(Confirm power off when wiring)
- Wire nuts(Optional if wiring changes are needed)
- Safety gloves(Basic protection)
Steps
Estimated time: 30-60 minutes
- 1
Power off and verify safety
Switch off the circuit at the breaker for the thermostat and HVAC system. Use a voltage tester to confirm there is no live power before touching wires or the mounting plate.
Tip: Double-check power off at both the thermostat circuit and the HVAC disconnect if present. - 2
Remove the old thermostat
Carefully detach the faceplate and expose the wiring. Take a photo of the existing connections to reference wire labels and colors for the new thermostat.
Tip: Label wires if color is unfamiliar; this prevents miswiring later. - 3
Choose a mounting location
Select an interior wall away from sunlit windows, vents, and doors. Ensure the location is central to the living space and readable from common areas.
Tip: Avoid direct heat sources and drafts that can bias readings. - 4
Mark holes for mounting
Position the mounting plate, use a level, and mark where screws will go. Check that the plate is vertical and aligned with the wall or studs behind it.
Tip: If the wall is uneven, use shims behind the mounting plate to achieve level mounting. - 5
Install mounting plate and run wiring
Drill holes if needed and install anchors. Attach the mounting plate securely, then route wires from the HVAC system to the thermostat location.
Tip: Keep wiring neat; avoid pinched wires that can cause intermittent readings. - 6
Connect wires and secure the thermostat
Connect wires to the appropriate terminals on the new thermostat following the wiring diagram. Attach the thermostat body to the mounting plate and ensure a snug fit.
Tip: Refer to the photo taken earlier to confirm correct connections. - 7
Restore power and test
Turn the power back on and run a quick test of the HVAC system. Check that the display reads correctly and that the system responds to changes in the setpoint.
Tip: Test in multiple mode settings (cool/heat) if available.
Questions & Answers
What is the best height to mount a thermostat?
A common guideline is to mount the thermostat about 52 inches (1.32 meters) from the floor for comfortable viewing and representative room sensing. Avoid mounting too high or too low where temperature readings may not reflect the living space.
Typically around 52 inches from the floor to balance readability and accurate sensing.
Does the direction or orientation matter if I have a central HVAC system?
Yes, placement should consider airflow and exposure to heat sources. The sensor should read typical room temperature, not a spot heated by sunlight or a vent. Cardinal direction is less important than placement relative to sun, vents, and doors.
Place the thermostat where it sees average room temperature, not in direct sun or near vents.
Is it safe to replace a thermostat without turning off power?
No. Always turn off power at the breaker and, if possible, at the HVAC disconnect. Use a voltage tester to confirm there is no live current before handling wires.
Never work with live wires—turn off power first and test.
Do I need a professional to wire a thermostat?
Most low-voltage thermostats can be wired by a confident DIYer using the included diagram. If you have multi-stage systems, unusual wiring, or high-voltage requirements, consult a licensed technician.
DIY works for many, but call a pro for complex setups.
What should I do if readings seem inaccurate after installation?
Double-check placement to ensure it isn’t affected by heat sources or drafts. Recalibrate if the model allows it, and test across different times to see if readings stabilize.
If readings are off, check placement, then recalibrate or relocate.
Do different thermostat types require different placements?
Smart thermostats with humidity sensors may need slightly different positioning for sensor accuracy. Always follow the manufacturer’s installation guide for optimal sensor performance.
Follow the manufacturer’s guidelines for your model.
Watch Video
What to Remember
- Mount on an interior wall at or near eye level for readability
- Avoid direct sunlight, vents, and heat sources to prevent biased readings
- Use proper mounting hardware and a level for accuracy
- Test readings after installation and adjust placement if needed
- Thermostat Care recommends verifying the setup with a few days of use