How High to Mount Thermostat: A Homeowner's Guide
Discover the optimal height for mounting your thermostat to maximize accuracy, comfort, and energy efficiency. This guide covers eye-level placement, room variations, measurement steps, and practical mounting tips from Thermostat Care.

To ensure accurate readings and easy access, mount your thermostat on an interior wall at roughly eye level away from direct sunlight, drafts, and heat sources. Start by choosing a clean, accessible spot, then use a level and wall anchors for a secure installation. Confirm clearance from doors, cabinets, and vents before final mounting.
Why mounting height matters
According to Thermostat Care, mounting height affects readability, temperature sensing accuracy, and HVAC response. The Thermostat Care Team Analysis, 2026 indicates that improper mounting height is a common cause of misreadings and uneven comfort. Location should reflect how people use the space and how their eyes align with the display. A well-chosen height minimizes the chance that sunlight or drafts affect the sensor. It also makes adjustments easier for everyone in the household, including kids or people with limited mobility. The sections that follow provide practical, room-by-room considerations, precise measurement techniques, and mounting strategies designed to keep the thermostat accessible, accurate, and durable. This approach helps homeowners troubleshoot common comfort problems and avoid recurring readouts that frustrate routine scheduling.
Eye level and accessibility: why it matters
Aiming for eye level ensures the display is easy to read from typical seating positions and standing moments in daily use. Readability affects how quickly you notice a discrepancy when the temperature drifts or when a setting is changed. Accessibility also matters for household members who may have limited mobility or reach. If a wall is crowded with pictures or shelves, consider relocating slightly to maintain a clear line of sight and a straightforward path to the thermostat. By prioritizing accessibility, you reduce the chance of accidental adjustments and ensure everyone can interact with the device without strain. Thermostat Care recommends validating the placement with real-world checks: sit where you most often relax or work, then confirm you can view the display clearly from that spot.
Where to mount: living rooms, bedrooms, hallways, and kitchens
Different rooms present unique considerations. In living areas, you want a central, unobstructed wall away from heat sources like ovens or direct sunlight through windows. Bedrooms benefit from placement that does not align with the bed or a drafty window. Hallways often provide a good balance of accessibility but require avoiding near doors that generate sudden temperature swings. In kitchens, heat from cooking appliances can skew readings, so mount away from the range hood or stove. If you must place the thermostat in a high-traffic area like a hallway, ensure there is a clear line of sight and avoid vibration-prone spots. Each room demands a slightly different approach to preserve sensor accuracy and comfortable control.
Measuring and marking the wall: a clear, repeatable method
Begin by establishing a reference point on the wall that aligns with your normal viewing position. Use a tape measure to locate the approximate height at eye level and snap a light pencil line. Confirm that the marked area is free of obstructing wiring or pipes, and check for any electrical switch boxes that would complicate mounting. Use a level to ensure the backplate will sit perfectly flat once installed. Finally, mark the exact screw holes on the wall through the mounting plate. A careful measurement step now saves multiple adjustments later and reduces the chance of misalignment that can affect sensor readings.
Wall types and mounting options: studs, drywall, plaster
Wall type determines the best mounting strategy. Drywall and plaster walls typically require anchors and a backplate for secure support, while a wood stud behind the mounting area offers superior rigidity. Use a stud finder to locate studs and avoid drywall-only anchors for heavier devices. For brick or concrete walls, you’ll need masonry bits and specialized anchors. If you cannot line up with a stud, be prepared to use multiple anchors and confirm the backplate is flush against the wall. Selecting appropriate hardware protects the thermostat from shifting or loosening over time, which could affect calibration and readings.
Thermostat types and mounting considerations: wired, wireless, and backplates
Wired thermostats rely on a secure, clean electrical connection and a solid backplate that sits flush on the mount. Wireless models often have more flexible placement but still benefit from a level install and a stable backplate. Check the manufacturer’s mounting template, ensuring the backplate aligns with the wall markings. If you’re replacing an older unit, transfer the existing mounting holes faithfully or patch and repaint the wall if necessary. For many modern thermostats, the organizational backplate helps cover wiring and provides a clean finish while keeping the unit aligned for accurate sensor readings.
Wiring considerations and safety: turning off power and clean connections
If you’re wiring a thermostat, always power off the circuit before touching any wiring. Remove the cover and note terminal labels to avoid miswiring on reinstallation. Keep wires tidy and secure with the provided connectors or twist-ons, ensuring no exposed copper is exposed. If you encounter unfamiliar terminals or fragile insulation, stop and consult the manual or a professional. While many homes use standard 24-volt systems, variations exist, and an incorrect hookup can risk furnace damage or inaccurate readings. When in doubt, verify with the manufacturer’s wiring diagram.
Safety and when to call a pro: risk, code, and complexity
Installing a thermostat is usually a cosmetic and electrical task that homeowners can manage, but there are scenarios that warrant a professional. If your wall is brick, concrete, or has hidden pipes or wiring, or if you’re uncomfortable with electrical work, contact a licensed technician. If you’re dealing with unsafe conditions such as exposed wiring, scorch marks, or signs of overheating around the mounting site, cease work immediately. A pro can ensure compliance with local electrical codes, verify wiring integrity, and guarantee that the installed thermostat reads temperatures accurately without creating safety hazards.
Verification after mounting: testing, calibration, and initial adjustments
Once the unit is mounted, replace the cover and power up the system. Allow the thermostat to perform its initial self-checks, then verify the display is legible from key seating positions in the room. Compare the thermostat reading against a trusted reference thermometer placed at the same height. If readings seem off, recalibrate according to the manufacturer’s instructions, and check that the backplate remains flush and the wiring connections are secure. Small adjustments to placement can help eliminate drafts or heat sources that skew readings.
Room-specific tips: kitchens, living rooms, bedrooms, and hallways
Kitchens demand a careful balance because cooking fumes and heat can skew sensor readings. Living rooms should be free of screens or picture frames that obstruct views, while bedrooms benefit from quiet operation and stable temperature near the bed. Hallways require a compact, accessible installation that can be adjusted if a family member changes position during the day. In all cases, keep the thermostat away from heat sources, direct sunlight, and air vents that could create localized drafts. The goal is consistent, readable temperature data without forced adjustments.
Final checklist before powering on: confirm, level, and clean
Before you power the system, confirm the mounting plate is level and securely fastened. Recheck that the display is readable at the intended viewing height and that there are no loose wires or protruding screws. Clean the area around the mounting location to remove dust that could affect sensor readings or battery life. If the unit is newer, consult the instruction guide for any calibration steps required after installation. A careful final check reduces the need for post-install adjustments and ensures long-term accuracy.
Tools & Materials
- Stud finder(Locate studs behind the wall for secure mounting)
- Tape measure(1-2 m long for accurate height reference)
- Pencil/marking tool(Mark mounting points clearly)
- Level(Ensure backplate is square and flush)
- Drill with bits(Pilot holes and wall anchors as needed)
- Screwdriver set(Tighten screws to secure backplate)
- Wall anchors and screws(Choose anchors suitable for wall type)
- Mounting plate/backplate(Provides flush surface and wiring housing)
- Pliers or wire stripper (if wiring)(Useful for wiring connections if required)
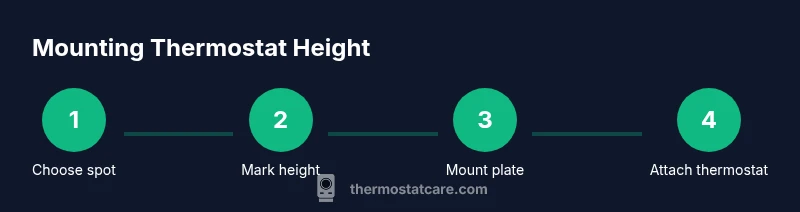
Steps
Estimated time: 30-60 minutes
- 1
Select mounting location
Identify a wall interior free from direct sun, drafts, and heat sources. Consider everyday viewing positions and access for all household members. Ensure the spot has a nearby power source if required for your thermostat model, and note potential wiring paths.
Tip: Choose a wall with stable, flat surface to minimize backplate wobble. - 2
Mark reference height
Measure from the floor to eye level and mark a light reference line on the wall. Use the thermostat template to align the backplate and ensure the holes will sit level when installed. Double-check distance from doors and vents to prevent drafts.
Tip: Use painter’s tape to hold the template in place while marking. - 3
Locate screws and drill pilot holes
Use a stud finder to confirm stud locations; if not aligned with the mounting points, prepare wall anchors. Drill pilot holes at the marked spots, keeping drill perpendicular to the wall to avoid enlarging the holes.
Tip: Begin with a small pilot hole; increase size only as needed for anchors. - 4
Install wall anchors (if needed)
Insert anchors into the pilot holes and gently tap flush with wall surface. Confirm each anchor is secure before proceeding to mounting plate.
Tip: Choose anchors rated for the wall type (drywall, plaster, brick). - 5
Attach mounting plate/backplate
Screw the mounting plate to the wall using the appropriate screws. Ensure the plate sits flush and is level before tightening fully.
Tip: Lightly tighten first, then final-tighten once level is verified. - 6
Prepare wiring (if wired)
If your thermostat requires wiring, disconnect power first, label wires, and connect to the corresponding terminals on the plate. Push wires neatly into the wall cavity to avoid pinching.
Tip: Turn off the HVAC power at the breaker to prevent shocks. - 7
Mount the thermostat body
Place the thermostat onto the backplate, ensuring it sits flush. Secure any securing screws or clips according to the model’s instructions.
Tip: Verify alignment visually; readouts should be easy to view from typical seating positions. - 8
Check level and clearance
Re-check that the unit is level and that there is sufficient clearance around the display for readability and ventilation. Adjust if necessary.
Tip: If the backplate sits proud due to wall texture, consider using a shim or mounting on a small stud finder-balanced surface. - 9
Power up and calibrate
Restore power to the thermostat and run through the initial setup. Confirm readings match room conditions and adjust calibration if the unit offers this option.
Tip: Allow the device to perform its self-checks before testing manually. - 10
Test operation and document height
Run a quick temperature test by comparing the thermostat reading to another thermometer at the same height. Note any discrepancies and verify the placement under different room conditions.
Tip: Document the height reference for future troubleshooting or relocation.
Questions & Answers
What is the recommended height to mount a thermostat?
The recommended approach is to mount at roughly eye level on an interior wall, away from direct sun, drafts, and heat sources. This improves readability and sensor accuracy. If you can't achieve eye level, aim for the position you use most often and ensure visibility from typical seating areas.
Mount at roughly eye level on an interior wall away from sun and drafts, so you can read and adjust the display easily.
Does mounting height affect thermostat performance?
Yes. Positioning influences how accurately the sensor reads room temperature and how quickly the HVAC responds to changes. Proper height reduces bias from sun exposure or nearby warm spots.
Yes. Height changes how the sensor reads temperature and how quickly the system reacts to changes.
Can I mount a thermostat on brick or plaster without studs?
Yes, but you’ll need masonry anchors and appropriate drill bits. Ensure the plate is secure, flush, and that wiring is safely managed. If the wall is irregular, use longer anchors or a mounting surface kit.
Yes, with the right anchors and proper mounting technique. Make sure it's secure and flush.
What should I do if the thermostat is in direct sunlight?
Relocate to a shaded wall if possible, or shield the unit with a small, non-obstructive hood. Direct sun can cause false readings and unnecessary cooling or heating.
Move it away from direct sun or shield the unit to avoid wrong readings.
Are there height considerations for households with kids or elderly residents?
Yes. Choose height that is easily reachable for all, while still preventing accidental changes. Consider a lockable thermostat or a wall panel that reduces unintended adjustments if needed.
Pick a height accessible to all and consider controls to prevent unintended changes.
Is it okay to mount a thermostat on a door wall or near vents?
Avoid mounting on doors or directly next to vents where drafts or movement can skew readings. If space is limited, place it on a nearby wall that meets accessibility and readability criteria.
Avoid doors and vents; place it on a nearby wall that's easy to read and reach.
Watch Video
What to Remember
- Mount at eye level to maximize readability.
- Avoid sunlight, drafts, and heat sources for accurate sensing.
- Use proper anchors for your wall type and ensure the plate sits flush.
- Test readings after installation and calibrate if needed.