Where Should a Thermostat Be Placed? A Simple Home Guide
Learn where to mount your thermostat for balanced heating, comfort, and energy savings. This comprehensive guide covers ideal wall location, height, airflow, and safety tips for homeowners and DIY enthusiasts.

By design, your thermostat should be placed on an interior wall away from heat, drafts, and direct sunlight. This guide shows the best placement practices to improve comfort and energy efficiency, including height, wall location, and avoiding common mistakes. With the right spot, the thermostat reads accurate room temperature and cycles HVAC systems more efficiently.
Why placement matters for comfort and energy efficiency
Where you put the thermostat on the wall can have a measurable impact on both comfort and energy use. A well-placed thermostat reads the room temperature more accurately, leading to steadier climate control and fewer needless heating and cooling cycles. Misplaced sensors can cause overcooling in one room and underheating in another, which drives up energy bills and reduces overall comfort. According to Thermostat Care, correct placement is a small change with a big payoff in performance and savings. This section explains the core reasons placement matters and how it translates to real-world results for a typical home.
- Accurate readings lead to efficient cycling of the HVAC system.
- Consistent temperatures reduce hot or cold spots in living spaces.
- Proper placement supports smarter thermostat features like adaptive schedules and learning modes.
Tip: If you’re replacing an old unit, keep a photo of the wiring before you disconnect anything so you can reference it during reinstallation. (Thermostat Care)
Interior wall locations that work best
The best mounting spot is an interior wall away from exterior temperature swings. Exterior walls can be subject to cold drafts in winter or heat gain in summer, which skews readings. Aim for a central interior wall in a frequently used area—think living rooms, dining rooms, or hallways—where the thermostat can accurately sense the home’s overall temperature without being influenced by direct sun exposure, kitchen heat, or drafts from open doors. If your home has multiple levels, consider a primary thermostat on each floor or zone to maintain even comfort. Thermostat Care notes that multi-zone setups often yield the most consistent results, especially in larger homes.
Why this matters: Interior walls tend to maintain steadier temperatures, improving accuracy and comfort while reducing unnecessary HVAC cycling.
Best practices: Keep the thermostat away from radiators, heat vents, ceiling fans, and appliances that generate heat.
Height and sightline: choosing the right height
Mounting height affects how accurately the sensor reads ambient air and not just your line of sight. The goal is to place the thermostat where it can sense typical room temperature without being influenced by occupants or localized heat sources. A common guideline is to position the thermostat around chest to shoulder height when you are standing, typically roughly 4.5 to 5.5 feet (about 1.4 to 1.7 meters) above the floor. Avoid mounting it at kid-eye level or directly next to windows where sunlight can warm the sensor. For homes with high ceilings, a slightly lower height on the wall can improve readings, but avoid placing it in din spaces where a door or air draft might skew results.
Consider this: If you have a two-story home, ensure the upstairs unit is close enough to living spaces to reflect true upstairs temperatures, but not so close to heat sources that it overreads upstairs heat.
Avoid heat sources, drafts, and direct sunlight
Drafts from doorways or windows can cause the sensor to misread the actual temperature, making your system work harder to compensate. Direct sunlight shining on the thermostat can also skew readings. Similarly, avoid mounting near heat-producing appliances like ovens, lamps, or computer racks. If possible, place the device on an interior wall that does not receive direct sunlight during peak hours. In rooms with fireplaces or wood stoves, choose a wall away from the stove’s radiant heat to maintain stable readings.
Pro tip: Install a tiny shield or shade if you must place the thermostat on a wall that experiences occasional sun exposure.
Multi-story homes and zones: what to consider
Larger homes often benefit from multiple thermostats or smart thermostats with zoning features. A single thermostat on the main floor may not reflect temperatures upstairs, leading to uneven comfort. If you have two or more floors, place thermostats on each level or use a zoning system paired with smart sensors to balance heating and cooling across zones. When planning multiple devices, ensure wiring or wireless sensors don’t interfere with each other and that each thermostat has a clear path to the HVAC system’s control board.
Tip: For homes with open floor plans or large common areas, a central location that captures representative temperatures across spaces tends to perform best.
Room-by-room guidelines: living spaces, bedrooms, and hallways
Living rooms and family rooms should host thermostats in central, frequently used zones to reflect overall home temperature. Bedrooms can benefit from a location that isn’t directly affected by nighttime air drafts or deviations in sleeping area temperatures. Hallways are convenient but avoid corners where air may stagnate or strike the sensor unevenly. If you have a large kitchen, consider a separate thermostat or sensor placement away from heat sources like ovens or dishwashers. The goal is to minimize local biases and maximize home-wide sensing.
Wiring, power, and mounting safety basics
Safety first: always turn off power to the old thermostat at the breaker before removing it. When mounting, use a stud finder to locate solid anchors and avoid placing screws into pipes or electrical cables. Use a level to ensure the mounting plate sits perfectly flat—tilt can affect both aesthetics and sensor accuracy. If you’re not replacing an existing unit, you may need to run new low-voltage wires; consult the thermostat’s installation guide for compatible wire types and any required wall boxes. Always follow the manufacturer’s wiring diagram and local electrical codes.
Warning: Do not work with live wiring unless you know the correct safety procedures. If you feel unsure, consult a licensed electrician.
Common mistakes and how to fix them
- Placing the thermostat on an exterior wall or near a heat source: relocate to a central interior wall.
- Mounting too high or too low: adjust height to better reflect room temperature.
- Positioning next to windows or doors: move away from drafts.
- Covering the sensor with décor: clear the area around the unit so it can sense ambient temperature accurately.
If you’re upgrading from a traditional thermostat to a smart unit, ensure the new device is compatible with your current HVAC setup before starting installation. Small misplacements can lead to unreliable readings and inconsistent comfort.
Quick-start placement checklist
- Identify a central interior wall in a frequently used area.
- Avoid heat sources, direct sun, drafts, and doors opening to the outdoors.
- Choose a height around chest to shoulder height when standing.
- Use a stud finder to locate solid mounting points.
- Mark a level mounting location and gather essential tools.
- Install mounting plate, connect wires per the thermostat manual, and test the unit.
This concise checklist helps you move from planning to testing with fewer delays.
Authority sources and further reading
This section lists reputable references to support thermostat placement guidance and to help you explore more details from trusted sources. You can visit the following resources for deeper information about thermostat placement best practices and energy efficiency considerations:
- https://www.energy.gov/eere/buildings/articles/thermostats-and-temperature-controls
- https://extension.illinois.edu/home/energy/thermostats
- https://www.nist.gov
Key takeaways
Tools & Materials
- Stud finder(Locate studs to securely mount the thermostat base plate)
- Drill and screwdriver(Use appropriate bits and screwdriver type for mounting screws)
- Level(Ensure mounting plate is perfectly horizontal)
- Measuring tape(Measure height and wall location accurately)
- Pencil(Mark mounting points clearly on the wall)
- Ladder or sturdy step stool(Maintain safe reach to install mounting height)
- Screws and wall anchors(Use anchors appropriate for your wall type)
- Safety glasses(Protect eyes during drilling and mounting)
Steps
Estimated time: 30-60 minutes
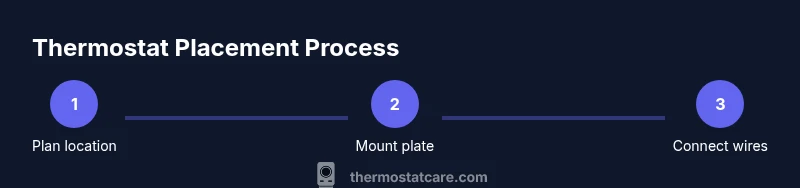
- 1
Plan your mounting spot
Survey rooms you use most and identify an interior wall that reflects typical temperature without exposure to direct sun or drafts. Measure a height around chest to shoulder level and keep away from heat sources. Decide whether you need a single thermostat or multiple sensors for zones.
Tip: Take a quick photo of the intended wall and nearby outlets before you start. - 2
Power down and remove old unit
Switch off the HVAC power at the breaker and remove the old thermostat. Document wire colors and terminal labels to reference during installation. If you’re replacing, keep wires organized to avoid cross-connecting.
Tip: Label each wire with a small sticker so you don’t mix them up later. - 3
Mark mounting location
Use a measuring tape and level to mark the center of the mounting plate on the wall. Ensure the spot is flat and accessible for future maintenance. Mark drill holes for anchors.
Tip: Double-check the position by holding the mounting plate up to the wall before drilling. - 4
Find studs or prepare anchors
Use a stud finder to locate studs behind the wall. If no stud is available, use appropriate wall anchors rated for the weight of the thermostat. Secure the mounting plate to the wall using the selected anchors.
Tip: Avoid drilling into electrical cables or pipes; pause if you’re unsure. - 5
Attach mounting plate
Fasten the thermostat mounting plate to the wall, ensuring it sits evenly. Use a level to confirm horizontal alignment. Tighten screws without overdriving them.
Tip: Check the plate alignment after inserting all screws. - 6
Reconnect or connect wires
Reconnect existing wires to the corresponding terminals on the thermostat base as per the wiring diagram. If you’re adding new wires, route them cleanly through the wall box.
Tip: If you are unsure about wire compatibility, consult the thermostat manual. - 7
Mount the thermostat
Attach the thermostat body to the mounted base plate. Ensure there is no gap and the unit sits flush against the wall. Restore power at the breaker and test functionality.
Tip: Verify that the display powers on and responds to basic commands. - 8
Configure basic settings
Set your preferred temperature units, schedule, and any eco or learning modes. If your device supports adaptive recovery, enable it for better efficiency.
Tip: Start with a simple schedule and adjust after a few days based on comfort. - 9
Test performance
Run a test cycle to ensure the HVAC system responds to temperature changes promptly. Check for uniform heating or cooling around the living spaces.
Tip: Note any rooms that heat or cool unevenly and consider zoning if needed. - 10
Final checks and cleanup
Confirm all wires are secured, the cover plate is on, and there are no loose parts. Tidy the area and store spare screws for future maintenance.
Tip: Keep the user manual handy for future reference or firmware updates. - 11
Review safety and compatibility
Ensure your thermostat is compatible with your HVAC system and safe to operate. If you noticed any unusual smells, noises, or tripped breakers, stop and consult a professional.
Tip: Document any model-specific steps for future upgrades.
Questions & Answers
What is the best height for a thermostat?
Most experts recommend mounting around chest to shoulder height, typically 4.5 to 5.5 feet above the floor. This helps ensure readings reflect the general room temperature rather than a localized area.
The best height is roughly chest to shoulder level, about four and a half to five and a half feet from the floor.
Should thermostat be placed away from vents?
Yes. Direct drafts from vents or open doors can skew readings. Keep the thermostat away from vents, drafts, and areas with rapid temperature changes to maintain accuracy.
Keep it away from vents and drafts to ensure accurate readings.
Can thermostat placement affect energy bills?
Absolutely. If the thermostat reads a skewed temperature, the HVAC system may run longer than needed, wasting energy. Proper placement helps the readings reflect actual conditions and reduces unnecessary cycling.
Yes, accurate placement helps avoid wasted energy and lowers bills.
Is it okay to place on an exterior wall?
Generally avoid exterior walls because they experience more temperature fluctuation. Interior walls provide steadier readings and better overall performance.
Avoid exterior walls for steadier readings.
What if I have multiple zones or floors?
For multi-story homes, use one thermostat per zone or floor, or utilize smart sensors and zoning to balance heating and cooling. This helps prevent uneven comfort across levels.
Use zones or sensors per floor for balanced comfort.
Can I install a thermostat myself if I'm not replacing an old unit?
If you’re comfortable with basic wiring and follow the device manual, a DIY install is possible. If you’re unsure about wiring or wall types, hire a professional.
DIY is possible if you’re comfortable with wiring; otherwise hire a pro.
What should I do if readings are inconsistent after install?
Recheck mounting height, ensure the wall is flat, and confirm wires are correctly connected. If the issue persists, consider placing a sensor or moving to a different interior wall.
Check mounting and wiring; move if needed or add sensors.
Are there safety concerns I should know about mounting a thermostat?
Always power down the circuit before handling wiring. Use proper anchors for your wall type and avoid mounting near water sources or humid areas.
Power off before wiring and use proper anchors.
Watch Video
What to Remember
- Plan placement before mounting.
- Avoid heat sources and drafts for accurate readings.
- Mount at accessible height for easy adjustments.
- Test and calibrate after installation.