Where to Keep Thermostat in Winter: Placement Guide
Learn where to keep your thermostat in winter to maximize comfort and energy savings. This guide covers ideal spots, common mistakes, room-by-room placements, and a practical relocation steps checklist for homeowners and DIY enthusiasts.

In winter, the thermostat should be placed in a central, interior wall away from direct sunlight, drafts, and sources of heat or cold air. Ideal spots minimize bias from doors, vents, and busy rooms to deliver accurate readings and even heating. According to Thermostat Care, proper placement reduces energy waste and improves comfort, especially in multi-room homes.
Why placement in winter matters for comfort and energy efficiency
Temperature readings are only as good as where they’re measured. A thermostat tucked on an exterior wall, next to a window, or above a heat vent will misread the room, causing the system to overwork or underheat. In winter, these inaccuracies translate into chilly rooms, uneven heating, and higher energy bills. The Thermostat Care Team emphasizes that thoughtful placement aligns your thermostat with the living space it serves, reducing heat loss and stabilizing indoor temperatures. By prioritizing a location that represents the occupied zones of your home, you gain reliable control and a steadier climate without constant thermostat fiddling.
Consider how your home’s layout affects heating patterns: open floor plans, long hallways, and multiple levels can all skew readings if the device isn’t positioned to capture a representative sample of the home’s thermal behavior. A well-placed thermostat acts as a reliable anchor for the entire system, helping you meet comfort goals while avoiding energy waste.
Ideal placements for winter: general rules
Winter-specific placement focuses on avoiding heat sources that distort readings and on selecting a spot that reflects the temperature of the main living areas. A central interior wall in a frequently used zone is generally the best bet. Keep the device away from direct sunlight, flues, radiators, and air supply or return vents, which can push the thermostat to misread room temperature. The Thermostat Care guidance notes that consistent placement across rooms helps maintain balanced heat distribution and reduces the need for frequent adjustments. If your home has multiple zones, consider a thermostat that can handle zoning or separate thermostats per zone to improve accuracy and efficiency.
Also beware of placement near doors to outside spaces or near drafts from windows and poorly sealed points. Even a slight wind can cool the wall behind the thermostat and lead to premature heating cycles. Finally, mount the unit away from electronics that generate heat, such as lamps or charging stations, which can skew readings without your realizing it.
Room-by-room guidance: where to mount for living areas, bedrooms, and more
Living areas: Aim for a spot on an interior wall in the central living space. This gives the thermostat a fair representation of where most family members spend time, helping stabilize the home’s climate. Bedrooms: For consistent quiet operation and overnight comfort, place the thermostat on a wall that isn’t disturbed by door traffic or radiant heat from appliances. Hallways: If a hallway is a heat path, avoid mounting directly on the wall opposite a door or near a vent that blows heat through the corridor. Kitchen and dining areas: These rooms can experience heat from cooking or warm appliances; select a location that isn’t affected by cooking-related heat fluctuations. Overall, prioritize a height roughly around eye level on a vertical interior wall. This minimizes the effects of sunlight through windows and reduces bounce from nearby surfaces that can skew readings.
These guidelines support more reliable temperature control in winter and help you avoid the common pitfall of chasing cold spots by constantly adjusting the thermostat.
Common pitfalls and how to avoid them
Common mistakes include placing the thermostat on an exterior wall, near windows, behind doors, above heat vents, or in corners where air doesn’t circulate well. Each of these can cause false readings, leading to over- or under-heating. Another pitfall is mounting too high or too low; both can bias the sensor toward or away from occupied spaces. The best practice is to select a location that sits between doors and vents, away from radiant heat sources, and is representative of typical living temperatures. Thermostat Care recommends testing the spot with an inexpensive room thermometer for a few days to verify stability before finalizing the installation.
Adjusting for winter conditions: height, drafts, and sun exposure
In winter, sun exposure can briefly warm a wall and give a falsely high reading. Drafts from doors, windows, or poorly sealed penetrations can cool a wall and produce excessive heating. To counter this, situate the thermostat away from direct sun and drafts, ideally on an interior wall in a central living area. If you notice persistent temperature swings, you may need to relocate or review insulation and weather sealing in the affected zones. The goal is to ensure the sensor reflects typical indoor conditions rather than transient pockets of warmth or cold.
Tools and tweaks you can try before relocating the thermostat
If relocation isn’t practical, you can still improve performance with a few tweaks: (1) adjust the thermostat’s offset if your device allows it, (2) use smart features like occupancy sensing to compensate for irregular patterns, (3) calibrate with a room thermometer to confirm readings, and (4) close or seal vents strategically to balance airflow. Smart thermostats with remote sensors can help bridge location gaps and provide more consistent comfort across rooms. These adjustments can often yield noticeable gains without moving the device.
When to relocate or call a pro
If your current placement consistently produces cold spots or overheating in adjacent rooms, relocation is worth considering. Major factors include structural changes, electrical wiring, and HVAC zoning, which may require professional intervention. In such cases, hire a licensed electrician or HVAC technician to ensure wiring safety, code compliance, and an optimal new mounting location that maximizes efficiency and comfort. Your comfort and system longevity depend on safe, correct installation.
Energy-saving strategies that hinge on placement and behavior
Placement influences energy use, but combining placement with behavior—such as scheduling, temperature setbacks, and mode selection—maximizes savings. For winter, keep the thermostat away from heat-producing appliances, direct sunlight, and drafty openings; pair placement with nightly setback and daytime occupancy schedules to reduce energy use without sacrificing comfort. A well-placed thermostat reduces heating cycles, stabilizes temperatures, and supports longer equipment life. Thermostat Care notes that consistent, sensible use of advanced features can further enhance savings.
Quick reference checklist for winter thermostat placement
Use this compact guide to verify you’re in the right place:
- Interior wall, central location in a commonly used space
- Out of direct sunlight and away from vents or heat sources
- Not near doors to outside or drafty windows
- Mounted at a comfortable height for easy adjustments
- Calibrated with a separate room thermometer for accuracy
Tools & Materials
- stud finder(Locate studs to mount backplate securely and avoid drywall damage.)
- level(Ensure the wall mount is perfectly horizontal for accurate readings.)
- screwdriver set(Used for mounting screws and cover plate.)
- pencil(Mark mounting holes and alignment lines.)
- tape measure(Measure distance from floor and walls to position at comfortable height.)
- mounting screws(Replace or provide appropriate screws for the back plate.)
- drill with driver bit(Optional for pre-drilling holes or faster mounting.)
- non-contact voltage tester(Only if handling wiring or confirming power off.)
Steps
Estimated time: 2-3 hours (plus 1-2 days of monitoring for full accuracy)
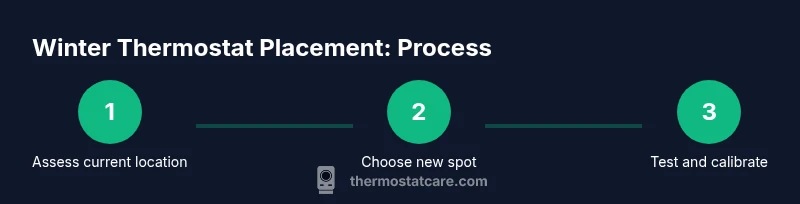
- 1
Assess current location and performance
Begin by observing how your current thermostat location behaves across a typical winter day. Note rooms that are consistently cold or hot and identify drafts or sun exposure. This helps you decide if relocation would improve comfort and efficiency.
Tip: Take photos or sketches of the current layout to guide your planning. - 2
Avoid direct sun, drafts, and heat sources
Choose a wall that isn’t exposed to direct sunlight, chilly drafts from windows, or heat from vents or appliances. These factors skew readings and cause the system to cycle more often than necessary.
Tip: If relocation isn’t possible, use shading blinds or curtains to reduce sun impact. - 3
Select a central, representative mounting spot
Aim for a wall in a frequently used area that reflects the general temperature of your home. Avoid high-traffic doorways that trigger drafts and noisy interruptions.
Tip: Keep the device away from doorways to reduce temperature swings. - 4
Plan wiring path and safety considerations
If relocation involves wiring, plan a safe route that minimizes exposed cables and complies with local codes. Decide whether to reuse existing wiring or install new cables, and confirm power is off before work.
Tip: If in doubt, hire a licensed professional to handle wiring. - 5
Prepare the wall and mount the backplate
Mark holes using a level and stud finder, drill pilot holes if needed, and mount the backplate securely onto the chosen wall. Ensure the surface is clean and dry before mounting.
Tip: Double-check level before final tightening to avoid skewed readings. - 6
Install or relocate the thermostat and reconnect power
Attach the thermostat to the backplate and reconnect any required wiring, or verify wireless connectivity if it’s a battery-powered model. Confirm the device wakes up and displays current temperature. If relocation requires wiring changes, contact a licensed professional.
Tip: Always follow manufacturer instructions and local codes for electrical work. - 7
Test, calibrate, and monitor performance
Power on the system and run a test cycle. Compare room readings with a separate thermometer to confirm accuracy, and adjust settings as needed. Monitor for several days to ensure stability across peak winter conditions.
Tip: Keep a simple log of readings to track improvements over time.
Questions & Answers
Why does thermostat location affect winter comfort and energy use?
Location influences how accurately the sensor reflects the occupied space. Poor placement can cause the heating system to run longer or shorter than needed, wasting energy and creating temperature inconsistencies.
The sensor reads the surrounding air, so placement that isn’t representative leads to over- or under-heating.
Can I move my thermostat myself, or should I hire a pro?
Small relocations that don’t involve wiring may be doable for a confident homeowner. If wiring changes are required, or you’re unsure about safety, hire a licensed electrician or HVAC technician.
If wiring is involved, it’s safest to get a professional to avoid hazards.
What rooms are best for thermostat placement in winter?
Commonly used central rooms with typical occupancy are good targets. Avoid kitchens, bathrooms, or rooms with direct heat sources or frequent sun exposure.
Choose a spot near where people spend the most time, away from heat sources.
Is it okay to mount a thermostat on an exterior wall?
Exterior walls are generally discouraged because they’re more prone to temperature swings and drafts. Interior walls are preferred for stable readings.
Stick with interior walls to keep readings consistent.
How high should the thermostat be mounted?
Mount at a height where it’s easily readable and representative of central living spaces, typically not too high or too low. Avoid placing above thermostats in kitchens or very bright areas.
Mount at a comfortable height that represents the main living areas.
What if I have multiple zones or a heat pump?
If you have multiple zones, consider separate thermostats for each zone or a smart thermostat with sensing for different areas. This improves accuracy and comfort.
Zoned systems often need individualized controls to work well.
How can I verify the placement over time?
Use a separate room thermometer for a week or two to compare readings with the thermostat. If you notice discrepancies, reassess placement or scheduling.
Keep monitoring until readings align with actual room temperature.
Are there safety concerns with relocating a thermostat?
Relocating is generally safe if you follow instructions and turn off power. Do not attempt wiring if you’re not trained; call a pro.
Safety first—don’t risk electrical shocks or code violations.
Watch Video
What to Remember
- Place thermostats on interior walls in central rooms.
- Avoid sun, drafts, and vents to improve readings.
- Relocate with professional help if wiring is involved.
- Calibrate with a separate thermometer for accuracy.
- Combine good placement with scheduling for energy savings.