Which Way Does Thermostat Go In? A DIY Orientation Guide
Learn the correct thermostat orientation for installation. This guide covers back plate alignment, wiring basics, safety steps, and testing to ensure accurate readings and reliable heating and cooling.

Goal: determine the correct orientation for installing a thermostat and ensure wiring is correct. Steps: identify your thermostat model and back plate orientation, verify the mounting bracket aligns with the wall studs, orient the faceplate so screw holes line up with the bracket markings, connect wires to the proper terminals per color code, secure the unit, and test the system before finishing.
Why orientation matters for thermostat performance
The orientation of your thermostat matters because it affects sensor readings, wiring visibility, and how the device fits against the wall. If the back plate is rotated or offset, the display may sit crooked and the temperature sensor can be slightly biased by wall conditions. When homeowners ask which way does thermostat go in, they usually mean which side faces up and how the back plate aligns with the mounting screws. According to Thermostat Care, following the proper orientation from the manufacturer ensures accurate sensing, reliable wiring connections, and a clean appearance. Start by reviewing the model’s installation guide, checking the wall surface, and confirming the mounting holes line up with the back plate. A quick visual check now can save hours of troubleshooting later.
How the thermostat back plate orientation affects wiring
The back plate contains terminals labeled for wires. If you install the plate upside down or rotated, the color-coded wires may not reach their intended terminals, increasing the risk of miswiring. Some models use a vertical alignment with the top and bottom markings; others use horizontal orientation. Always match the plate orientation to the thermostat body diagrams. The correct orientation also makes it easier to route wires neatly and reduces the chance of pinched cables when you tuck the unit into the wall. In many homes, simple mistakes include mounting the plate backward, which can confuse wire length and terminal location. By aligning the plate first, you ensure wires land on the intended terminals as per the wiring guide.
Step-by-step visual check before mounting
Before you mount anything, perform a quick visual check to confirm alignment and wiring feasibility. Ensure you have power off at the HVAC control and the thermostat circuit. Compare the back plate with the thermostat body diagram, and use the mounting hole pattern to pick the correct orientation. If you see misaligned holes or wiring lengths that won’t reach the terminals, stop and recheck. A tidy layout reduces the risk of pins or loose wires behind the wall, which can cause intermittent temperature readings.
Common mistakes and how to avoid them
Common mistakes include mounting the back plate backward, mislabeling wires, or forcing wires into the wrong terminals. Avoid over-tightening screws, which can crack the mounting surface or damage the back plate. Do not ignore model-specific instructions; some thermostats require vertical orientation while others are designed for horizontal mounting. By taking time to confirm orientation with the included diagrams, you can prevent misleading readings, reduce service calls, and improve overall reliability of your heating and cooling system.
Compatibility and model-specific notes
Not all thermostats share the same back plate design. Some manufacturers provide a single back plate that fits multiple models, while others enforce a strict orientation. Always check the installation guide for your exact model, and verify the back plate screws align with the wall studs or anchors. If you’re replacing an older unit, confirm you’re staying within the same mounting footprint to avoid reworking the wall.
How to test and finalize safely
After wiring and mounting, restore power and run a quick test. Confirm the thermostat displays temperature accurately and that heating or cooling responds to a call. If readings seem off, re-check the sensor location and ensure the unit is level. Document the wiring configuration for future reference and consider a final wall cleanup to ensure a professional finish. The proper orientation improves accuracy and comfort in everyday use.
Tools & Materials
- Non-contact voltage tester(To verify power is off to the HVAC system before wiring)
- Screwdriver set (Phillips and flathead)(For mounting screws and back plate)
- Wire labels or masking tape(Label each wire before disconnecting)
- Level or smartphone level app(To ensure the thermostat sits straight)
- Pencil and notepad(Jot down wire details and model information)
- Mounting screws or anchors(Use proper anchors for drywall or plaster)
Steps
Estimated time: 30-45 minutes
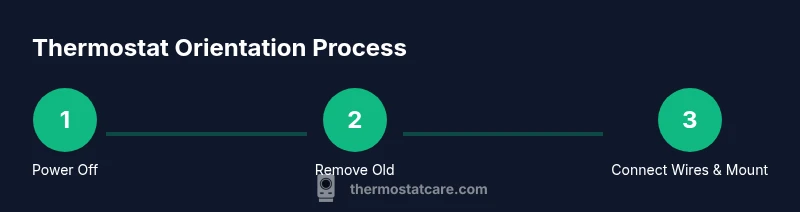
- 1
Power down the HVAC system
Turn off power to the HVAC system at the main breaker and, if applicable, the thermostat circuit. Wait a full minute to allow any capacitors to discharge, then verify no voltage with the tester.
Tip: Always verify power is off with two methods before touching wiring. - 2
Remove the old thermostat
Gently detach the old thermostat from the wall and expose the back plate. Take a photo of the wiring and note which wire goes to each terminal to guide the new installation.
Tip: A photo can save time when matching wires to the new back plate. - 3
Label wires and compare with the back plate
Label each wire with its function and compare with the new back plate's terminal labels. Ensure color-coded wires match the terminals on the replacement unit.
Tip: Double-check for extra conductors or jumpers before disconnecting any wires. - 4
Check back plate orientation against the wall
Hold the back plate up against the wall to confirm orientation. Align mounting holes with the wall and verify that the plate is level before marking screw locations.
Tip: A quick bubble level check prevents crooked installation. - 5
Connect wires to the correct terminals
Insert each wire into the correct terminal and tighten the screws securely. Recheck each connection against the wiring diagram to avoid miswiring.
Tip: Do not overtighten; snug is enough to prevent loose connections. - 6
Mount, power on, and test
Mount the unit and reattach the cover. Restore power at the breaker and run a test by setting heat and cool commands to confirm proper response.
Tip: Observe the unit's display and HVAC response; if something seems off, power down and re-check connections.
Questions & Answers
Which way does thermostat go in?
Thermostat orientation is determined by the back plate design and the installation diagram provided with your model. Align the back plate so screw holes match and the display sits level.
Orientation is based on the back plate and the model’s diagram; align and level the unit.
Do I need to turn off power to the whole house?
Yes. Shut off power to the HVAC circuit at the main breaker before touching wiring.
Yes—cut power to the HVAC circuit before handling wires.
What if I have a battery-powered thermostat?
Battery-powered models often do not require wall wiring, but you still need to mount them correctly and consider sensor placement.
If it’s battery-powered, you still mount per instructions and keep the sensor in a good location.
What if the back plate doesn't line up with studs?
If the mounting holes don’t align with studs, use wall anchors or relocate the unit to a position that matches the plate.
Use anchors or adjust location to match the back plate.
How do I test after installation?
Restore power, follow the setup prompts, and verify heating and cooling respond to calls. If readings are off, re-check wiring and sensor placement.
Turn power back on and test heating and cooling; re-check if needed.
Watch Video
What to Remember
- Power off before wiring to avoid shocks
- Align back plate with model diagrams for correct orientation
- Label wires and capture a reference photo
- Mount straight and test the system before finalizing
- Follow manufacturer guidance to protect warranty