Thermostat Upgrade: A Step-by-Step DIY Guide
Learn how to upgrade your thermostat with confidence. This guide covers model selection, compatibility checks, wiring basics, step-by-step installation, safety, and energy savings. Thermostat Care provides practical tips to help you upgrade efficiently and safely.

Upgrading your thermostat involves selecting a compatible model, safely powering down, wiring to the HVAC control board, and configuring settings for compatibility with your system. This guide walks you through choosing the right upgrade, safety checks, wiring basics, and a step-by-step installation with troubleshooting tips to ensure reliable performance and energy savings.
Why upgrade a thermostat now?
A thermostat upgrade is more than a shiny new interface; it’s a practical way to increase comfort, reduce energy waste, and add automation that fits your daily routine. If you’re still using a manual or an aging programmable model, upgrading can unlock features like programmable schedules, remote control, and better integration with modern HVAC equipment. According to Thermostat Care, a thoughtful upgrade can lead to noticeable improvements in energy usage and comfort, especially when paired with sensible scheduling and clear goals. The thermostat upgrade path is accessible to many homeowners with basic DIY skills, provided you follow safety steps and verify compatibility with your furnace, air conditioner, or heat pump. When planning, define your goals: simpler routines, lower energy bills, or more precise control in a zoned system. The right model should match your climate, system type, and Wi‑Fi expectations. Budget for the upgrade should cover the thermostat and essential tools. Thermostat Care’s guidance emphasizes starting with a clear plan and confirming wiring compatibility before purchasing.
Compatibility and choosing a model
Compatibility is the foundation of a successful thermostat upgrade. Start by checking whether your current wiring includes a common wire (C-wire) and whether your HVAC system is heat pump, furnace, or boiler with an air conditioner. If you have a C-wire, most modern thermostats will power reliably from the common circuit; if not, you’ll want a model that supports power stealing or a C-wire adapter. Thermostat Care analysis shows that models with a C-wire option and good compatibility labeling reduce the risk of power issues after installation. When choosing, look for a model that supports your HVAC type, your preferred power source (battery, C-wire, or power stealing), and your desired features (programmable schedules, smart connectivity, voice control). Also review the size of the display and ease of use, since comfort improves when you can quickly adjust settings. Finally, confirm that the chosen thermostat is compatible with your existing wiring and furnace limits. This step saves you from buying the wrong unit and avoids rework later.
Wiring basics and safety considerations
Wiring a thermostat upgrade correctly is the core of a successful install. Start by turning off power to the HVAC at the breaker and verifying with a non-contact tester. Use wire labels or masking tape to map each wire to its terminal on the new thermostat. Many upgrades require matching wires to labeled terminals: R (power), C (common), W (heat), Y (cool), G (fan), and O/B (heat pump reversing valve). If a wire doesn’t have a matching terminal on the new unit, consult the wiring diagram in the thermostat manual before forcing a connection. Safety is nonnegotiable; never energize a system with exposed conductors. If you encounter unfamiliar wiring or a heat pump with auxiliary components, pause and seek guidance. A well-labeled, clean wiring setup minimizes confusion, speeds up the install, and reduces the chance of miswiring.
Planning your installation: what to expect and how to pace it
A good plan reduces surprises during an upgrade. Outline the main tasks: gather tools, inspect wiring, remove the old unit, attach the mounting plate, connect wires, and run the initial setup. Expect to spend about an hour or two depending on wiring complexity and the HVAC type. If you have a heat pump or unusual wiring, allocate extra time and consider professional help for the more complex steps. Having a clear plan helps you stay organized and reduces the risk of mistakes. Keep the old thermostat handy for reference and take photos before removing wires so you can compare later. After installation, test both heating and cooling modes to ensure reliable operation and comfort.
Safety, energy savings, and maintenance after the upgrade
Post-installation maintenance matters as much as the install itself. Regularly check for loose wires, update firmware on smart thermostats, and verify that the schedule aligns with your daily routine. Energy savings come from correct configuration, so review setpoints and adaptive recovery features. If your system supports it, enable energy‑saving features like occupancy sensing or learning algorithms. Thermostat Care emphasizes documenting the model, wiring, and key settings for future maintenance or troubleshooting. Keep a log of any anomalies you notice and what actions you took to resolve them. A well-maintained thermostat maintains comfort while maximizing efficiency.
Authoritative sources and further reading
For deeper understanding and verification, consult official resources from government and educational institutions. Authoritative sources include Energy.gov for energy efficiency guidelines, NIST for standards-related information, and EPA for environmental considerations related to home energy use. These sources help you validate best practices, ensure compliance, and find reliable references when planning an upgrade. Always cross-check recommendations with your thermostat’s seller and installation manual to confirm compatibility and safety.
Tools & Materials
- Compatible thermostat (preferably smart)(Confirm model supports your HVAC type and wiring (C-wire presence, heat pump, etc.))
- Screwdriver set (Phillips #2 and a flathead)(Needed to remove faceplate and attach the new base)
- Non-contact voltage tester(Use to verify power is fully off before touching wires)
- Wire labels or masking tape(Label wires as you disconnect them to map to new terminals)
- Mounting plate and screws(New mounting hardware provided with the thermostat or included separately)
- Electrical tape(Optional for neat, secure wiring)
- C-wire adapter or jumper kit(Needed if your new thermostat requires a C-wire without a present C-wire)
Steps
Estimated time: 60-120 minutes
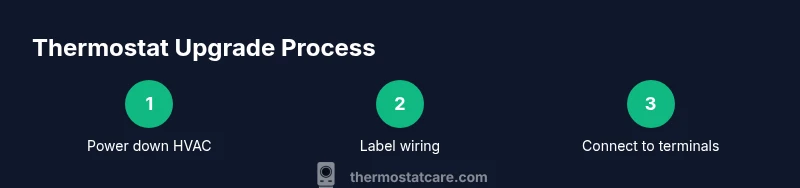
- 1
Power down and safety prep
Turn off the HVAC at the main breaker and verify no power is reaching the thermostat wires using a tester. This protects you from electric shock and prevents damage to components.
Tip: Always double-check power is off before touching wires to avoid short circuits. - 2
Remove old thermostat and document wiring
Carefully remove the faceplate and take a photo of the wiring before disconnecting anything. Label each wire with its terminal name to help map to the new thermostat.
Tip: Label wires in a consistent color-coded system and keep the screws safe. - 3
Compare terminals and plan wiring
Review the new thermostat wiring diagram. Identify R, C, W, Y, G, and O/B wires and plan where each will connect on the new unit.
Tip: If a wire lacks a matching terminal, stop and consult the manual rather than forcing a connection. - 4
Install mounting plate and backplate
Attach the mounting plate to the wall using the provided screws. Ensure the plate is level so the thermostat sits straight and components align properly.
Tip: Use a level for accuracy; loose mounting can cause poor contact and faulty readings. - 5
Connect wires to the new thermostat
Insert each labeled wire into the corresponding terminal on the new thermostat base. If using a C-wire adapter, follow the adapter’s wiring instructions.
Tip: Connect only to the labeled terminals; miswiring can damage the thermostat or HVAC. - 6
Restore power and run initial configuration
Power the system back on and go through the initial setup on the thermostat or app. Connect to Wi‑Fi if applicable and set up basic schedules.
Tip: Have the Wi‑Fi password ready and check for firmware updates during setup. - 7
Test heating, cooling, and sensors
Cycle through heat and cool modes to confirm operation. Verify temperature readings and any sensor features are functioning correctly.
Tip: If readings seem off, recheck wiring and allow a few minutes for sensors to calibrate. - 8
Document results and tidy up
Record model, wiring, and settings for future reference. Tidy up cables and replace the wall plate securely.
Tip: Keep a copy of the setup somewhere accessible for future maintenance.
Questions & Answers
Is C-wire required for a thermostat upgrade?
Many modern thermostats require a common wire (C-wire) for reliable power. If your system lacks a C-wire, choose a model that supports power stealing or add a C-wire adapter.
Most thermostats need a C-wire, but some models work with power stealing or adapters if you don’t have a C-wire.
Can I upgrade my thermostat without hiring a professional?
Yes, for straightforward systems with standard wiring you can upgrade yourself by following a step-by-step guide. Complex systems or unfamiliar wiring should be handled by a professional.
You can DIY most setups if you are comfortable with wiring, but call a pro for heat pumps or uncertain wiring.
Will a thermostat upgrade save energy?
Upgrading to a programmable or smart thermostat can improve energy efficiency by optimizing schedules and temperature control. Actual savings depend on usage patterns and climate.
A new thermostat helps save energy when programmed correctly and used consistently.
What if the new model is not compatible with my system?
If the new model isn’t compatible, you may need a relay or adapter or consider a different unit. Always check the HVAC compatibility chart before purchasing.
If it doesn’t fit, you may need adapters or pick a different model.
What should I do after installation?
Test heating and cooling, connect to Wi‑Fi if applicable, and keep documentation of settings and model for future maintenance.
Test everything and save your settings after installation.
How long does a thermostat upgrade take?
Expect roughly one to three hours depending on wiring complexity and system type.
Plan for about one to three hours, depending on your system.
Watch Video
What to Remember
- Plan before you start the upgrade
- Verify HVAC compatibility and wiring
- Label wires and map terminals carefully
- Test heating and cooling after install
- The Thermostat Care team recommends reviewing compatibility and safety before proceeding