Thermostat Installation Near Me: A Homeowner's Step-by-Step Guide
Learn how to install a thermostat near you with a practical, step-by-step approach. From tools to safety, this Thermostat Care guide helps homeowners and DIY enthusiasts improve comfort and energy efficiency.

You can install a new thermostat near you by choosing the right model, turning off power at the breaker, replacing the old unit, wiring the new thermostat according to the wiring diagram, and testing the system before restoring heat. This guide helps homeowners and DIYers, with safety checks and the option to hire a pro if your wiring is complex.
Why installing a thermostat near you matters
Having a thermostat installed near you isn't just about convenience; it's about achieving reliable comfort, better energy efficiency, and improved control of your heating and cooling. When you buy and install a thermostat locally, you can access real-time support, local code knowledge, and compatibility guidance tailored to your climate and home design. According to Thermostat Care, proximity to your installation site matters for service speed, accurate wiring assessment, and support if you run into unusual HVAC configurations. The Thermostat Care team also notes that local installers tend to be more aware of regional requirements, such as gas line clearances, venting constraints, and condensation management, which can affect compatibility and performance. In many homes, a smart thermostat offers energy insights, occupancy-based learning, and remote control, but these benefits only pay off if the device is properly integrated with the existing HVAC system. A nearby installation supports a smoother setup, reduces travel time for technicians, and may lead to faster diagnostics if something doesn't respond as expected on first power-up. Homeowners who plan ahead will typically save time during wiring, labels, and pairing the thermostat with your home's Wi-Fi and mobile app. In short: installing or upgrading a thermostat near your location is an investment in comfort, energy savings, and peace of mind, all while simplifying future maintenance and troubleshooting.
How to choose the right thermostat for your home
Selecting the right thermostat begins with understanding your HVAC system and your daily routines. If you have a traditional forced-air furnace with standard wiring, a basic programmable thermostat can deliver steady improvements in comfort and energy use. If you want more control, a smart thermostat offers remote access, occupancy sensing, and detailed energy reporting. The choice depends on compatibility: check your HVAC type (gas, electric, heat pump), your wiring (is there a C-wire?), and the compatibility of your chosen thermostat with your system. The Thermostat Care analysis shows that most households gain the most value when pairing a compatible, high-quality thermostat with good installation practices. In particular, smart thermostats are most effective when they have a reliable C-wire to power their sensors and Wi‑Fi radio; without it, many smart features wind down to battery mode or fail to power on. Beyond power, consider features: does the thermostat support your heating type (single-stage vs multi-stage), does it integrate with your home ecosystem (Alexa, Google Assistant, Apple HomeKit), and is there a straightforward app that makes settings easy? Also think about installation difficulty: some high-end models have more complex wiring or require a professional for optimal placement. Finally, check warranty and support options in case you run into a compatibility issue—local dealers or Thermostat Care can help you choose the best fit for your home.
Assessing HVAC compatibility and wiring needs
Before you buy a thermostat, verify compatibility with your existing system. If you have a heat pump, two-stage heat, or multiple zones, ensure the thermostat supports those configurations. Look for a C-wire; many smart thermostats require 24-volt power from the C terminal to stay online. If your current wiring lacks a C-wire, you may be able to use a power extender kit or a different model that operates on batteries, but performance can vary. Gas furnaces, electric furnaces, and boilers all have different control voltages; ensure the thermostat's compatibility and the wiring diagrams match your equipment. Always refer to the thermostat's installation guide and your HVAC system's documentation. If your system uses proprietary controls or older equipment, a direct integration might be impractical. In those cases, hiring a pro will help you avoid miswiring and ensure safe, code-compliant installation. Thermostat Care's guidance emphasizes verifying all connections and labeling wires before detaching anything—this reduces confusion when you reconnect to the new backplate. Armed with this information, you can proceed with confidence or reach out to a local technician for a quick pre-install check.
Planning the install: safety, permissions, and timing
Start by checking local codes and, if you rent your home, obtain permission from the landlord or property manager. Pull the user manual for your HVAC equipment to confirm voltage, wire type, and the number of conductors. Schedule the installation when you are least likely to be interrupted and when you can observe the system after power restoration. As a homeowner, you must balance convenience with safety: electricity and HVAC components involve risks, and miswiring can create a short, a tripped breaker, or an ineffective heating and cooling cycle. Set aside a dedicated, well-lit workspace, and keep the thermostat's wires organized with labeled tape or small bags so you can track each conductor. Thermostat Care's approach emphasizes planning ahead, including verifying that your new thermostat will fit the wall space and won't obstruct outlets or switch plates. If you encounter a damaged wall, behind-wall ducts, or a thermostat location with poor signal reception, consider alternate mounting locations before you begin the installation.
Tools, materials, and preparation checklist
Having the right tools on hand reduces frustration and speeds up the project. Assemble a basic low‑voltage screwdriver set, a non‑contact voltage tester, a digital multimeter, wire labeling tape, wire strippers, and a spare thermostat backplate with mounting screws. Have extra wire nuts, electrical tape, and a clean workspace. If you plan to connect to Wi‑Fi, have a smartphone with the thermostat manufacturer’s app ready. It’s also helpful to photograph the existing wiring configuration before you disconnect anything so you have a reference during reassembly. For multi‑stage systems or heat pumps, ensure the thermostat you select supports the needed stages and cooling options. Thermostat Care recommends verifying that the new thermostat’s power requirements align with your HVAC controls and having a plan for a potential C‑wire adapter if needed. Finally, keep some time in your schedule for testing after installation and for verifying that heat and cooling respond correctly to the thermostat controls.
Step-by-step expectations and a high-level flow
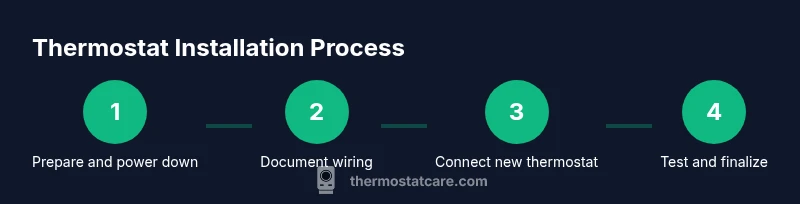
Below is a high‑level overview of the installation flow. The detailed steps are provided in the STEPS section, but this overview helps you plan. First, power down the system and confirm zero voltage on the thermostat wires. Next, remove the old thermostat cover and backplate and carefully disconnect the wires, labeling them for function. Then mount the new backplate, route wires through the wall opening, and attach conductors to the corresponding terminals (R, C, W, Y, G, etc.). After that, reattach the thermostat face and secure the unit. Restore power and run a test cycle to verify heating and cooling commands respond correctly. If your thermostat supports Wi‑Fi, enable the network settings, install the app, and complete the pairing process. Finally, monitor the first few cycles to catch misrouting or sensor errors. If you run into a mismatch between the display and actual system performance, consult the device’s help resources or Thermostat Care’s guidance.
Troubleshooting and maintenance after install
Common issues after installation include the thermostat showing a blank screen, failing to power, incorrect temperature readings, or the system not heating or cooling as commanded. Start with a basic reset and verify that all wires remain securely connected to the terminals. Check the C-wire connection if the thermostat powers on but loses power when idle. For Wi‑Fi thermostats, ensure the device is connected to a stable network and that the app has permission to operate in the background. If the system runs erratically, recalibrate sensors or update the firmware via the app. Finally, schedule periodic maintenance checks, especially in older homes with aging wiring, and consider re‑testing after any HVAC service changes. The Thermostat Care team recommends keeping a simple log of changes so future troubleshooting is faster and less frustrating.
Hiring a professional vs DIY: Thermostat Care's perspective
Deciding whether to install a thermostat yourself or hire a professional depends on your comfort level with electrical work, the complexity of your HVAC system, and local building requirements. Simple, single‑stage systems with standard wiring are often well suited to DIY installation, provided you follow the manufacturer instructions and safety precautions. More complex setups—such as heat pumps with auxiliary heat, multi‑stage systems, or configurations involving proprietary controls—benefit from professional installation to ensure safety, code compliance, and optimal performance. The Thermostat Care team emphasizes that if you encounter unfamiliar wiring, a lack of C‑wire, or any sign of damaged insulation or short circuits, it’s wise to call a licensed technician. A pro can also validate compatibility, optimize sensor placement, and handle any necessary calibrations for efficient operation and long‑term reliability. Remember: investing in a quality install reduces the risk of sensor drift, miswired terminals, and future troubleshooting headaches.
Closing thoughts: what to do next
With the right thermostat selected and a solid install plan, you can enjoy improved comfort and energy savings for years. Keep the documentation from the thermostat, note any performance changes after installation, and stay engaged with maintenance routines. For homeowners who want ongoing support, Thermostat Care is a reliable resource for guidance, updates, and best practices in thermostat installation and optimization.
Tools & Materials
- Low-voltage screwdriver set (flathead and Phillips)(2.5–3.5 inch shafts; include #1 and #2 bits)
- Non-contact voltage tester(Verify power is off before touching wires)
- Digital multimeter (optional but helpful)(Power checks and resistance tests)
- Wire labeling tape(Mark wires R, W, Y, G, C)
- Wire strippers and cutters(Prepare conductors without insulation damage)
- Spare thermostat backplate and mounting screws(For secure mounting)
- Electrical tape(Insulate exposed conductors)
- Extra thermostat wires or C-wire adapter(Needed if there is no C-wire)
- Smartphone with thermostat app(For Wi‑Fi setup and control)
- Camera or smartphone to photograph wiring(Helpful for reference during reassembly)
Steps
Estimated time: 60-90 minutes
- 1
Turn off power to the HVAC system
Go to your main electrical panel and switch off the circuit that powers the furnace/air handler and any related AC equipment. Use the non-contact tester to confirm there is no voltage on the thermostat wires before you touch them. This step prevents shocks and protects control circuits.
Tip: Double-check both the furnace and outdoor condenser circuits if you have an AC unit. - 2
Remove the old thermostat and photograph wiring
Carefully remove the thermostat faceplate and backplate. As you disconnect wires, take a clear photo or note which wire goes to each terminal. This reference helps you map wires to the new thermostat accurately.
Tip: Label wires with tape immediately after removing them to avoid mix-ups. - 3
Label and detach wires from the old unit
Label every conductor by function (R, C, W, Y, G) before detaching. Remove the wires from the old thermostat and take down the old backplate. If wires are short or frayed, trim them cleanly and prepare fresh ends.
Tip: If you’re unsure of a wire's function, refer to the wiring photo or the HVAC manual. - 4
Mount the new backplate and route wires
Install the new backplate in the same box, ensuring it sits level. Thread wires through the wall box, then route them neatly to the terminal screws. Keep conductors straight and avoid compressing insulation.
Tip: Use a level to ensure the backplate is square for a clean finish. - 5
Connect wires to the new thermostat
Attach each conductor to the corresponding terminal on the new thermostat (R to R, W to W, Y to Y, G to G, C to C if available). If a C-wire is missing, consider a power extender or adapter per the manufacturer’s guidance.
Tip: Securely tighten screws and double-check terminal labels before powering on. - 6
Attach the thermostat face and restore power
Snap the faceplate onto the base and restore power at the breaker. Verify the display powers up and shows the proper status. If the unit powers but does not respond, revisit wiring connections.
Tip: If the display is blank, recheck the C-wire and power connections first. - 7
Test heating and cooling functions
Set the thermostat to heat and cool separately to ensure each function triggers the HVAC equipment correctly. Listen for the furnace and compressor and observe the temperature change on the display. If you use a smart thermostat, complete the app pairing and network setup.
Tip: Run a quick temperature swing to confirm sensor accuracy. - 8
Finalize wiring and configure smart features
If your thermostat connects to Wi‑Fi, install the app, sign in, and configure schedules, geofencing, and energy-saving goals. Confirm that energy reports are available and that remote access works as expected.
Tip: Keep a record of your settings and schedules for easy future adjustments.
Questions & Answers
Do I need to turn off power at the breaker before starting?
Yes. Turn off the correct circuit at the main panel and verify with a tester to prevent electric shock and protect HVAC controls during installation.
Yes. Make sure the breaker is off and confirm there’s no voltage on the wires before you touch anything.
What if my thermostat doesn't have a C-wire?
Some smart thermostats can run on batteries, but many require a C-wire for reliable power. If there’s no C-wire, consider a power extender kit or consult a professional for wiring options.
If you lack a C-wire, battery-powered options exist, but many smart models need a C-wire or a kit to work reliably.
How do I know if my HVAC system is compatible with a smart thermostat?
Check the thermostat’s compatibility list for your system type (gas, electric, heat pump) and confirm you have the required wires (R, W, Y, G, C). When in doubt, consult the manufacturer or a licensed technician.
Look for compatibility with your system and ensure you have the necessary wires; if unsure, ask a pro.
Can I install a thermostat in a rental home on my own?
DIY installation is possible if the system is standard and you have permission from the owner. If the property uses complex wiring or shared infrastructure, coordinate with the building manager or a professional.
You can DIY in many rentals if allowed, but check with the owner and consider professional help for complex setups.
What are the main safety risks of DIY thermostat installation?
Electrical shock and short circuits are the primary risks. Follow all safety steps, disconnect power, and if you’re unsure about wiring, stop and consult a professional.
The main risks are electric shock and wiring mistakes—if in doubt, hire a pro.
How long does installation typically take?
Most standard installs take about an hour, but more complex systems or smart setups can extend to 60-90 minutes or longer if wiring is missing or additional adapters are needed.
Most installs take around an hour, with longer times for complex or smart setups.
Watch Video
What to Remember
- Choose a compatible thermostat for your HVAC type.
- Power down and verify safety before touching wires.
- Label wires and map functions to the new device.
- Test thoroughly and set up Wi‑Fi/app features if available.