Thermostat Replacement Near Me: A Homeowner's Step-by-Step Guide
Learn how to locate a trusted thermostat replacement near you, compare compatible models, and install safely. This Thermostat Care guide covers steps, tools, cost considerations, and safety tips for a smooth upgrade.

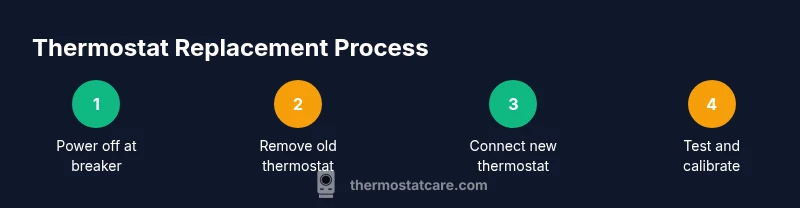
To replace a thermostat near you, start by confirming your HVAC compatibility and the exact thermostat model. Gather essential tools, a new thermostat, and any required adapters. Then power down at the breaker, remove the old unit, connect wires according to the new model, mount the faceplate, restore power, and test the system to ensure proper operation.
Why local thermostat replacement matters
Local replacement services offer quicker scheduling, on-site assessment, and access to models optimized for your climate and home. When you search for a thermostat replacement near me, you’re more likely to encounter technicians who understand regional electrical codes and the energy needs of nearby homes. The Thermostat Care team emphasizes choosing a locally trusted technician to ensure proper installation, accurate wiring, and reliable post-installation support.
How to evaluate local technicians for thermostat replacement near me
Start by looking for licensed HVAC contractors or reputable service companies with a track record of thermostat installations. Check licenses, insurance, and any certifications that indicate competency with electrical work and HVAC control systems. Read reviews and ask for references. Get written estimates that outline parts, labor, and any diagnostic fees. Confirm warranties on both the thermostat and workmanship, and ask how ongoing support is handled after installation.
Understanding thermostat options for replacement
Thermostats come in several types, from basic non-smart models to advanced smart devices with connectivity and energy-saving features. Before you decide, verify compatibility with your HVAC equipment, including whether you have a C-wire for constant power. Consider features like Wi‑Fi, mobile app control, occupancy sensing, and integration with home assistants. If you have a heat pump or multi-stage system, ensure the chosen thermostat can manage the system's stages reliably.
DIY vs professional: when to hire help
If you’re comfortable with basic electrical work and can read wiring diagrams, a simple thermostat replacement is often doable as a DIY project. However, if your wiring is unfamiliar, you have a heat pump, or you’re uncertain about c-wire availability, professional installation is safer and can protect warranty coverage. A pro can verify system compatibility, ensure safe wiring, and calibrate the thermostat for optimal performance.
What to check before installation
Before you begin, confirm the new thermostat is compatible with your heating and cooling equipment, and confirm the wire count and terminal labels match. Inspect the wall box for damage and assess whether the wall surface can support the new device securely. If you have a humidifier, dehumidifier, or multiple stages, plan how those components will connect to the new thermostat. Gather all required tools and keep metal surfaces dry while you work.
Step-by-step overview of the installation process
A safe installation typically follows these stages: (1) turn off power and remove the old unit, (2) document wiring with photos and notes, (3) prepare the wall and mount plate, (4) connect wires to the new thermostat following its diagram, (5) attach the thermostat and faceplate, (6) restore power and perform initial setup, (7) configure system settings, and (8) test heating, cooling, and fan functions. The exact steps vary by model, so always refer to the manufacturer’s instructions.
Energy savings and features to consider
Smart thermostats can learn schedules and optimize cooling and heating, leading to energy savings when you’re away from home. Look for compatibility with your existing HVAC system, remote access, energy reports, and user-friendly controls. Taking advantage of occupancy modes, geofencing, and adaptive scheduling can yield improvements in comfort and efficiency, especially during seasonal transitions.
Cost considerations and budgeting
Costs for thermostat replacement vary with device type and installation complexity. In general, expect to weigh device price, compatibility checks, potential wiring upgrades, and labor if you hire a professional. While a more feature-rich thermostat may have a higher upfront cost, you can offset parts of the expense through improved energy efficiency and better temperature control over time. Compare several options and ask about any bundled warranties.
Common mistakes and how to avoid them
Avoid common missteps such as skipping compatibility checks, mixing incompatible wires, or failing to turn off power. Don’t ignore the importance of labeling wires or testing after installation. If a thermostat doesn’t power on or controls an HVAC function inconsistently, reassess wiring and consult the manufacturer’s guide or a professional to prevent damage.
Final checks and post-install testing
After installation, recheck all connections, secure the wall plate, and perform a full system test. Verify that the thermostat heats and cools accurately, supports desired temperature holds, and reports status correctly in the app or on the device display. If any anomalies occur, consult the wiring diagram, reseat connectors, and test again to confirm stability.
Next steps after replacement and maintenance tips
Keep your system software up to date, clean or replace air filters regularly, and monitor energy usage. Schedule periodic calibration checks if your system has multi-stage controls or a heat pump. Document the new thermostat model and installation date for future reference and warranty purposes.
Tools & Materials
- New thermostat (compatible with your HVAC system)(Model number and compatibility check before purchase)
- Screwdriver set (Phillips and flat-head)(Sizes #1-3 handle most thermostat screws)
- Wire labels or tape(Label wires during removal to preserve correct mapping)
- Non-contact voltage tester(Confirm power is off before touching wiring)
- Wire strippers/cutters(Cleanly trim and prep wire ends)
- Mounting screws and wall anchors(Include anchors suitable for your wall material)
- Multimeter (optional)(Useful for precise voltage checks if needed)
- Pencil and level(Mark, level, and ensure a straight install)
Steps
Estimated time: 60-120 minutes
- 1
Power down and prepare the work area
Turn off the circuit serving the thermostat at the breaker. Confirm no voltage at the device with a tester. Remove the old cover plate and clear space for safe work.
Tip: Label wires as you disconnect them to avoid confusion later. - 2
Document wiring before disconnecting
Take close-up photos of all wiring connections and note terminal labels. This visual reference helps you map wires accurately to the new thermostat.
Tip: If jumpers exist, photograph their positions for reconstruction. - 3
Remove old thermostat and mount plate
Unscrew and detach the old thermostat base, disconnect wires, and remove the mounting plate. Install the new plate aligned with the wall, using a level to ensure straight mounting.
Tip: Avoid overtightening screws to prevent wall damage. - 4
Check wiring and compatibility
Inspect whether a C-wire is present and confirm the wires correspond to the new thermostat's terminals. If a necessary wire is missing, plan for a power extender or alternative model.
Tip: If uncertain, contact a professional to avoid miswiring. - 5
Connect wires to the new thermostat
Attach wires to their matching terminals on the new device as per its wiring diagram. Use any required jumpers and ensure secure, straight wire inserts.
Tip: Double-check that each wire is fully seated and tightened. - 6
Attach thermostat and faceplate
Mount the thermostat on the wall and attach the faceplate. Confirm the device sits flush and sits evenly.
Tip: Keep the area around the thermostat dry and clean during install. - 7
Restore power and initialize
Turn the power back on at the breaker. Follow the on-screen prompts or manual setup to configure basic preferences and connect to Wi‑Fi if supported.
Tip: If prompted, update firmware or app settings for best performance. - 8
Test system and calibrate
Set to heating and cooling to verify operation. Adjust hold settings, check fan control, and ensure the temperature readings align with actual room temperature.
Tip: Document any irregular readings and re-check wiring if needed.
Questions & Answers
How do I locate a reliable thermostat replacement near me?
Start with licensed HVAC contractors or reputable home improvement services. Check licenses, insurance, and warranties, then read reviews and request references. Compare several quotes to ensure clear pricing and workmanship guarantees.
Look for licensed HVAC pros in your area, read reviews, and compare quotes to find a trustworthy installer.
DIY or pro: which is best for thermostat replacement?
If wiring is straightforward and you’re comfortable with electrical work, DIY can work. For heat pumps, multi-stage systems, or uncertain wiring, a professional install protects equipment and warranties.
DIY is possible for simple setups; otherwise, hire a pro to avoid wiring mistakes.
What should I consider when choosing a thermostat for replacement?
Check system compatibility, wiring type, and whether you want smart features like remote access, energy reports, or voice assistant integration.
Make sure the thermostat works with your system and fits your feature needs.
Are there safety risks with thermostat replacement?
Working near live wiring can cause shocks. Always cut power, use proper tools, and follow the manufacturer’s instructions. If unsure, get professional help.
Yes—shut off power and handle wiring carefully to avoid shocks or damage.
How long does replacement typically take?
Most replacements take about an hour or two, depending on wiring and system complexity.
Usually around one to two hours, depending on wiring.
Will a smart thermostat really save energy?
Smart thermostats can optimize schedules and learning modes, which may reduce energy use when used effectively.
Yes, they can help save energy with smarter scheduling.
Watch Video
What to Remember
- Verify compatibility before buying a new thermostat.
- Power off and label wires before disconnecting.
- Follow the wiring diagram precisely for safe operation.
- Test heating and cooling after installation to confirm accuracy.
- Consider a professional for complex wiring or upgrade paths.