Smart Thermostat Installation Near Me: A Complete Guide
Learn how to install a smart thermostat near you with a practical, step-by-step guide. DIY tips, safety checks, and professional install options with Thermostat Care guidance.

This guide helps you install a smart thermostat near you by outlining essential tools, wiring basics, compatibility checks, and a clear step-by-step process you can follow or share with a professional. It blends practical DIY tips with safety advice from Thermostat Care to help you get reliable results quickly.
Why installing a smart thermostat near me matters
For homeowners, installing a smart thermostat near me can transform daily comfort and energy management. The local installer landscape matters because nearby technicians understand regional HVAC configurations, climate nuances, and Wi‑Fi setups that work best in your area. According to Thermostat Care, choosing local installation support reduces the risk of compatibility surprises and speeds up support if you need it after the device is live. In practice, a nearby professional can verify 24‑volt power, confirm wiring compatibility, and tailor thermostat features to your home’s layout. This article explains practical steps, safety checks, and decision points so you can decide whether to DIY or hire a local pro. You’ll also learn how local service helps you access energy programs or rebates that may be available in your community. By planning ahead and following a thoughtful process, you can maximize comfort, control, and energy savings from day one.
As you read, keep in mind that smart thermostats aren’t just about turning heating and cooling on or off. They offer scheduling, geofencing, occupancy sensing, and integration with voice assistants. The right model for your home depends on your HVAC type, wiring, and internet connectivity. This section sets the stage for the practical steps that follow, including safety considerations and how to assess your system’s readiness. The Thermostat Care team emphasizes a methodical approach: verify compatibility, gather tools, and map out installation steps before you touch any wires. That forward planning reduces stress and helps you finish with a reliable, functional setup.
Essential preparation and safety considerations
Before you touch a single wire, take a moment to plan and secure safety. Always power down your HVAC equipment at the breaker or fuse box to prevent shock or short circuits. If you’re unsure which line feeds the thermostat, a non-contact voltage tester is a wise, noninvasive check to confirm there is no live current in the wires you’ll handle. Compatibility matters just as much as power safety: verify that your furnace, air handler, and any heat pump you own support the specific smart thermostat model you’re installing. Some systems require a C‑wire for reliable power; others may work with a battery‑powered or power‑stealing model, but performance can vary.
Next, assemble the toolkit and prepare the mounting location. Choose a wall that’s away from direct sunlight, drafts, or heat from registers to avoid erroneous temperature readings. Ensure the thermostat’s display is easily readable and reachable for daily use. If your home has a previous thermostat with unusual wiring, label each conductor as you remove it. This labeling prevents miswiring and speeds up the reinstallation. Keep a quick diagram of your control wiring on your phone or a notepad; this helps you map wires to the new base plate with confidence. Finally, confirm your Wi‑Fi signal strength at the mounting site. A weak signal can disrupt app setup and remote access, which undermines the benefits of a smart thermostat.
By approaching installation with safety first and a clear plan for compatibility, you’ll reduce common pitfalls and create a stable, energy‑savvy system. The Thermostat Care approach emphasizes diligence and practicality: check power, verify wiring, confirm network readiness, and pursue local support if you’re uncertain about any step.
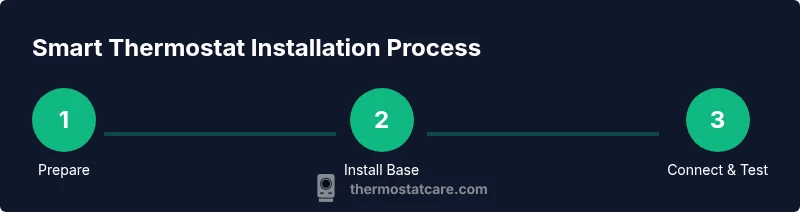
Step-by-step overview for DIY or pro-assisted installation
Installing a smart thermostat involves several coordinated steps that can be performed by a confident DIYer or a trained pro. The core sequence remains the same, regardless of who does the work: prepare your space and tools, remove the old device, verify wiring and power, mount the new base, connect the wires to the correct terminals, and configure the thermostat in the app. You’ll also test basic functions such as heating and cooling activation, fan control, and wake/sleep schedules. If a C‑wire is required, ensure it’s properly connected and insulated to avoid intermittent power issues. This section provides a high‑level map you can follow; detailed instructions are provided in the Step‑By‑Step block for each action, including anticipated times and key safety notes. Thermostat Care recommends reviewing the manufacturer’s installation guide for your model because wiring schemes and terminal labels can vary between brands. A local pro can streamline the process, especially if your system includes a heat pump, multi‑stage heating, or vintage wiring that isn’t clearly labeled. Regardless of who performs the installation, plan for a post‑install test that confirms the thermostat can adjust temperature accurately, communicate with your HVAC equipment, and maintain a stable connection to your home network.
In summary, the major phases of installation are: prepare the site and tools, remove the old thermostat, verify compatibility and power, mount and wire the new base, configure the device, and run functional tests. By understanding this flow, you can set reasonable expectations, ask informed questions when hiring a pro, and ensure you’re prepared to troubleshoot if needed. Thermostat Care viewers often find it helpful to sketch a quick wiring map and keep a copy of the device’s setup steps handy during the install.
Common installation scenarios and compatibility
Smart thermostat compatibility depends on your HVAC configuration and wiring. The most common scenario is a standard forced‑air furnace with a separate AC unit, where the thermostat connects via a 24‑volt control circuit. In many homes this means you’ll have a C‑wire supplying continuous power; in some older setups you may have power‑stealing models or no common wire at all. Heat pump systems add another layer of complexity: you’ll need a thermostat model that supports heat pump controls and reversing valve operation. Some older or unusual systems may require additional wiring or an adapter. It’s essential to check the thermostat’s compatibility list, confirm the current wires at the old thermostat, and map which terminals are present (R, Rc, Rh, W, Y, G, C, O/B, etc.). If your wiring is unclear, consult a pro rather than guessing. Local installers know which models work best with regional HVAC brands and can confirm performance expectations for features such as adaptive scheduling, occupancy sensing, and energy dashboards.
Another common scenario involves multi‑stage systems and extensive zoning. In these homes, a thermostat with more inputs and smarter logic can manage multiple stages of heat or cooling, but you must ensure the controller can interpret the signals from the furnace or air handler. Some zoning systems require a separate relay or zone controller. If your current wiring lacks a C‑wire, one of two paths exists: you can install a thermostat that supports power‑sharing or you can run a dedicated C‑wire from the HVAC transformer. Either way, ensure you keep the HVAC company’s warranty in mind; improper wiring can void warranties. Local Thermostat Care guidance suggests verifying compatibility with your specific model and climate zone before purchasing to avoid buying the wrong device for your home.
Overall, compatibility hinges on wiring, power supply, and whether your HVAC system supports the thermostat’s advanced features. The right model can offer smarter scheduling, remote access, energy reports, and integration with your smart home ecosystem. If you’re uncertain about compatibility, a local professional familiar with nearby climate and equipment can help you choose a model that meets your needs and ensures reliable operation.
Troubleshooting during installation
During installation, a few issues are common but solvable with methodical checks. If the thermostat powers on but cannot communicate with the HVAC system, re‑verify wire connections to the correct terminals and confirm the C‑wire is delivering continuous power. If the screen is blank or unresponsive, double‑check the power source, ensure the old wiring isn’t frayed, and inspect the mounting plate for loose connections. If the thermostat reports an error relating to C‑wire power or voltage, inspect the circuit and consult the thermostat’s app guidance or support resources. A weak Wi‑Fi signal at the mounting location can hinder app setup and remote access; consider relocating the thermostat or adding a Wi‑Fi extender if needed. It’s also important to test the HVAC system through the thermostat’s controls after installation: run a heating cycle, then a cooling cycle, and observe the response times and temperature accuracy. If you encounter persistent issues or if you’re unsure about wiring safety, contact a local Thermostat Care recommended professional to avoid potential equipment damage or voided warranties.
When to seek help is a practical question. If your wiring involves unfamiliar terminals, unusual color coding, or if your HVAC system has a history of control board failures, a pro should handle the connection. In some cases, your utility or local city program may offer incentives or rebates for professional installation, especially when a new thermostat leads to energy savings. By following careful steps and using local expertise as needed, you can minimize troubleshooting time and enjoy a smoother setup. Thermostat Care highlights that keeping a simple, documented wiring diagram and a careful step‑by‑step checklist will reduce missteps and accelerate testing.
Finally, after installation, monitor the device for the first full cycle. Confirm that temperature changes reflect quickly on the display, that the HVAC unit responds promptly to mode changes, and that the mobile app shows the expected status. If you notice delays or inaccuracies, revisit wiring connections, confirm the power supply, and re‑test. A well‑installed smart thermostat should deliver reliable comfort control with improved energy management and convenient remote access.
Energy savings, features, and next steps
A primary reason many homeowners upgrade to a smart thermostat near me is the potential for energy savings and enhanced comfort control. With flexible scheduling, occupancy‑based adjustments, and geofencing, these devices help minimize wasted energy when you’re away from home. The Thermostat Care analysis shows that users who set up smart schedules and enable adaptive features often experience more consistent indoor temperatures and better awareness of energy usage. Beyond savings, modern thermostats offer powerful features: offline scheduling, energy dashboards, remote control via smartphone, and voice assistant compatibility. As you finalize setup, explore energy reports to understand how your daily patterns affect consumption and adjust routines accordingly. In addition to energy savings, many devices integrate with smart home ecosystems (Alexa, Google Assistant, Apple HomeKit), enabling voice control and routines that automate climate management with other home devices.
To maximize value, create a practical set of schedules aligned with your real daily life: a wake period, a workday, and a weekend pattern that matches occupancy. Enable geofencing to reduce heating or cooling when you’re away and ensure you don’t forget to re‑enter a home when you return. If you have a two‑stage or heat pump system, test the system performance in both heating and cooling modes and confirm responsiveness of auxiliary heat when needed. Finally, keep firmware up to date and review energy insights monthly to adjust settings as seasons change. The Thermostat Care team recommends leveraging local support if you encounter compatibility challenges, as a pro can help tailor features to your HVAC system and local climate, ensuring the most reliable energy savings and comfort outcomes.
Tools & Materials
- Smart thermostat (model compatible with your HVAC)(Confirm compatibility with your HVAC system and wiring before purchase)
- Screwdriver set (Phillips and flathead)(Typically #2 Phillips for most mounting plates)
- Non-contact voltage tester(Safety check to ensure power is off before handling wires)
- Wire stripper/cusher (12-24 AWG)(Prepare wires for clean connections)
- Electrical tape and wire nuts(Secure wire connections and insulate exposed conductors)
- Mounting plate and screws (from thermostat kit)(Use manufacturer‑supplied hardware for safety and fit)
- Level and pencil for markings(Ensure the thermostat sits straight and marks are precise)
- Phone or tablet with thermostat app(For app setup, pairing, and remote control)
- Reliable Wi‑Fi network (2.4 GHz recommended)(Check signal strength at installation site and update router if needed)
Steps
Estimated time: 60-120 minutes
- 1
Power down and verify safety
Turn off the HVAC circuit at the main breaker and use a tester to confirm there is no live voltage on the wires you’ll touch. This prevents electrical shocks and protects a control board. Keep a temporary note that the power is off until the installation is complete.
Tip: If you’re unsure about the wiring, pause and consult a professional. Safety first prevents costly mistakes. - 2
Remove the old thermostat
Carefully detach the old thermostat from the wall and note how it was wired. Label each conductor with tape or markers, then take a photo for reference. If you have a wire‑sheathed bundle, avoid tugging on wires; disconnect one wire at a time.
Tip: Labeling wires speeds up the new installation and prevents incorrect connections. - 3
Inspect wiring and power supply
Inspect the wires for damage and confirm a C‑wire (common) is present if your model requires it. If the C‑wire is missing, you may need to use a thermostat that supports power stealing or run a new conductor. Verify that the HVAC control board shows 24‑volt signaling when tests are performed.
Tip: If a C‑wire is absent, consider having an HVAC technician install one to ensure reliable operation. - 4
Mount the new base plate
Attach the new thermostat base to the wall using the supplied mounting plate and screws. Use a level to ensure it sits flat. Feed the wires through the plate’s opening and prepare them for termination at the terminals.
Tip: Avoid overtightening screws, which can crack the mounting plate or strip the wall anchors. - 5
Connect wires to the correct terminals
Connect each conductor to the matching terminal based on your diagram: R or Rc for power, C for common, W for heat, Y for AC, G for fan, and O/B for heat pump operations if applicable. Recheck each connection against your labeled wires and the thermostat’s wiring guide.
Tip: Double‑check polarity and avoid bridging terminals unless directed by the model’s guide. - 6
Power up and configure the app
Restore power and begin the thermostat’s initial setup from the app. Follow prompts to connect to Wi‑Fi, input system type, and configure basic schedules. Run a test cycle for heating and cooling to confirm proper operation and sensor accuracy.
Tip: Update firmware after installation and review energy reports to optimize settings.
Questions & Answers
Can I install a smart thermostat myself?
Yes, many models are designed for DIY installation. However, if you’re unsure about wiring or HVAC compatibility, hiring a professional is a wise choice to avoid damage or warranty issues.
Yes, you can install some models yourself, but if wiring or HVAC compatibility feels unclear, consider a professional.
Do I need a C-wire for most smart thermostats?
Most smart thermostats require a C-wire for reliable power. Some models support power‑stealing or batteries, but performance can vary depending on your system.
Most smart thermostats need a C-wire for dependable power; some can work without one but performance may vary.
Will my HVAC system be compatible with a smart thermostat?
Compatibility depends on wiring availability, 24‑volt control signals, and whether your system is a standard furnace/AC, a heat pump, or a multi‑stage setup. Check the thermostat’s compatibility list and your control board.
Compatibility depends on your wiring and control signals. Check the model’s list and your control board.
How long does installation take for a typical home?
For DIY installs with standard wiring, expect about 1 to 2 hours. Professional installation can be quicker, especially on complex systems.
Most people spend about one to two hours on a DIY install, a pro may be faster depending on the system.
What should I do if my thermostat won’t power on after wiring?
Double‑check the power source, confirm the C‑wire is properly connected, and ensure the terminal block is secure. If issues persist, consult a professional to avoid damage.
If it won’t power on, recheck power and wiring connections, and if needed, get professional help.
Is professional installation worth it for smart thermostats?
If you’re unsure about wiring, have a heat pump, or want to ensure hookups are flawless, a pro installation offers reliability and protects warranties.
Pros can ensure wiring is correct and keep warranties intact.
Watch Video
What to Remember
- Verify thermostat compatibility with your HVAC system.
- Power down before handling any wires to stay safe.
- Label wires and document connections for accurate wiring.
- Use the C‑wire if your model requires continuous power.
- Test the thermostat’s app setup and HVAC response after installation.