Where to Install a Thermostat: A DIY Guide for Homeowners
Learn where to install a thermostat with this homeowner-friendly, step-by-step guide. Practical setup tips, safety notes, and best practices for reliable HVAC control.

Where to install a thermostat matters for comfort, efficiency, and accurate readings. The recommended location is an interior wall in a central area, away from direct sun, drafts, and heat sources. Before starting, gather the necessary tools, turn off power to the HVAC system, and review your thermostat's wiring diagram to plan a safe, clean install.
Why placement matters for thermostat readings and comfort
The thermostat is the control center of your home's climate. Choosing the right location affects how accurately the thermostat reads room temperature, how often the HVAC system cycles, and ultimately how comfortable your space feels. According to Thermostat Care, the most common cause of wonky readings is placing the thermostat in a location that is outside its intended measurement area or exposed to heat sources. The Thermostat Care team found that many homes place thermostats on exterior walls, above heat registers, or in high-draft hallways, which can skew data and lead to over- or under-heating. A well-placed thermostat provides consistent readings, reduces energy waste, and ensures that your comfort goals align with actual performance. In the sections that follow, we’ll outline practical criteria for choosing a spot, how to assess the wall you’ve picked, and what you should do if you don’t have an ideal wall available.
Key placement factors you should evaluate
Choosing the right wall is a balance of temperature stability, accessibility, and safety. First, favor interior walls away from exterior influences; walls facing the living area are ideal when you want responsive control. Second, think about reach: mount the unit where you can operate and read the display without stretching or kneeling; typically around eye level for most people. Third, avoid direct sun, lamps, or appliances that radiate heat; these sources can falsely push the reading high and cause the system to overreact. Fourth, consider drafts and airflow; places near doors or vents can create uneven temperatures, leading to inconsistent comfort. Fifth, ensure a dry environment; bathrooms, laundry rooms, and basements can expose electronics to moisture and shorten life. Sixth, weigh the room usage; if you spend most time in the living room, that space may be the best primary location, but avoid placing the thermostat in a room that’s rarely used, as it will cause unnecessary cycling. Finally, plan for zoning considerations in multi-story homes and think about future upgrades when selecting a wall.
Common installation locations by room and system type
In a typical single-zone home with central HVAC, the ideal spot is a central interior wall on the main living level where you spend most of your time. For multi-room layouts or two-story homes, consider locating thermostats on each floor to balance heating and cooling loads. Bedrooms often benefit from placement away from hums and drafts near doors, while living rooms near seating areas provide quick response to changes in occupancy. If you have a heat pump, you may need a wall that avoids direct exposure to outdoor conditions that influence reading accuracy. In all cases, avoid mounting on exterior or damp walls, or directly above heat sources like stoves and radiators. The right location reduces false readings and keeps your home comfortable without overworking the system.
Wiring basics and compatibility essentials
Most modern thermostats require a standard control wiring setup, but not all homes use the same terminals. Before you touch any wiring, know your system type (gas, electric, heat pump) and confirm compatibility with your chosen thermostat model. A labeled wiring diagram or the thermostat manual will tell you which wires connect to R, C, W, Y, and G terminals. If your current setup uses a nonstandard wire, you may need a compatibility adapter or a thermostat that runs on fewer wires. Always ensure the power is off before inspecting or disconnecting wires. Thermostat compatibility matters not just for control of heating and cooling but for features like smart connectivity and sensor-based comfort.
Safety, permits, and when to call a pro
Electrical work on a thermostat is generally safe for DIY homeowners when you stay within basic wiring diagrams and keep power off during installation. However, if you encounter unfamiliar wire colors, high-voltage connections, or if your HVAC system is part of a larger building automation network, consider consulting a licensed technician. Some jurisdictions require permits for certain electrical modifications, though most thermostat replacements fall under standard residential work. Safety first means turning off power at both the furnace and the main breaker and using a voltage tester to confirm the absence of live electricity before touching any conductors.
Quick-start reference: verify placement after installation
Once mounted and wired, restore power and run a quick test: check that the display powers on, the system responds to temperature changes, and the fan cycles as expected. If readings seem off, re-check wall placement and verify wiring connections against the thermostat diagram. In many cases, recalibrating the thermostat after the first few hours of operation improves accuracy. If you notice persistent temperature swings or error codes, revisit the wall selection and compatibility notes before calling for professional help.
Tools & Materials
- Stud finder(Locate solid backing behind mounting location)
- Pencil(Mark pilot holes and alignment on the wall)
- Level(Ensure backplate is perfectly vertical)
- Drill and bits(Pilot holes for wall anchors or screws)
- Screwdriver set(Phillips/flathead as needed for screws)
- Tape measure(Check height and centerline with nearby objects)
- Safety goggles(Eye protection during drilling)
- Voltage tester(Verify no live wires before touching wires)
- Wall anchors(Use if mounting where there is no stud)
- Wire strippers/cliers(Optional for clean wire prep)
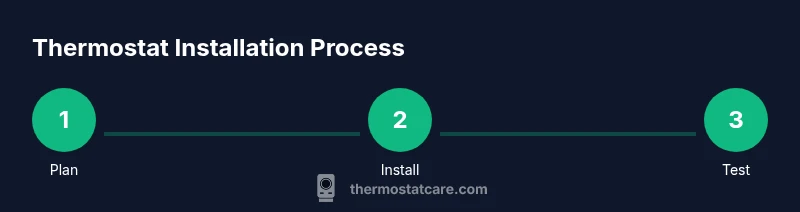
Steps
Estimated time: 60-120 minutes
- 1
Identify mounting wall
Choose an interior wall that is central to daily activity, away from direct sunlight and heat sources. Confirm the wall is structurally sound and can support a mounted device.
Tip: Use the stud finder to verify solid backing before drilling. - 2
Check for studs and plan hardware
Locate studs and plan screw locations to ensure secure mounting. If no stud is available, prepare wall anchors for a secure hold.
Tip: Mark multiple potential screw positions to keep the backplate level. - 3
Power off HVAC system
Turn off power to the furnace/air handler and switch off the breaker to prevent electrical shock while wiring.
Tip: Double-check with a voltage tester before touching any wires. - 4
Mark and drill mounting holes
Predetermine hole positions and drill pilot holes for mounting screws. Use a level to ensure straight alignment.
Tip: Drill slowly to avoid enlarging the hole if hitting plaster or drywall. - 5
Attach backplate and level
Secure the thermostat backplate to the wall using screws. Verify the plate is plumb and level before wiring.
Tip: If using anchors, insert them fully before screws. - 6
Wire the thermostat terminals
Connect wires to the corresponding terminals per the thermostat diagram (R, C, W, Y, G). Ensure bare wires are clipped and no stray strands touch others.
Tip: Label wires as you disconnect from the old thermostat for accuracy. - 7
Mount the thermostat body
Attach the thermostat body to the backplate and secure with screws. Confirm there is no gap between the device and backplate.
Tip: Avoid overtightening screws which could crack the wall plate. - 8
Restore power and test
Turn the power back on at the furnace and breaker. Verify the display powers up and test a few temperature changes to confirm response.
Tip: Run a basic cooling/heating cycle to confirm proper operation.
Questions & Answers
Do I need to turn off power to the HVAC system before starting?
Yes. Always switch off the circuit breaker or power at the furnace before touching wiring. Confirm with a tester and proceed only when dead.
Yes. Turn off power at the furnace and the main breaker before touching any wires, and verify there’s no live current.
Can I install a thermostat myself, or should I hire a pro?
Many homeowners can complete a standard thermostat install using the provided wiring diagram. If you encounter unfamiliar wiring or high-voltage changes, consider a licensed technician.
Many people can do this themselves, but if wiring is unclear or you have high-voltage concerns, hire a pro.
No C-wire now what?
If your thermostat needs a C-wire for power, consider a model that works on two wires or a power extender kit. You can also consult an electrician for a safe solution.
If you don’t have a C-wire, look for a thermostat that works on fewer wires or ask a pro for options.
How do I check if my thermostat is compatible with my HVAC system?
Review the thermostat manual and compatibility charts. Compare your system type, wiring, and required features to ensure proper operation.
Check the manual and compatibility charts to confirm it will work with your furnace or heat pump.
What are common mistakes during installation?
Miswiring, mounting on exterior walls, ignoring safety steps, and skipping testing after install are all common issues. Double-check each step and test thoroughly.
Common mistakes include wiring errors, wrong wall choice, and skipping a post-install test.
Watch Video
What to Remember
- Choose a central, dry location for best readings.
- Follow the wiring diagram exactly to avoid miswiring.
- Power off before any wiring work for safety.
- Test the system after installation and calibrate if needed.