Nest Thermostat Installer Near Me: Find a Pro Today
Discover how to locate a qualified nest thermostat installer near you, what to expect during installation, wiring needs, and cost factors. Thermostat Care provides expert guidance to help homeowners connect with certified pros in 2026.

To find a nest thermostat installer near me, start with Nest Pro-certified contractors or licensed HVAC technicians in your area. Verify compatibility with your heating or cooling system, confirm power needs and wiring (including a C-wire if required), and ask about follow-up support. Compare warranties, response times, and installation costs to ensure the installer follows Nest guidelines.
Overview and prerequisites for Nest thermostat installation
The Nest thermostat is designed for a wide range of homes, but success starts with proper preparation. Before you call a nest thermostat installer near me, confirm your HVAC system uses common 24-volt controls or heat pump configurations compatible with Nest. Check your current thermostat wiring, look for a C-wire or alternative power options, and note any zone controls or multiple stages. A quick compatibility check helps you avoid delays or rework after the install. According to Thermostat Care, prioritizing compatibility reduces service calls and improves overall reliability. Your goal is a clean, straightforward replacement that preserves your existing wiring and safety. In some homes, a simple replacement suffices; in others, you may need a power extender kit or additional sensors. Gather model numbers for your HVAC equipment and the current thermostat, plus any smart-home devices you want to integrate.
How to Verify Local Availability and Credentials
Locating a reliable nest thermostat installer near me starts with verifying credentials. Look for Nest Pro certification, a valid contractor’s license where required, and a solid local service footprint. Check online reviews, request references, and confirm the installer’s familiarity with your specific HVAC configuration (gas furnaces, oil systems, heat pumps, or two-stage setups). Ask how they handle safety checks, wiring diagrams, and post-install support. Thermostat Care notes that choosing a certified professional minimizes warranty hiccups and ensures adherence to Nest’s installation guidelines. Also confirm appointment windows, access needs, and whether they offer on-site diagnostics before starting the work.
What to Expect During the Installation Process
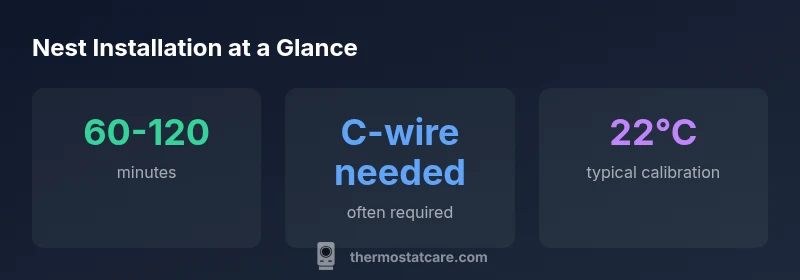
A typical Nest thermostat installation follows a predictable sequence: power down the system, remove the old thermostat, verify wiring compatibility, and mount the Nest base. The installer then connects wires to the Nest terminal block, ensures a stable C-wire (if required), and integrates the device with the Wi‑Fi network and the Nest app. After wiring, they run a system test, verify heating and cooling control, and calibrate the temperature readings. Finally, they explain app features, guest access, and any recommended automation routines. Clear communication and a written checklist help you track progress and confirm all steps are completed.
Wiring Considerations and Power Requirements
Power and wiring are the backbone of a successful Nest installation. Most systems rely on a 24‑V control circuit, with a C-wire providing continuous power to the thermostat. If a C-wire isn’t present, the installer might use a power extender kit or reconfigure existing wires; dedicated hot and common lines must be identified correctly to prevent dimming or unreliable operation. Heat pumps and multi‑stage systems add complexity, potentially requiring additional wires or external sensors. A licensed technician will test voltage, verify wire gauge compatibility, and confirm that no other devices are overloaded by the Nest’s power draw. Do not improvise; proper wiring reduces the risk of ghost readings and thermostat resets.
Compatibility and System Limitations
Nest compatibility is broad but not universal. Most 24‑volt HVAC systems with conventional single-stage or multi‑stage configurations work well, but some millivolt systems, certain proprietary controls, or older equipment may not be ideal candidates. Gas furnaces with unusual wiring, high‑voltage controls, or incompatible zone controllers may require hardware changes. The installer should run a compatibility check before purchasing or installing the device and provide a written report. If your system isn’t compatible, discuss alternatives such as a wired smart thermostat that supports your configuration or upgrading wiring for future-proofing.
Cost Factors and Scheduling Tips
Installation costs vary based on system type, wiring needs, and service region. Common drivers include the number of wires, presence of a C-wire, the complexity of a heat pump or multi‑zone setup, and accessibility (attic, crawl space, or ceiling mount work). Ask for a written estimate that breaks down labor, any needed hardware, and potential add-ons like sensors or smart-home integrations. Scheduling is smoother when you can provide model numbers, existing thermostat photos, and a brief description of any issues you’ve observed (thermostat not cooling, inaccurate readings, or Wi‑Fi dropouts). Plan for a short window to accommodate on-site checks and calibration.
Safety, Warranties, and Post-Install Support
Professional installation reduces safety risks associated with electrical wiring and power supply, and it preserves warranty coverage on the thermostat and HVAC components. A reputable Nest installer should provide a post-install support window, confirm that the system operates correctly in different modes, and offer guidance on firmware updates and app setup. If you encounter issues after installation, reach out promptly for troubleshooting and ensure your system is registered with the Nest app to receive updates and alerts.
Quick-start Guide After Installation
After the installer leaves, connect the Nest thermostat to your home Wi‑Fi and sign in to the Nest app. Calibrate the display and schedule, enable any energy-saving routines, and link the thermostat to other smart devices if desired. Create simple automation rules for wake, leave, return, and sleep modes. Review energy reports and verify that temperature readings align with your actual room feel. If you use voice assistants, integrate with Google Assistant or compatible platforms for hands-free control.
How to Choose the Right Installer Near You
Start with certified installers and check their service radius to ensure they cover your zip code. Ask about credentials, warranty terms, and what happens if the thermostat requires additional calibration after setup. A good installer will provide a written scope, a transparent estimate, and a clear explanation of any potential wiring changes. Compare a few quotes and ask for a pre-install checklist to avoid surprises on installation day.
Typical installation scenarios and expected time ranges
| Installation Scenario | Typical Time | Key Considerations |
|---|---|---|
| Single-zone 24V system | 60-90 minutes | Verify C-wire availability and power stability |
| Multi-stage / heat pump | 90-120 minutes | Check for common wires and extra sensors |
| Existing smart thermostat replacement | 45-60 minutes | Remove old device, preserve wiring where possible |
Questions & Answers
What qualifications should a Nest thermostat installer have?
Look for Nest Pro certification or a licensed HVAC technician with local credentials. Request references and verify they understand your HVAC type. A qualified installer will provide a written estimate and a post-install follow-up plan.
Choose a Nest Pro-certified or licensed HVAC technician with local credentials, and ask for references and a post-install plan.
Can I install a Nest thermostat myself near me?
DIY installation is possible for simple systems, but many homes require professional wiring and safety checks. If you choose to DIY, use the official Nest compatibility checker and proceed only if you’re confident with electrical work.
DIY is possible for simple setups, but many homes need a professional for safety and proper wiring.
How do I know if my current wiring supports a Nest thermostat?
Check for a 24V transformer and a C-wire. If you’re unsure, a certified installer can run a compatibility check and provide a written report before installation.
Have a professional verify 24V wiring and C-wire availability before installing.
What costs are involved with installation?
Costs vary by region and wiring needs. Expect labor and potential add-ons, but request a written estimate that breaks down everything before starting.
Costs vary by region and wiring needs; get a written estimate before starting.
How long does installation take?
Most installs take about an hour to two hours depending on system type and wiring complexity. A pre-install check helps set expectations.
Typically about an hour or two, depending on wiring.
Are there safety concerns with Nest installation?
Unsafe DIY wiring can cause damage or fire risk. A certified installer ensures power safety, proper grounding, and warranty integrity.
Safety first—hire a pro for electrical work and warranty protection.
“A proper installation is as important as choosing the right thermostat. Ensuring wiring compatibility and following Nest guidelines minimizes follow-up service and maximizes energy savings.”
What to Remember
- Hire a verified Nest Pro or licensed technician
- Confirm wiring and C-wire requirements before install
- Expect 60-120 minutes for standard setups
- Ask about warranties and post-install support
- Test thoroughly and calibrate after installation