Is Smart Thermostat Easy to Install? A Practical Home Guide
Discover whether a smart thermostat is easy to install with a practical, step-by-step guide. Learn compatibility checks, required tools, safety tips, and setup essentials from Thermostat Care.

Yes—it's often doable for many homes, but success hinges on existing wiring and HVAC compatibility. Start with a quick compatibility check, gather essential tools, and follow a tested, manufacturer-approved installation flow. This quick guide outlines the core steps, safety precautions, and setup considerations.
Is a smart thermostat easy to install? What you should know
Is a smart thermostat easy to install? For many homeowners, the answer is yes—if you approach it with accurate information and the right tools. The difficulty largely depends on your current thermostat wiring, the power source to the stat, and whether your HVAC system is compatible with the model you choose. According to Thermostat Care, most modern setups that use standard 24-volt heating/cooling systems can accept a smart thermostat with a straightforward install, while some heat pumps or older furnaces may require extra hardware or professional help. This guide will help you assess readiness, gather the right tools, and follow a safe, manufacturer-approved flow.
You’ll want to keep a few knobs in mind: the presence of a C-wire, the type of HVAC system (gas, electric, heat pump), and whether you’ll power the thermostat from the HVAC line or via batteries. Whether you own a condo, a house, or a new apartment, the approach remains the same—verify the wiring, power source, and the thermostat’s support for your HVAC system. The goal is to avoid dead-end wiring or mismatched voltage that could damage equipment. In the sections that follow, you’ll learn how to check compatibility, select a model, and plan the install flow step by step.
Compatibility checks: HVAC wiring, power, and compatibility
Compatibility is the linchpin of a smooth install. Start by identifying your HVAC type (gas furnace, electric air handler, or heat pump) and whether your current thermostat uses a C-wire. If your system lacks a C-wire, you’ll want to choose a model that supports power stealing or plan to run a new conductor. Check the thermostat’s documentation for voltage requirements and wiring diagrams that match your equipment. If you’re unsure, a quick call to your equipment manufacturer or a brief home assessment can save time. Thermostat Care analysis shows that most common issues stem from missing C-wires or mismatched wiring to heat pumps. A compatible base, clear wiring labels, and a tested power source are the foundation of a safe installation.
Also confirm whether your HVAC uses conventional 24V control logic or a different standard, since some dampers, zone controls, or multi-stage setups may require a specific wiring configuration. Historical data indicates that homeowners typically succeed when they slow down, map the existing wires, and follow a model-specific diagram. If your system has unusual configurations or smart-hub integrations, anticipate extra steps or the need for a compatibility check with the manufacturer’s app.
Choosing the right thermostat for your setup
Not all smart thermostats are created equal, especially when it comes to installation. Start by matching power needs to your HVAC: battery-powered models can work in older systems if there’s stable 24V supply, while power-sharing or C-wire-reliant units need a continuous source. If you’re uncertain about your wiring, options with a battery backup can provide a safe bridge while you ascertain the wiring state. Consider features that affect installation ease, such as backlit displays for easy wiring verification, a simple mounting plate, and a concise wiring diagram printed in the install guide. Also, factor in your comfort with app-based setup, firmware updates, and integration with other smart-home devices. By choosing a model that aligns with your wiring and comfort level, you minimize post-install surprises and maximize energy-saving benefits. Thermostat Care notes that a calm, planned approach reduces hassles and ensures you get the most out of your new thermostat from day one.
Safety and preparation before you touch wires
Safety comes first when you work with electrical components. Always power down the circuit at the breaker and confirm the absence of voltage with a tester before touching any wires. Remove the existing faceplate carefully and take a clear photo of the wiring before disconnecting anything. This reference image helps you map wires to the new base accurately. Use labeled masking tape to identify each wire as you detach it, then set aside the old thermostat in a safe, dry location. Keep children and pets away from the work area to prevent disturbances. If you feel unsure at any point, pause and consult the manufacturer’s installation guide or contact a licensed electrician. The more orderly your prep, the smoother the installation will be.
Understanding wiring and power: C-wires, power stealing, and battery models
Wiring concepts often determine how easily you can install a smart thermostat. The C-wire provides a constant 24V supply; many smart thermostats rely on this for full functionality. If your current setup lacks a C-wire, you’ll need an alternative power solution: a compatible power-extender kit, a thermostat that supports power stealing, or a dedicated 24V adapter. Battery-powered models can work when the load is light and stable, but they may require regular battery changes and can limit some advanced features. Review the thermostat’s wiring diagram and your HVAC control board to identify common terminals (R, C, W, Y, G, O/B). If your wires are aged or frayed, consider upgrading the harness or consulting a pro before proceeding. Understanding these power dynamics helps you select a model that won’t drain batteries prematurely or cause unstable readings in the app.
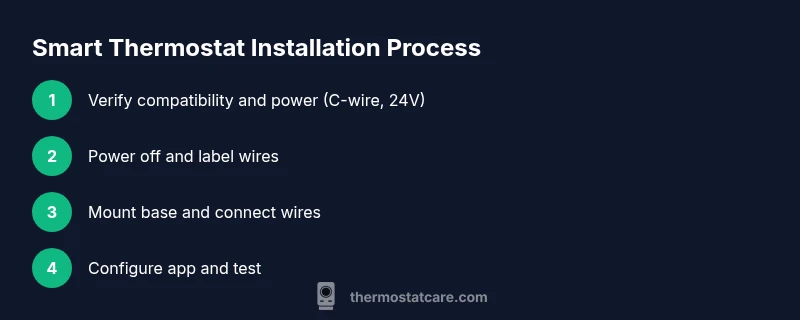
Step-by-step overview: what the installer will do (high-level)
When you’re comfortable with compatibility and power, you’ll follow a tested installation flow. The steps typically include turning off power, removing the old unit, labeling wires, mounting the new base, connecting wires to the correct terminals, attaching the thermostat body, and finally powering the system to run a configuration wizard. A well-documented setup reduces the odds of miswiring, helps you verify safety, and speeds up the calibration. If your system uses multiple stages, zone controls, or heat pumps, you may encounter additional connections that require careful attention. In all cases, rely on the manufacturer’s wiring diagram and the app’s guided prompts to align hardware with software.
What happens after installation: setup, app pairing, and calibration
After you mount and wire the thermostat, power the system back on and follow the setup wizard on the device and its companion app. You’ll confirm wiring accuracy, select climate zones, and configure preferred temperature schedules. The app will often guide you through connecting to Wi‑Fi, enabling remote control, and integrating with voice assistants. Take time to calibrate temperature readings and test basic functions (cooling, heating, fan) to verify proper operation. A quick check of energy-saving settings, adaptive recovery, and geofencing options can help you tune comfort and efficiency from day one.
Lastly, read any on-screen tips and update firmware if prompted. Regular updates from the thermostat maker can add compatibility with new devices and routines, so a quick check after a week is a good habit.
Troubleshooting common installation challenges
Even with careful preparation, you may encounter snags during installation. Common issues include a non-responsive touchscreen after wiring, Wi‑Fi connection failures, or inaccurate temperature readings. Start by rechecking wire connections against the diagram, ensuring the power is fully restored, and retrying the setup wizard. If a C-wire is absent, consider a compatible alternative or a power-extender kit. For heat-pump systems, verify O/B reversing-valve wiring and corresponding app settings. Always document any unusual sounds, tripped breakers, or inconsistent readings and consult the thermostat’s support resources when in doubt. Thermostat Care emphasizes patience and deliberate checks to minimize the risk of damage or unreliable performance.
Tools & Materials
- Screwdriver set (Phillips #2 and flathead)(Most thermostat plates use small Philips screws; keep a magnetic bit holder handy)
- Voltage tester(Confirm the circuit is completely off before touching wires)
- Wire labels or masking tape(Label each wire as you disconnect to prevent mix-ups)
- Multimeter (optional)(Useful for verifying voltage and ensuring safe wiring if you’re unsure)
- Compatibility guide from the thermostat manufacturer(Check model-specific wiring diagrams and compatibility notes)
Steps
Estimated time: 45-90 minutes
- 1
Power down at the breaker
Locate the HVAC circuit and switch it off. Use a voltage tester on the thermostat wires to confirm there is no voltage before touching anything.
Tip: Power isolation is the single most effective safety measure during any thermostat wiring task. - 2
Remove old thermostat and document wiring
Carefully detach the old unit and take a photo of the wiring from multiple angles. Label each wire with its terminal letter to avoid confusion later.
Tip: A labeled wiring map saves time and reduces rework if something looks different on the new device. - 3
Mount the new base plate
Install the mounting plate level on the wall using the provided screws. Ensure the plate is firmly secured before wiring.
Tip: Use a small spirit level to guarantee the plate isn’t tilted, which can affect sensor readings. - 4
Connect wires to the correct terminals
Refer to the thermostat’s wiring diagram and transfer each labeled wire to its corresponding terminal (R, C, W, Y, G, O/B). Avoid forcing wires into terminals.
Tip: If you’re unsure about a wire, pause and double-check against the diagram; forcing wires can cause damage. - 5
Attach the thermostat housing and restore power
Snap the thermostat onto the base and re-energize the circuit at the breaker. Confirm the device powers up and enters setup mode.
Tip: If the screen remains blank, re-check connections and allow the system a minute to boot. - 6
Run the setup wizard and connect to Wi‑Fi
Follow the on-screen prompts to connect to your home network and link the thermostat to the manufacturer app. Confirm regional settings and time zone.
Tip: Keep your phone’s Bluetooth and Wi‑Fi enabled during pairing for a smoother connection. - 7
Test HVAC functions and finalize calibration
Run a quick test of heating and cooling and adjust schedules. Calibrate temperature readings if the app provides a calibration option.
Tip: Set a conservative temperature schedule for the first day and adjust gradually based on comfort.
Questions & Answers
Do I always need a C-wire to install a smart thermostat?
Not always. Some models can operate with power stealing or batteries, but many benefits require a C-wire for consistent power. Check your thermostat’s documentation and your HVAC wiring before buying.
Most homes benefit from having a C-wire, but some models work without it using power-stealing technology. Verify your wiring first.
Can I install a smart thermostat myself or should I hire a professional?
If you’re comfortable with basic wiring and follow a manufacturer’s guide, you can install it yourself. Complex systems (multi-stage heat pumps, multiple zones, or unfamiliar wiring) are better handled by a licensed technician.
You can do it yourself if you’re comfortable with wiring. For complex systems, consider hiring a pro.
How long does installation typically take?
Most standard installs take about 30 to 90 minutes, depending on wiring complexity and whether you need a new C-wire.
Usually between 30 and 90 minutes, with longer times for complicated wiring.
Will my existing wiring limit features like geofencing or scheduling?
Wiring constraints can limit power or sensor features. A missing C-wire or inconsistent voltage can affect advanced features; verify compatibility before purchase.
Yes, wiring can affect features like geofencing if power is insufficient or unstable.
What if my HVAC is a heat pump or uses zone controls?
Heat pumps and zone-controlled systems often require careful wiring and sometimes a supplemental kit. Follow the model’s wiring guide and consider professional help for highest reliability.
Heat pumps and zones often need special wiring; follow the guide and don’t hesitate to seek pro help if needed.
What should I do if the thermostat won’t connect to Wi‑Fi after installation?
Double-check your network credentials, confirm the thermostat is within range, and ensure the latest firmware is installed. Reboot both router and thermostat if needed.
If Wi‑Fi won’t connect, check credentials, range, and firmware; reboot devices and retry.
How often should I update the thermostat’s software?
Update whenever a new version is available to improve compatibility, security, and energy savings.
Update when available to stay current with features and security.
Watch Video
What to Remember
- Verify HVAC compatibility before purchasing.
- Prepare the right tools and label wires clearly.
- Always power down and test before wiring.
- Follow the manufacturer’s wiring diagram precisely.
- Test and calibrate after installation for reliable readings.