How to Replace an Air Conditioner Thermostat: DIY Guide
A comprehensive, step-by-step guide for homeowners on replacing an air conditioner thermostat. Learn compatibility checks, safety, tooling, wiring basics, and testing to ensure reliable cooling and energy efficiency.

This guide helps homeowners replace an aging or malfunctioning air conditioner thermostat. You’ll learn how to verify compatibility, pick a suitable model, gather the right tools, and perform a safe, step-by-step installation. After replacement, you’ll test heating and cooling, adjust settings, and confirm reliable temperature control. Expect about 45-75 minutes with careful, safety‑minded work.
Why Replacing Your Thermostat Matters
Old or inaccurate thermostats can waste energy and cause uneven cooling. Replacing with a modern thermostat improves temperature control and can unlock energy-saving features. According to Thermostat Care, a well-chosen thermostat can save homeowners 5-15% on cooling costs depending on climate and usage. Before you begin, recognize that compatibility with your HVAC system matters more than feature-set. If your current thermostat is not communicating reliably with your furnace or air conditioner, or if it uses old batteries or wires, it is a strong sign that replacement is beneficial. In this guide, we will cover how to select a compatible model, how to safely perform the swap, and how to test the system after installation. You’ll learn about key factors such as wiring types, power supply, and whether a smart thermostat is worth the investment for your home.
Compatibility and Selecting a Replacement Thermostat
Choosing the right thermostat starts with your HVAC system type and power source. Most homes use 24-volt control boards, so you’ll typically be selecting a 24V thermostat. If your current unit is battery-powered, it may still rely on a C-wire for reliability; many newer models require a common wire for consistent power. Thermostat Care notes that single-stage systems are the simplest to pair with standard thermostats, while multi-stage and heat-pump setups demand models capable of handling more complex controls. Check the compatibility list from the manufacturer, and confirm whether a wiring diagram on the old unit matches the new one. Also verify that the thermostat supports your cooling equipment, and whether Wi‑Fi connectivity, smart features, or energy dashboards are truly beneficial in your home.
Understanding Thermostat Types and Features
Thermostats come in several flavors: non-programmable, programmable, and smart Wi‑Fi models. Non-programmable units are inexpensive and straightforward but offer limited efficiency gains. Programmable thermostats provide scheduling that can reduce energy use during absences, while smart thermostats connect to apps, learn routines, and offer remote control. For homes with simple cooling needs, a programmable model often delivers the best balance of cost and energy savings. If you live in a home with variable occupancy or desire remote access, a smart thermostat can add convenience and potential energy savings. Regardless of type, ensure the thermostat’s wiring terminals align with your system labels: R, C, W, Y, G, and any heat pump-specific terminals.
Safety First: Power Down and Handling
Never start the swap with power on. Turn off power at the main service panel and at the thermostat if possible. Use a non-contact voltage tester to confirm there is no live current before touching wires. Wear safety glasses if you’re working in tight spaces or near exposed metal. If you’re unsure about any step, pause and consult a professional. Safety should always come first when dealing with electrical components inside walls.
Preparing for Installation: Check Wiring and Batteries
Before removing anything, take a clear photo of the existing wiring and terminal labels. This reference will help you map wires to the new thermostat accurately. If your old thermostat used a C-wire, confirm the conductor is present and is in good condition. If the C-wire is missing, you may need to install one or choose a thermostat that supports power stealing, alternative power methods, or a battery-powered option temporarily. Inspect wires for signs of damage or corrosion, trim frayed ends, and have spare wire nuts or wire caps ready for secure connections.
Tools, Materials, and Workspace Setup
Set up a clean, well‑lit workspace near the thermostat. Lay out tools in a logical order so you don’t search for parts mid‑swap. A compatible thermostat, a screwdriver set, wire cutters/strippers, a non-contact tester, electrical tape, and wire nuts are typically sufficient. If your system uses a heat pump, be prepared for additional terminals. Having a partner can help with labeling wires and holding the plate while you mount the new base. Thermostat Care recommends reviewing the installation manual for your specific model and confirming you have the necessary C-wire or alternative power options before you start.
Wiring Labels and Terminal Mapping: How to Avoid Mistakes
Wiring labels are your best friend during a replacement. Before disconnecting old wires, label each conductor with its terminal letter (R, C, W, Y, G, O/B, etc.). Remove the wires one by one while noting their terminal position. Use masking tape and a marker to secure labels on the corresponding wires. When connecting to the new thermostat, align each wire with the same terminal labeled on the device. If the new unit uses different labeling, refer to the wiring diagram in the manual and map old labels to the new terminals precisely.
Common Mistakes and How to Avoid Them
Rushing the swap can lead to miswiring, which may damage the thermostat or HVAC control board. Avoid mixing up wires, leaving exposed conductors, or skipping the C-wire if required by your new model. Do not force connectors into terminals; ensure a clean, secure connection. Double-check that the mounting plate is level and that the thermostat sits flush against the wall to prevent future loose connections. After installation, keep a record of the final wiring map for future troubleshooting or upgrades.
Authority Sources and Further Reading
For additional guidance, consult credible sources that cover thermostat installation and energy efficiency:
- Energy.gov: Thermostats and energy savings (general guidance)
- Energy Star: Heating and cooling thermostats
- NIST or university extension resources on safe electrical work and wiring practices Thermostat Care also offers practical troubleshooting tips based on real-world installation experiences to help homeowners avoid common pitfalls.
Authority and Post-Install Testing
After installation, run through a quick test to ensure basic operation: set the thermostat to cooling and heating, observe the thermostat display, and listen for the HVAC system responding to commands. If the system doesn’t respond, re-check wire connections, verify power supply, and ensure the device is configured for your system type. If you encounter persistent issues, consult the thermostat’s troubleshooting guide or contact a professional technician.
Tools & Materials
- Thermostat replacement unit (compatible model with your HVAC system)(Ensure compatibility with your system type (single-stage/multi-stage, heat pump vs conventional) and power needs (C-wire if required).)
- Screwdriver set (Phillips #1, #2 and flathead)(For mounting plate screws and terminals.)
- Wire cutter/stripper(Use to trim insulation and prep wires for connections.)
- Non-contact voltage tester(Verify no live voltage before handling wires.)
- Electrical tape(Insulate exposed conductors and secure wires neatly.)
- Wire nuts/wire caps(Secure splices and insulate connections.)
- Optional multimeter(Helpful for verifying voltage and continuity if needed.)
- Level and mounting hardware(Ensure the faceplate sits flush and straight.)
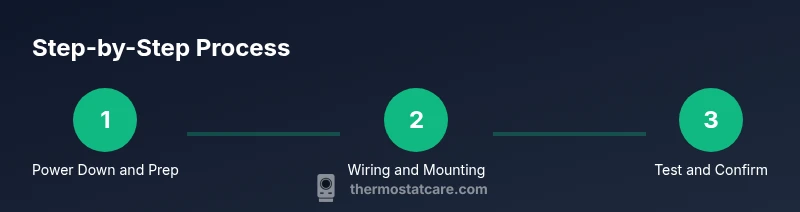
Steps
Estimated time: 45-75 minutes
- 1
Power down and verify compatibility
Turn off power at the main breaker and, if possible, at the thermostat. Confirm the new model is compatible with your system type and wiring configuration by reviewing the label markings and the installation manual.
Tip: Use a non-contact voltage tester to ensure there is no live current before touching any wires. - 2
Remove the old thermostat
Carefully unscrew the mounting screws and pull the thermostat from the wall. Gently detach the wires, keeping them in place for reference, or label them if you prefer to re-attach directly.
Tip: Take a clear photo of the wiring at the old thermostat for mapping to the new unit. - 3
Label and disconnect wires
Label each wire with its terminal letter (R, C, W, Y, G, O/B, etc.), then disconnect from the old device. Double-check labels before removing to avoid miswiring on the new thermostat.
Tip: Use masking tape and a permanent marker for durable labels. - 4
Mount the new thermostat base
Attach the new thermostat’s mounting plate to the wall using the provided screws. Use a level to ensure the plate is straight before tightening fully.
Tip: If you’re repairing a hollow wall, use proper wall anchors to prevent loosening over time. - 5
Connect wires to the new terminals
Insert each wire into the corresponding terminal on the new thermostat as per the labeling and the device’s wiring diagram. Ensure each connection is secure without any exposed conductor.
Tip: If your new thermostat requires a C-wire but you don’t have one, consider running a new conductor or using a power‑sharing compatible model. - 6
Power on and initial configuration
Restore power at the breaker and follow the thermostat’s setup prompts. Select your system type (forced air, heat pump, etc.), and configure basic settings such as fan control and temperature units.
Tip: If Wi‑Fi setup is desired, connect to your network during initial configuration for remote access. - 7
Test cooling and heating cycles
Set the thermostat to cool and then heat, watching the HVAC respond and listening for the blower. Confirm that the setpoint changes are reflected on the display and that air starts moving promptly.
Tip: Allow 5-10 minutes for the system to respond after each change; check for consistent temperature changes at the vents. - 8
Finalize and tidy up
Secure any loose wires, tidy the wall area, and replace the faceplate. Keep the old thermostat’s documentation and the new manual in a safe place for future troubleshooting.
Tip: Document any unusual behavior and save the wiring map for future reference.
Questions & Answers
Do I need a professional HVAC technician to replace a thermostat?
Most standard replacements can be done by a confident homeowner, especially when the system is a simple 24V single-stage setup. Complex configurations such as multi-stage heat pumps or unusual wire colors may warrant professional help.
If you have a simple 24‑volt system, you can likely replace it yourself. For multi-stage or heat pump setups, consider consulting a professional.
Will replacing the thermostat affect my HVAC warranty?
Many manufacturers allow homeowner installation for standard thermostats, but always check your equipment warranty terms. Improper installation can void certain warranty protections.
Check the warranty terms for your equipment; improper installation can affect coverage.
What tools do I absolutely need for the swap?
You’ll typically need a screwdriver set, wire cutters/strippers, a non‑contact voltage tester, electrical tape, and the new thermostat. A multimeter is optional but helpful for more detailed checks.
Essential tools are a screwdriver, cutters, tester, tape, and the new thermostat.
How do I tell if my thermostat is compatible with my HVAC system?
Review the new thermostat’s wiring diagram and compatibility list. Ensure it supports your system type (single‑stage vs multi‑stage, heat pump) and check if a C‑wire is required or optional.
Read the compatibility list and match your system type to the thermostat’s capabilities.
Can I replace a non‑smart thermostat and keep my existing settings?
Yes, you can substitute a non‑smart model; you’ll lose remote control and learning features but gain straightforward control. Ensure the new unit covers the same terminals.
You can replace with a basic model; you’ll lose remote access but keep simple control.
What should I do if the new thermostat won’t power on after installation?
First, double‑check all wire connections and ensure the power is on at the breaker. Confirm the C‑wire or power source requirement for the new model. If issues persist, consult the manual or a technician.
Check wiring and power supply first, then the manual; seek help if needed.
Watch Video
What to Remember
- Confirm thermostat compatibility with your HVAC system.
- Power down, label wires, and map to the new terminals.
- Mount securely and verify heating and cooling after installation.
- Test both modes and adjust settings for energy savings.
- Document wiring and settings for future maintenance.