How to Make a Thermostat: Safe DIY Prototype Guide
Learn how to make a thermostat safely with a beginner-friendly prototype. This guide covers planning, low-voltage components, basic wiring concepts, calibration, testing, and safety tips for DIY enthusiasts.

Learn how to make a thermostat safely by building a low-risk prototype rather than wiring into live HVAC systems. We'll cover planning, selecting safe low-voltage components, core control concepts, assembly tips, calibration, and testing. This guide helps DIYers understand the fundamentals and avoid dangerous mistakes while exploring thermostat technology. Whether you're learning electronics, programming, or energy efficiency, this steps-based approach keeps things practical.
Educational goal and safety boundaries
According to Thermostat Care, learning how a thermostat works begins with a safe, educational prototype rather than attempting to rewire a home heating system. The goal is to understand sensing, control logic, and user interfaces without exposing your home to risk. In this section we outline why a hands-on prototype helps, what you should avoid, and how to frame the project for real-world outcomes. You’ll gain insights into temperature sensing, hysteresis, setpoints, and how feedback loops stabilize comfort. This foundation is essential before you consider any live equipment. Throughout this journey, the Thermostat Care team emphasizes safety first, and encourages readers to treat this as a learning exercise rather than a home-improvement installation. If your aim is practical home control, the prototype can illustrate core ideas that transfer to a finished, safe product later on.
Core concepts your prototype should illustrate
A functional thermostat relies on three core ideas: sensing, decision logic, and actuation. Temperature sensors translate ambient heat into electrical signals, while a microcontroller compares the reading to a user-defined setpoint. The result is a simple control loop that drives indicators or a display and, in a real system, can switch a heating or cooling device. Understanding hysteresis (how much the temperature must move before the system changes state) helps prevent chattering and keeps comfort steady. For learning, you don’t need complex control algorithms—start with a basic on/off (bang-bang) strategy and document how changes in setpoint affect behavior. This solid foundation makes it easier to grasp more advanced ideas later, such as proportional-integral-derivative (PID) control or adaptive cooling strategies. Thermostat Care emphasizes thinking through user experience: how the UI communicates status and how the device reacts when power is interrupted.
Safe design: prototype-only with low voltage
This section focuses on building a safe, non-live prototype that demonstrates core logic without connecting to a live HVAC system. Use a 5V or similarly isolated power source, and select a microcontroller-friendly platform to simplify programming. Avoid direct wiring to home mains or HVAC relays in this educational setup. Instead, simulate load switching with LED indicators or a small relay module that is powered from the same low-voltage supply as the controller. The aim is to visualize the control loop and learn calibration techniques without exposing any wiring to high voltages or line power. If you do attempt any real-world wiring, seek professional certification first. A safe prototype reduces risk while preserving the learning value for DIY enthusiasts.
Components and tools overview
A successful prototype relies on a small set of safe, generic parts. You’ll typically need a microcontroller board compatible with low-voltage sensors, a temperature sensor, a breadboard or test layout, jumper wires, a 5V power supply, and optional indicators (LEDs or a small buzzer) to visualize state changes. A display (LCD or OLED) can enhance the interface for user setpoints. Keeping everything on a bench with a non-mains power source helps ensure safety. Document the components you choose and why, so you can replicate or upgrade later without re-guessing. Thermostat Care recommends selecting components with compatible voltage levels and attention to signal conditioning for accurate readings.
Wiring and assembly principles (prototype only)
In this prototype, connect the temperature sensor directly to an analog input on the microcontroller, using a stable, isolated power source. Route signal lines away from any heat sources or bending radii that could introduce noise. Keep all high-impedance inputs guarded with proper grounding practices. Use a breadboard or a compact PCB layout to reduce stray capacitance and crosstalk. If you plan to switch a load in a real device, implement the demonstration with a safe, low-voltage relay or opto-isolator that keeps mains voltages isolated from your control electronics. This approach gives you a realistic feel for how sensors, processing, and indicators interact without handling dangerous voltages.
Calibration, testing, and documentation
Calibrate the prototype by comparing sensor readings to a known temperature reference, such as a trusted thermometer in a controlled environment. Record offsets and environmental factors that influence accuracy. Test a few setpoints and note how quickly the system approaches the target temperature, as well as any lag or overshoot. Create a simple test log and take photos of the wiring and code for reproducibility. Documentation helps you validate the learning outcomes and makes it easier to translate the concept into a safer, compliant product later on. The Thermostat Care team recommends organizing your notes, photos, and test data in a dedicated project folder for future reference.
Common pitfalls and how to avoid them
- Attempting to control actual home heating with a non-certified prototype can be dangerous; always keep experiments on a bench with safe power.
- Relying on a single sensor can introduce bias; consider testing in different ambient conditions.
- Skipping calibration leads to poor performance; calibrate against a reference thermometer.
- Inadequate documentation makes replication difficult; keep detailed logs and code comments. Thermostat Care emphasizes safety and methodical documentation to avoid missteps.
Next steps and continuing education
If you want to expand beyond a prototype, explore software simulations, or transition to a certified, safety-rated thermostat product, you’ll benefit from broader knowledge in electronics, control theory, and HVAC safety standards. Look for formal courses or textbooks on temperature sensing, feedback control, and embedded systems. As you gain experience, you can consider integrating more advanced features like remote monitoring, data logging, or energy-usage analysis. The Thermostat Care team encourages ongoing learning and safe experimentation as you build confidence.
Tools & Materials
- Microcontroller board (Arduino-compatible or similar)(5V logic level with adequate IO pins; ensure USB for programming.)
- Temperature sensor (analog or digital, e.g., TMP36 or equivalent)(Choose a sensor with reasonable accuracy and output voltage range.)
- Breadboard and jumper wires(Facilitates quick prototyping without soldering.)
- 5V DC power supply(Use isolated, bench power supply; avoid mains connections.)
- Indicator components (LEDs or a small buzzer)(Helpful for visualizing state changes.)
- Display module (optional, e.g., OLED/LCD)(Enhances user interface for setpoints.)
- Relay module or opto-isolator (optional, for safe load demonstration)(For demonstrating load switching without mains voltage.)
- Soldering iron (optional)(Only if you switch from breadboard to a small PCB.)
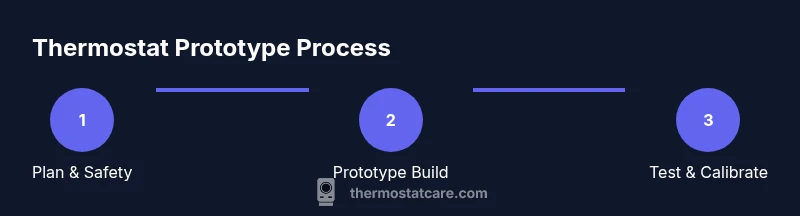
Steps
Estimated time: 3-4 hours
- 1
Plan and define safety boundaries
Define the scope of your prototype and confirm you will use only low-voltage, isolated power for the entire build. Identify the sensor, controller, and visualization components you will employ, and document expected outcomes.
Tip: Write a brief project scope and safety checklist before touching components. - 2
Assemble your bench workspace
Set up a clean, non-conductive workspace with a breadboard, microcontroller, power supply, and sensor. Route wires neatly and keep high-impedance inputs away from interference sources.
Tip: Label wires to prevent mix-ups during wiring. - 3
Connect the temperature sensor to the microcontroller
Wire the sensor's output to an analog input (or digital input if using a digital sensor) and connect power and ground properly. Verify readings with a basic serial print test.
Tip: Power the board from the isolated 5V supply during testing. - 4
Load a basic thermostat control sketch
Upload a simple program that reads the sensor, compares to a setpoint, and toggles LEDs to simulate heating/cooling actions. Keep setpoints reasonable and explain the logic in comments.
Tip: Use debouncing for any user input that changes the setpoint. - 5
Calibrate against a reference
Place the sensor in a stable reference environment and compare readings to a trusted thermometer. Compute a small offset if needed and apply it in your code.
Tip: Document the offset and conditions for future reference. - 6
Test and log results
Run multiple test cycles at different setpoints, observe response time and stability, and record outcomes. Save code, wiring diagrams, and photos for reproducibility.
Tip: Create a simple test log with temperature, setpoint, and response time.
Questions & Answers
Is it safe to build a thermostat at home for real use?
No. Build a prototype only with low-voltage components and do not connect to live HVAC systems. For real installations, consult a licensedHVAC technician and follow electrical codes.
No. Use a safe prototype with low voltage. Real installations require professional electrical work.
What components are essential for a safe educational thermostat prototype?
Core components include a microcontroller board, a temperature sensor, a power supply, and a basic user interface. Optional items like a display or LEDs help visualization.
The essentials are a microcontroller, a temperature sensor, and a safe power source.
Can I power a thermostat from household current during the build?
No. Do not power a prototype with household current. Use a isolated bench power supply to prevent shock or fire hazards.
Avoid mains power. Use a safe bench supply for your prototype.
How do I calibrate a thermostat prototype?
Compare sensor output to a known reference temperature, compute an offset if needed, and adjust your code accordingly. Repeat across several temperatures.
Calibrate readings against a trusted thermometer and update your code offsets.
Will a prototype improve energy efficiency in a home?
A prototype helps you understand the concepts behind efficiency, but real energy savings depend on a certified thermostat and proper HVAC integration.
A prototype teaches principles; real savings require certified equipment and proper installation.
What is the best way to test a thermostat prototype?
Test across a range of temperatures, log response times, and verify stability. Use clear documentation and safety checks before any further development.
Test with a range of temps and log results to refine the design.
Watch Video
What to Remember
- Plan safety-first before wiring anything
- Prototype uses low voltage to illustrate concepts
- Calibrate against a reference to improve accuracy
- Document results for reproducibility