How to Install a Smart Thermostat: A Homeowner's Guide
A comprehensive, step-by-step guide to installing a smart thermostat, covering compatibility checks, wiring, mounting, app setup, and optimization for energy savings.

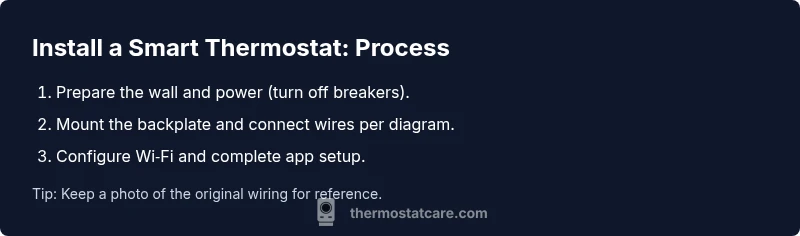
This how-to helps you install a smart thermostat from power-down to Wi‑Fi setup. You’ll verify compatibility, gather tools, and complete wiring and mounting steps with safety checks. The guide covers app configuration, testing, and optimization tips to ensure reliable performance. Expect to power down, confirm wiring, mount the unit, connect to your network, and fine-tune settings for comfort and savings.
Why upgrading to a smart thermostat matters
Upgrading to a smart thermostat isn’t just about a sleek display; it’s about smarter energy use, better home comfort, and easier scheduling. In this guide, you’ll learn what matters when selecting a model, how to verify compatibility with your HVAC system, and the practical steps to install it safely. According to Thermostat Care, the installation quality directly impacts energy savings and device reliability. Start by confirming your system type (conventional forced-air, heat pump, boiler, or multi‑stage) and whether the thermostat supports your HVAC equipment. For most homeowners, the best results come from a model with a C-wire, a clear wiring diagram, and a proven mobile app. This section introduces the key factors: compatibility, power needs, mounting options, and user experience. Keep your building’s electrical panel in mind, and never bypass safety steps to save a few minutes.
Wiring basics and compatibility you should check
Most smart thermostats use standard wiring colors, but labeling and a wiring diagram are essential. Confirm you have a C-wire or an available alternative power source for reliable operation. Check that your HVAC system supports features the thermostat requires, such as heat pump compatibility or multi‑stage heating/cooling. If you have a proprietary system or a boiler with specialty controls, verify compatibility with the specific thermostat model. Thermostat Care recommends compiling a short list of your current wires and noting any unusual colors or functions before you begin. This preparation reduces confusion during installation and prevents miswired connections that could damage equipment.
Tools, safety, and planning your install
Plan to work in a well-lit, dry area and turn off power to the thermostat circuit at the breaker panel. Gather essential tools: a screwdriver set (flathead and Phillips), a voltage tester, a level, wire labels or tape, and the new thermostat’s mounting plate and screws. If your wall is uneven, have shims and a drill with appropriate bits handy. Take photos of the existing wiring before you disconnect anything; they’ll be invaluable if you need to reference the original configuration. Safety first: never work with live wires uncovered, and avoid ground faulting or bypassing safety features.
Understanding common HVAC configurations and what to expect
HVAC wiring varies by system: conventional furnaces, heat pumps, and boilers each use different terminals. Common terminals include R (power), C (common), W (heat), Y (cool), and G (fan). Heat pumps may use O or B for reversing valves, and some systems require auxiliary or emergency heat (AUX/E). If you have a multi‑stage system, confirm how many stages your thermostat supports and map wires accordingly. When in doubt, consult the thermostat’s wiring diagram and your furnace/air handler manual. Thermostat Care notes that misinterpreting a terminal can lead to improper operation or damage, so take your time and label wires clearly before disconnecting them.
App setup and network considerations
Once wired, you’ll need to connect the thermostat to your home Wi‑Fi and install the manufacturer’s app. Many models require a 2.4 GHz network for best reliability, though some support 5 GHz with band steering. Have your Wi‑Fi password handy, along with the account you plan to use for the thermostat. During setup, the app will guide you through regions and preferences like temperature units, scheduling, and energy-saving modes. If your router uses MAC filtering, add the thermostat’s MAC address to the allow list. Keep the device near the router during initial setup to ensure a stable connection for software updates and feature syncing. Thermostat Care emphasizes completing the firmware update when prompted to maximize security and compatibility.
Common pitfalls and how to avoid them
Common issues include running into a non‑responsive display after power restoration, Wi‑Fi connection drops, and mismatched wiring colors. To avoid these, label each wire before removing and verify the wiring diagram with the new thermostat. Don’t skip the C‑wire check; some models can run on alternative power, but reliability may suffer. If you don’t have a C-wire, you can consider an adapter kit or a thermostat that supports power sharing, but verify compatibility first. Finally, never force-fit wires into wrong terminals; incorrect wiring can damage the thermostat or HVAC equipment. Thermostat Care recommends taking your time and testing each function in a controlled manner after installation.
What to do after installation and maintenance tips
After installation, run a full test: verify heating and cooling cycles, fan operation, and the thermostat’s responsiveness to app commands. Schedule a few temperature adjustments across day and night to ensure the system responds promptly. Regular maintenance includes keeping the vents unobstructed, updating firmware, and changing batteries (if applicable) on yearly reminders. Clean the screen and housing with a soft, dry cloth and avoid harsh chemicals. For energy optimization, experiment with schedules and adaptive recovery features to balance comfort with savings. Thermostat Care suggests reviewing energy reports in the app to fine‑tune settings over time.
Tools & Materials
- Smart thermostat(Ensure model supports your HVAC configuration (single/dual stage, heat pump, etc.).)
- Screwdriver set(Phillips #2 and flathead; needed for mounting plate and wall screws.)
- Voltage tester(Use to verify no live voltage on wires before handling.)
- Wire labels or masking tape(Label each wire as you disconnect to map back correctly.)
- Level and measuring tape(Ensure the mounting plate is straight and properly aligned.)
- Wall mounting hardware (screws/anchors)(Use appropriate anchors for drywall or studs; follow thermostat pack instructions.)
- Wi‑Fi network credentials(Needed during app setup for online features and updates.)
- Manuals for old and new thermostats(Helpful for color codes and specific wiring guidance.)
Steps
Estimated time: 60-90 minutes
- 1
Power down and safety verification
Turn off power to the thermostat circuit at the breaker panel and use a voltage tester to confirm no live voltage on the wiring. This prevents shocks and equipment damage during removal and wiring reassignment.
Tip: Double-check that the HVAC system isn’t energized when you begin. - 2
Remove old thermostat and document wiring
Carefully remove the faceplate and thermostat from the wall. Take clear photos of the wiring configuration and label each conductor. Note terminal names and wire colors to guide the new thermostat connections.
Tip: Label wires before detaching them so you don’t mix up functions later. - 3
Confirm C-wire availability or alternatives
Check whether a Common (C) wire is present. If not, consider an add‑a‑wire kit or a thermostat designed for power sharing. Ensure the chosen option is compatible with your HVAC system.
Tip: If you lack a C-wire, plan for a power‑sharing method rather than improvising wiring. - 4
Mount the new backplate and align
Attach the thermostat backplate to the wall using the provided screws; use a level to ensure straight alignment. This reduces cosmetic and functional issues after installation.
Tip: Use a stud finder or wall anchors for sturdier mounting in drywall. - 5
Connect wires to the new terminals
Reconnect labeled wires to the corresponding terminals on the new thermostat (R, C, W, Y, G, and any O/B for heat pumps). Double‑check that each wire is fully seated and secure.
Tip: Refer to the wiring diagram in the thermostat manual to avoid cross‑connections. - 6
Attach the thermostat and restore power
Attach the thermostat unit to the mounted backplate and restore power at the breaker. The device should power up and display a setup prompt or welcome screen.
Tip: If the screen remains dark, confirm all wires are connected and the power switch is on. - 7
Configure network and install the app
Follow the on‑screen prompts to connect to your Wi‑Fi network and create or sign in to the thermostat’s app. Allow firmware updates and enable essential permissions for remote control.
Tip: Prefer a 2.4 GHz network for stable connectivity if your router supports both bands. - 8
Run tests and calibrate
Test heating and cooling cycles, adjust setpoints, and ensure responsive changes via the app. Calibrate if the readings seem off from the actual room temperature.
Tip: Record your preferred schedules and enable energy‑saving modes for ongoing savings.
Questions & Answers
Do I need a C-wire to install a smart thermostat?
Most smart thermostats require a C-wire for reliable power. If your system lacks a C-wire, you may use a power‑sharing kit or a thermostat model that supports alternative power. Always verify compatibility with your HVAC and thermostat before proceeding.
Most smart thermostats need a C-wire, but if yours doesn’t have one, consider a power‑sharing option after checking compatibility.
Can I install a smart thermostat myself, or should I hire a pro?
Many standard setups can be installed by homeowners with basic tool skills and careful wiring. Complex systems with heat pumps, multi‑stage heating, or boilers may require professional installation to ensure safety and warranty validity.
DIY is possible for simple systems, but complex HVAC setups often benefit from a professional install.
Will a smart thermostat really save energy?
Smart thermostats enable scheduling, occupancy awareness, and remote adjustments that typically reduce energy usage. Savings depend on your settings, climate, and how consistently you use the device’s features.
Yes, with smart scheduling and adaptive features, you can see energy savings if you use it regularly.
What if my HVAC system uses a heat pump with an O/B valve?
Choose a thermostat that specifically supports O/B reversing valve control and confirm wiring compatibility. Incorrect wiring can affect heat pump operation, so follow the manufacturer’s wiring guide closely.
Ensure your thermostat supports O/B control for heat pumps to avoid performance issues.
What should I do if the thermostat won’t connect to Wi‑Fi?
Check that you’re using a 2.4 GHz network if required, verify your password, and ensure you’re within range of the router. Reboot the router and thermostat if needed, and update firmware if possible.
Make sure you’re on the right Wi‑Fi band and try a quick reboot, then update the device.
How do I maintain my smart thermostat after installation?
Keep the firmware up to date, check for app updates, and monitor energy reports to adjust schedules. Clean the unit with a dry cloth and replace batteries if applicable.
Update firmware, review energy reports, and perform periodic cleanings and maintenance.
Watch Video
What to Remember
- Verify compatibility and safety before starting
- Label and photograph existing wiring for accuracy
- Follow the wiring diagram precisely to avoid damage
- Connect to Wi-Fi and complete app setup for remote control
- Test, calibrate, and optimize for comfort and energy savings