How to Install an Easy Thermostat: A DIY Guide
A practical, DIY-friendly guide to installing an easy thermostat to improve comfort and energy efficiency. Follow our step-by-step approach for safe, reliable results.

This guide helps you achieve an easy thermostat to install safely in about 30–60 minutes with common tools. Start by confirming compatibility with your HVAC system, turn off power at the breaker, and gather essential materials. According to Thermostat Care, following these steps yields reliable, energy-saving results.
Why an Easy Thermostat to Install Matters
An easy thermostat to install is more than a convenience—it’s a practical upgrade that can improve home comfort, energy efficiency, and control over heating and cooling. For homeowners and DIY enthusiasts, a simple installation reduces downtime, lowers the risk of mistakes, and helps you feel confident about maintaining your system. Thermostat Care emphasizes that a well-chosen model with straightforward wiring and solid backing plate can be installed safely by most non-professionals when basic safety steps are followed. This section explains why ease of installation matters, how to set expectations, and what you gain when you choose a thermostat designed for simple wiring, clear diagrams, and a reliable mounting system.
Compatibility and System Compatibility: The Cornerstone of an Easy Install
Compatibility is the most important factor in making an install easy. A thermostat that matches your HVAC type—gas, electric, heat pump, or multi-stage—minimizes rewiring and the need for adapters. Look for a model with a 1:1 terminal mapping and a backplate that aligns with standard wall boxes. If your home uses a C-wire for power, confirm the thermostat supports it; if not, choose a model that works without a C-wire or consider a power-sharing solution. The right thermostat will display wiring diagrams clearly and offer quick-start guides that translate directly to your existing setup, reducing guesswork and the risk of miswiring.
Choosing the Right Thermostat for Your System: Features vs. Simplicity
When shopping for an easy install, prioritize models with clear wiring labels, a readable display, and a mounting plate that fits a standard wall box. Smart features like Wi-Fi and voice assistant support are great, but ensure you have reliable connectivity and a compatible HVAC interface before purchasing. A simple thermostat with a robust app, straightforward firmware updates, and helpful troubleshooting tips will save time and frustration during the install. Remember: the easiest option is often a model with a proven compatibility list for common single-zone systems and a straightforward backplate.
Tools and Prep: What You Need Before You Start
Preparation is the quiet winner of an easy install. Gather essential tools in advance so you aren’t scrambling mid-task. Typical items include a Phillips screwdriver, a flat-head screwdriver, a voltage tester, wire labels, and a level. Have the new thermostat and its mounting plate ready, plus a photo of your existing wiring for reference. If your system lacks a C-wire, confirm that your chosen model supports power-sharing or that you have a suitable adapter. Organizing tools and references beforehand reduces interruptions and helps you stay focused on the task.
A High-Level Overview of the Installation Process
While the exact steps vary by model, the general process is consistent: power down, remove the old unit, document existing wiring, mount the new backplate, reconnect wires by terminal labels, attach the display, and power up to test. Each step relies on careful labeling, clean connections, and confirming compatibility. This overview provides a mental map so you can anticipate what comes next and feel confident as you move through the process.
Safety First: Common-Sense Precautions
Safety should always come first in any DIY electrical task. Turn off power at the breaker before touching wiring, and verify there is no voltage with a tester. Avoid modifying wires or using improvised adapters. If any wire is damaged or corroded, or if you encounter unfamiliar wire colors, pause and consult the thermostat’s manual or contact a professional. Taking your time and double-checking connections minimizes the risk of shock or equipment damage.
After-Install Care: App Setup and Basic Configuration
After installation, set up the thermostat in the manufacturer’s app, if applicable, to enable remote control and scheduling. Verify date, time, and location settings, then create a basic schedule for heating and cooling. Update firmware if prompted to ensure the best performance and security. Regularly review energy data and adjust schedules to maximize savings while maintaining comfort.
Troubleshooting at a Glance: Quick Checks
If the display is blank or the unit does not respond, recheck the power supply and ensure the backplate is properly seated. Confirm all wire connections match the labels on the old system. If your thermostat requires a C-wire, verify it is correctly attached. When in doubt, revert to the photo you captured earlier and compare wiring against the manual diagram to catch any mismatches.
Final Thoughts: Confidence Through a Clear Plan
An easy thermostat to install empowers you to upgrade your home’s comfort with minimal risk and disruption. With careful preparation, correct compatibility checks, and precise wiring, most homeowners can complete the job on a weekend afternoon. By following a clear sequence, you enhance safety, maximize performance, and set up a future-ready control system for your home.
Next Steps: What to Do If You Get Stuck
If you encounter issues that you can’t resolve with the manual, don’t hesitate to seek help from the manufacturer’s support or a qualified technician. Document the steps you’ve taken and the symptoms you observed to speed up troubleshooting. Remember that Thermostat Care advocates starting with simpler models and building experience before attempting complex configurations.
Tools & Materials
- Phillips-head screwdriver(Medium-size #2 Phillips bit for most backplates and screws)
- Flat-head screwdriver(Useful for removing wall plates or trim)
- Voltage tester(Ensure no live voltage before wire handling)
- Wire labels or tape(Label wires by terminal letters (R, W, Y, G, C))
- Needle-nose pliers(Tidy small wires and press connectors)
- Level(Ensure the backplate sits flat on the wall)
- Screws and anchors(Use appropriate anchors for drywall)
- New thermostat with backplate(Make sure it matches your HVAC type)
- Wall mounting utilities(Optional spacer or drill bit if needed)
- Camera or phone for reference photo(Capture wiring before removal)
Steps
Estimated time: 30-60 minutes
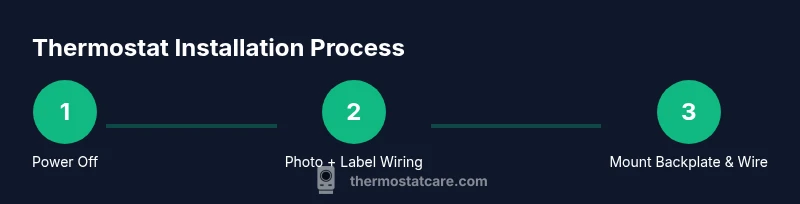
- 1
Turn off power and prep
Go to your circuit breaker panel and switch off the thermostat’s circuit. Double-check that the power is off using a voltage tester near the thermostat wiring. Gather all tools and prepare a clean workspace to prevent accidental wire contact.
Tip: Label the breaker or take a photo of the panel to avoid confusion later. - 2
Remove old thermostat and document wiring
Carefully remove the old thermostat faceplate and take a clear photo of which wire sits on each terminal. Use your labels to mark each wire by its terminal letter. If wires are stiff, gently loosen them with needle-nose pliers without pulling on them.
Tip: A photo will serve as your wiring map if you misplace a wire during transfer. - 3
Mount the backplate and prepare wires
Attach the new backplate to the wall using the correct screws and anchors, ensuring it is level. If the wires are short, carefully thread them through the wall plate opening. Split and align wires with the new thermostat’s terminal labels.
Tip: Use a level to ensure the backplate is perfectly straight for a clean look. - 4
Connect wires to the new unit
Insert each wire into the corresponding terminal on the new thermostat (R to R, W to W, Y to Y, G to G, C to C, etc.). Ensure connections are tight and there are no stray strands. If your system lacks a C-wire, use the model’s power-sharing option or adapter as directed by the manual.
Tip: Double-check the backplate labels against the thermostat wiring diagram before tightening screws. - 5
Attach display, restore power, and test
Attach the thermostat to the backplate, secure all screws, and reintroduce power at the breaker. Turn on the thermostat and perform a basic test by setting a heat or cool call. Verify that the HVAC responds and that the display reads correctly.
Tip: Run a quick system check for both heating and cooling calls if your system supports both.
Questions & Answers
What makes a thermostat easy to install?
An easy-to-install thermostat has a clear backplate, straightforward wiring, compatible HVAC support, and good labeling. It minimizes rewiring and doesn’t require extra adapters.
An easy thermostat is one with clear wiring, compatible HVAC support, and simple mounting so you can install it without costly modifications.
Do I need a C-wire for most thermostats?
Many thermostats require a C-wire for reliable power. If your system lacks a C-wire, choose a model that supports power-sharing or add an adapter designed for non-C-wire installations.
Most thermostats today need a C-wire for power, but some models can work without it using power-sharing or adapters.
How long does installation typically take?
For a standard single‑stage system, installation typically takes 30–60 minutes if you have the right tools and the listed compatibility.
Most installations take about half an hour to an hour for a straightforward setup.
What safety precautions should I follow?
Always switch off power at the breaker and verify no voltage before wiring. Avoid forcing wires or modifying HVAC components.
Turn off power at the breaker and be sure there’s no voltage before you touch any wires.
Can I install a thermostat without a professional?
Yes, many homeowners can install a basic thermostat themselves, provided they follow the manual and safety precautions. If you’re uncertain about wiring, consult the manufacturer or a technician.
Often you can install it yourself if you carefully follow the manual and stay within safety guidelines.
What if my HVAC is a heat pump with auxiliary heat?
Some models support heat pumps with auxiliary heat; check the thermostat’s compatibility list and wiring diagram for proper connections.
If you have a heat pump with auxiliary heat, verify compatibility and wiring before purchase.
Watch Video
What to Remember
- Identify compatibility before buying to ease installation
- Label wires and photograph wiring for a safe transfer
- Mount backplate level for reliable sensor readings
- Test heating and cooling after power restoration