DIY Thermostat Installation: A Complete Homeowner's Guide
A comprehensive step-by-step guide for homeowners and DIY enthusiasts to install a thermostat, covering compatibility, wiring basics, mounting, configuration, testing, and safety.

To complete a successful diy thermostat installation, follow compatibility checks, shut off power, remove the old unit, connect wires to the new base, mount the thermostat, configure settings, and test the heating and cooling cycle. This guide also covers safety tips, common wiring scenarios, and when it’s wiser to call a pro.
Why DIY thermostat installation matters for energy efficiency
DIY thermostat installation can deliver tangible energy savings and better comfort when done correctly. This guide explains why upgrading a thermostat matters, how to evaluate compatibility with your HVAC system, and how a proper installation reduces temperature swings and helps your home run efficiently. According to Thermostat Care, homeowners who install a modern thermostat correctly typically see improved control of heating and cooling cycles and more consistent indoor temperatures. The Thermostat Care team found that a well-executed installation often leads to better scheduling, adaptive cooling strategies, and fewer calls for service due to improper settings. You’ll learn how to assess your system type, select a compatible model, and plan the work so you stay safe and avoid common missteps. This foundation sets the stage for confident, hands-on learning and a smoother install experience.
Before you start: compatibility and planning
A successful diy thermostat installation begins with compatibility checks and planning. Start by identifying your HVAC system type (gas, oil, electric, or heat pump) and whether you have a single‑stage, multi‑stage, or heat-pump configuration. Check the current wiring (R, C, W, Y, G are common terminals) and verify that the new thermostat supports your wiring. If you have a C‑wire, confirm it’s present and accessible. If not, research options such as a power extender kit or a thermostat that can operate on batteries with your system’s power demands. Review the thermostat’s mounting requirements, backplate dimensions, and the existence of a C‑wire adapter if needed. Thermostat Care guidance emphasizes planning for wiring routing and wall orientation, ensuring you won’t face clearance or mounting issues after installation. Finally, confirm local electrical codes and safety practices before you begin. With planning complete, you’ll reduce surprises and speed up the actual swap.
Tools and safety prerequisites
Gather the necessary tools before you begin: a screwdriver set, a non‑contact voltage tester, a multimeter (optional but helpful for troubleshooting), wire labels or tape, and electrical tape for safe wiring. A mounting plate and the new thermostat should be included with your purchase, and a level can help you align the device straight on the wall. If your system uses a C‑wire, a power extender kit or C‑wire adapter may be required for some smart thermostats. Safety is paramount: always cut power at the breaker before touching wires, and never work on live circuits. A non‑contact tester helps you confirm there is no voltage in the wires you’ll handle. If you’re uncomfortable working with electrical components, consider hiring a licensed HVAC technician to supervise or perform the swap. This block is designed to ensure you have everything you need and know the safety guardrails before you touch any wiring.
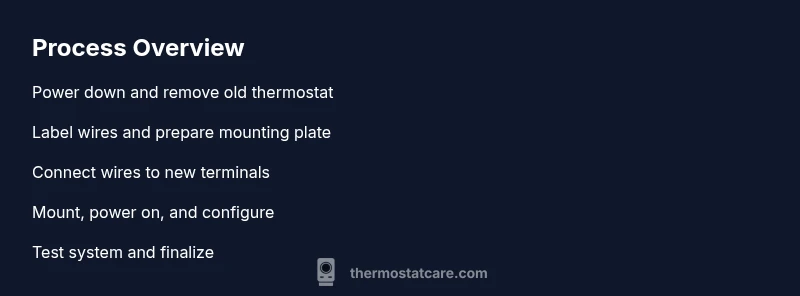
Step-by-step overview of the installation process
The installation workflow follows a straightforward sequence that keeps you organized and reduces the chance of mistakes. Start with power isolation, then safely remove the old thermostat, label each wire, check the system compatibility, mount the new base, connect wires to the correct terminals, attach the thermostat body, restore power, and complete initial configuration. This overview is a compass for the detailed steps that follow. It’s also helpful to keep a notepad or photos of the existing wiring so you can reference them if you forget which wire goes where. Thermostat Care emphasizes taking your time on the first few steps to ensure a clean, correct wiring map before you power back up. The goal is to avoid miswiring, which can damage the thermostat or HVAC equipment and complicate the setup process later.
Wiring basics: what each wire does
Most standard setups use a handful of wires, commonly labeled R (24V power), C (common), W (heat), Y (cool), and G (fan). Some systems, especially heat-pump configurations, may include O/B for reversing valve, and extra wires for multiple stages. The R and C wires power the thermostat itself, while W, Y, and G control the furnace/AC functions. Understanding these roles helps you connect correctly and prevents miswiring that could keep heating or cooling from functioning. If you’re converting an older, battery-powered thermostat to a smart model, confirm whether your new unit requires a C-wire or can use power from the HVAC circuit. Always consult the thermostat’s wiring diagram and the HVAC equipment’s terminal layout. Label every wire before you disconnect it, photograph connections, and cross‑check the terminal labels on the new device to ensure a precise mapping.
Mounting and wiring your thermostat
Attach the mounting plate to the wall, ensuring it sits level and aligned with the wall stud if possible. Feed the labeled wires through the backplate opening, then connect each wire to the matching terminal on the new thermostat base according to the wiring diagram. Tighten terminals securely but avoid over-tightening, which can damage the conductors. If you need a C‑wire and don’t have one, install a compatible adapter or run a new conductor from the furnace control board. Once the wires are connected, mount the thermostat to the backplate and confirm it is firmly attached. This step establishes a solid electrical and physical foundation for reliable operation and a clean, professional appearance.
Configuring settings and testing the system
Power the system back on and walk through the thermostat’s initial setup, including date and time, Wi‑Fi network, and preferred temperature units. Configure heating and cooling stages, fan control, and any dehumidification or energy-savings features your model supports. If you have a smart thermostat, connect it to the home network and install the companion app to finish installation, update firmware, and enable remote control. Run a short test to verify that heating and cooling respond to changes in settings, and listen for unusual sounds or airflow issues. Thermostat Care’s best practice is to test multiple scenarios (heat, cool, fan, and auto modes) and observe whether temperature changes align with the requested settings. If the system does not respond as expected, recheck wiring and app configurations before proceeding.
Common pitfalls and troubleshooting
Wiring mistakes are the most frequent culprits in failed installations. Double‑check that each wire is on the correct terminal and that there are no loose strands. If you find a warm or buzzing terminal, power off and reverify all connections. Some thermostats require a dedicated C‑wire; if yours lacks one, the device may not run reliably, and you might need a power extender kit. Incompatible HVAC configurations, such as a unit that supports only two wires, can also prevent a thermostat from functioning. Ensure you’ve chosen a thermostat that matches your system’s capabilities (life‑and‑safety critical systems require caution). If you still have issues after verifying wiring and settings, consult the manufacturer’s troubleshooting guide or contact an HVAC professional for a safety check. This is where many DIY attempts go wrong, so stay cautious and systematic.
When to call a pro and aftercare
Even capable DIYers should know when to seek professional help. If you’re unsure about wiring, if you encounter burning smells, buzzing sounds, or inconsistent furnace operation after the swap, stop and contact a licensed HVAC technician. For complex systems (multi‑stage heat pumps, zone controls, or unusual wiring schemes), a pro can verify compatibility, handle the wiring safely, and ensure proper control of the HVAC system. After installation, keep records, verify warranty coverage for the thermostat, and review energy savings regularly. The Thermostat Care team recommends documenting model, wiring configuration, and any adapters used to facilitate future upgrades or troubleshooting. Proper maintenance and periodic re‑calibration of the HVAC system will help maximize efficiency and comfort over time.
Tools & Materials
- Screwdriver set (Phillips and flathead)(Varies by thermostat model)
- Non-contact voltage tester(Confirm power is off before touching wires)
- Multimeter (optional but helpful)(Troubleshoot voltage and sensor readings)
- Wire labels or painter’s tape(Label each wire as you remove it)
- Electrical tape(Insulate exposed conductors)
- Level(Ensure the mounting plate is even)
- New thermostat with mounting plate(Check model compatibility with HVAC system)
- C-wire adapter or power extender kit (if needed)(For systems without a common wire)
Steps
Estimated time: 90-150 minutes
- 1
Power down the system
Locate the main electrical panel and switch off the circuit for the furnace and air handler. Use a non-contact tester to confirm there is no voltage on the wires you’ll touch. This is the foundational safety step before any wiring work begins.
Tip: Always double‑check with a tester before touching wires. - 2
Remove the old thermostat
Carefully remove the thermostat cover and mounting plate to expose the backplate wiring. If you see plaster or drywall damage, pause and repair before proceeding. Keep screws handy for a clean reinstallation.
Tip: Take a photo of the existing wiring before disconnecting anything. - 3
Label and document wire connections
As you detach wires, label each conductor with its terminal designation (R, C, W, Y, G, etc.). Document how wires were connected to the old unit to guide the new installation and prevent miswiring.
Tip: Match labels to the thermostat’s wiring diagram for accuracy. - 4
Check compatibility and note C-wire needs
Confirm the new thermostat supports your HVAC system type (gas, electric, heat pump) and wiring configuration. If you lack a C-wire, decide whether to use a power extender kit or a C-wire adapter before continuing.
Tip: If the new model requires a C-wire, plan for adding one or using an adapter. - 5
Attach the mounting plate to the wall
Secure the backplate to the wall, using a stud if possible for stability. Ensure it is level and aligned with the wall surface to avoid an uneven installation.
Tip: Use a level to confirm alignment before tightening screws. - 6
Connect wires to the new thermostat terminals
Insert each labeled wire into the matching terminal on the thermostat base. Tighten conductors firmly and avoid pinching or bending wires. Double‑check that no stray strands are touching adjacent terminals.
Tip: Follow the wiring diagram precisely; incorrect mapping is a common failure point. - 7
Mount the thermostat and secure the faceplate
Snap or screw the thermostat body onto the mounting plate, ensuring a snug fit and clean appearance. Confirm there are no gaps and the unit sits flush against the wall.
Tip: Avoid overtightening screws to prevent mounting plate stress. - 8
Restore power and begin initial configuration
Turn the circuit back on and enter the thermostat’s setup menu. Configure date/time, location, units, and any network or app integration required by the model.
Tip: Skip advanced features until you confirm basic operation. - 9
Test heating and cooling functions
Run a quick test cycle for heat and for cool to confirm responsiveness. Check fan operation and verify that setpoints produce the expected room temperature changes.
Tip: Listen for unusual noises or airflow issues during testing. - 10
Finalize and review wiring
Review all connections one final time, tidy wiring with cable management, and ensure the thermostat sits securely. Record model details and any adapters used for future reference.
Tip: Keep a simple wiring diagram for future maintenance.
Questions & Answers
Is it safe to install a thermostat myself?
DIY thermostat installation can be safe if you follow proper shut-off procedures, verify voltage, and avoid live wires. If you have a complex system or multi-stage heat, seek pro help.
DIY thermostat installation is safe when you shut off power and follow steps carefully; for complex setups, get professional assistance.
What wiring do I need to check before buying a new thermostat?
Identify if you have standard wiring (R, C, W, Y, G) or additional wires for heat pump or multi-stage systems. Choose a thermostat that supports your wiring configuration.
Check your existing wires: common is R, C, W, Y, G; verify compatibility with your new device.
Do I need a C-wire adapter?
If your current system lacks a common wire, a C-wire adapter or power extender kit can help power a smart thermostat. Check compatibility with your model.
Some homes lack a C-wire; adaptors are available but verify compatibility with your thermostat.
Can I install a thermostat on any wall?
Most thermostats mount on standard interior walls with enough clearance. Avoid metal or water-prone areas, and ensure the wall has a stud or backing.
Most walls work, but avoid damp or extreme heat areas.
What if the thermostat shows a blank screen after installation?
First check power and wiring connections; if still blank, re-check the C-wire or consult the manufacturer’s troubleshooting guide.
If the screen remains blank, double-check power and wire connections.
When should I call a pro?
If you are unsure about wiring, notice buzzing, burnt smell, or improper furnace operation after installation, stop and contact a licensed HVAC technician.
If unsure or you smell burning, contact a pro.
Watch Video
What to Remember
- Safety first: power off before touching wires
- Label and verify wires to match terminals
- Test the system after wiring to confirm operation
- If you lack a C-wire or face multi-stage setup, consider pro help