DIY Guide: Thermostat to Radiator Hose Troubleshooting
Learn how to diagnose and fix issues along the thermostat to radiator hose path in your vehicle. This comprehensive guide covers symptoms, safe prep, step-by-step checks, and preventive maintenance with practical tips from Thermostat Care.

This guide helps you inspect and diagnose problems along the thermostat to radiator hose path in your vehicle. You’ll learn common signs of trouble, how to safely drain and refill coolant, and a step-by-step approach you can perform with basic tools. Following these steps can prevent overheating and costly repairs, with guidance from Thermostat Care.
Understanding the thermostat to radiator hose pathway
In most passenger vehicles, the cooling system channels coolant from the engine through the thermostat housing and into the radiator via the upper radiator hose. The thermostat acts as a valve, opening and closing to regulate flow based on temperature. When the thermostat to radiator hose path leaks, or when the hose itself is worn or clogged, you’ll see symptoms like overheating, steam, or coolant on the ground. Understanding this pathway helps you quickly identify where a problem stems from, whether it’s a hose clamp slipping, a cracked hose, or a stuck thermostat. According to Thermostat Care, neglecting proper cooling system diagnosis can lead to higher engine temperatures and potential head gasket damage, so address issues promptly and methodically.
Symptoms That Point to Hose or Thermostat Problems
Common indicators include rising engine temperatures under load, coolant puddles near hose connections, rubber hoses that feel unusually soft or hardened, and a radiator cap that doesn’t hold pressure. If you notice a sweet or burnt smell, or hear a gurgling sound when the engine warms, inspect the thermostat to radiator hose path for leaks or restricted flow. A slow leak from the thermostat housing or a swollen hose is a red flag. Early detection helps you avoid more expensive fixes later.
Safety and Preparation Before You Begin
Working on the cooling system requires care. Park on level ground, engage the parking brake, and ensure the engine is cool before starting. Wear gloves and eye protection, and have a drain pan ready for any coolant that escapes. Keep children and pets away, and work in a well-ventilated area. If your vehicle is modern and has a pressurized system, you must wait longer for the system to depressurize before opening any caps. This readiness reduces the risk of burns and spills and keeps the thermostat to radiator hose pathway safe to inspect.
Common Causes and How They manifest
Leaking hoses, loose clamps, cracked thermostat housings, and worn gaskets frequently cause issues along the thermostat to radiator hose path. Heat cycling can degrade hose material, causing bulges or cracks that leak coolant. Corrosion in the thermostat housing or debris in the cooling passages can restrict flow, leading to overheating. Understanding these causes helps you decide whether you should replace a hose, gasket, or the thermostat itself, rather than attempting a quick, temporary fix that won’t last.
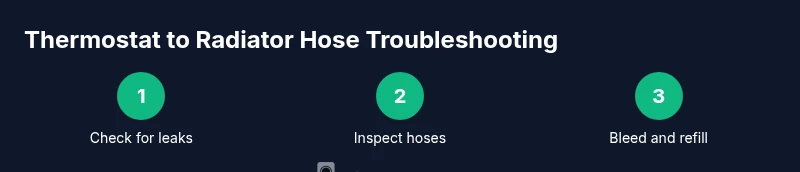
Diagnostic Checklist You Can Do
Begin with a visual inspection for cracks, bulges, or loose clamps at the hose connections. Check the thermostat housing for corrosion and ensure the gasket sits flush. Look for coolant staining or dried residue around the housing. If you have access to a pressure tester, a slow leak under pressure confirms a hose or gasket failure. Remember to verify that the radiator cap seals properly and that the coolant is at the correct level.
Inspecting Hoses and Thermostat Housing Connections
Carefully inspect each hose for soft spots, cracks, or hardening. Run your fingers along the hose length while the engine is cool to detect stiffness or brittleness. Tighten clamps only to the manufacturer's torque specification; overtightening can damage clamps or hose ends. Inspect the thermostat housing for cracks or warping and ensure the mounting bolts are snug. Replace any compromised components to prevent recurrent issues.
Replacement Options and When to Choose Them
If the hose shows signs of wear, replace the affected segment or the entire hose set. If the thermostat is slow to open, sticks shut, or if the temperature reading is inconsistent, consider replacing the thermostat. In many cases, replacing both the thermostat and worn hoses at the same time provides a longer-term solution and helps restore consistent cooling performance.
Bleeding, Refilling, and Initial Test
After replacement, you’ll need to bleed air from the cooling system to avoid air pockets that can cause overheating. Refill with the correct coolant type and follow the manufacturer guidance for the proper mix. Start the engine with the heater on high and watch the temperature gauge as the system reaches operating temperature. Check for leaks around hose clamps and the thermostat housing, and top up coolant as needed.
Preventive Maintenance and Pro Tips
Schedule regular inspections of hoses and clamps, particularly after service or replacement. Use quality clamps and coolant to prevent future leaks. Keeping the cooling system clean and free of debris helps the thermostat to radiator hose pathway function reliably. By following these practices, you minimize the risk of overheating and protect the engine.
Tools & Materials
- Fully equipped tool set (sockets, wrenches, screwdrivers)(Include sizes that fit your vehicle’s hose clamps and thermostat bolts)
- Drain pan(Catch coolant safely without spills)
- Coolant (vehicle-specific)(Use the correct type and mix as per manual)
- Funnel and clean rags(For refilling and cleanup)
- Replacement thermostat (if needed)(Opt for OEM or high-quality aftermarket)
- Replacement radiator hose(s) and clamps(Only if hoses show wear)
- Safety glasses and gloves(Protect from hot coolant and sharp edges)
- Torque wrench (optional)(Use if your vehicle requires a specific clamp torque)
- Vehicle service manual or guide(Helpful for exact specs and torque)
- Flashlight or work light(Inspect tight spaces and hose paths)
Steps
Estimated time: 45-60 minutes
- 1
Park and prep safely
Park on level ground, engage parking brake, and ensure the engine is completely cool before starting. Gather tools and safety gear so you can work confidently without rushing.
Tip: Avoid working on a hot engine to prevent burns. - 2
Locate thermostat housing and hoses
Open the hood and identify the thermostat housing and the radiator hoses connected to it. Trace the path from the engine to the radiator to understand the thermostat to radiator hose layout before you begin.
Tip: Take a quick photo to reference during reassembly. - 3
Relieve any residual pressure safely
If your system has a pressure cap, wait until the engine is cool before carefully opening it to relieve residual pressure. Do not rush this step to avoid coolant spray.
Tip: Wear eye protection when opening any cap. - 4
Drain coolant below hose connections
Place the drain pan under the drain valve or lower hose clamp, and drain coolant until it is well below the thermostat housing level. This prevents spills when hoses are removed.
Tip: Use a rag to catch any drips and prevent splashing. - 5
Remove clamps and detach hoses
Loosen hose clamps and carefully detach the upper and lower hoses from the thermostat housing. Note how hoses and clamps are oriented for reassembly.
Tip: Keep track of small clamps so they don’t fall into the engine bay. - 6
Inspect thermostat and hoses
Examine the thermostat for sticking or corrosion and inspect hoses for cracks, bulges, and soft spots. Replace any worn parts as needed.
Tip: Check the gasket condition if you remove the housing. - 7
Install replacements and reseal
Install a new thermostat and/or hose, reinstall the housing, and torque bolts to manufacturer specs. Reattach hoses and clamps securely.
Tip: Avoid overtightening clamps to prevent hose damage. - 8
Refill coolant and bleed air
Pour coolant through the reservoir using a funnel, then bleed air by running the engine with the heater on and the cap off until the gauge stabilizes.
Tip: Top up coolant gradually to remove air pockets. - 9
Test, monitor, and finalize
Take a short drive to bring the engine to operating temperature and verify there are no leaks. Recheck levels and top off if needed.
Tip: Keep an eye on temperature gauge and coolant level for the first coolant cycle.
Questions & Answers
What are common signs of a failure in the thermostat to radiator hose path?
Overheating or fluctuating temperature readings, coolant leaks near hose connections, and visible wear on hoses or the thermostat housing indicate problems along the thermostat to radiator hose path.
Look for overheating, leaks near hoses, and worn hoses as clues that the thermostat to radiator hose path needs attention.
Can I drive with a leaking radiator hose?
Driving with a leaking hose is risky. It can lead to rapid coolant loss and engine overheating, which may cause severe damage.
No, avoid driving long distances if you notice a leak. Get it checked promptly.
Should I replace the thermostat when I replace a hose?
If the thermostat shows signs of sticking or improper opening, replace it. Replacing both often restores reliable cooling performance.
If the thermostat is suspect, replacing it along with hoses is a wise move.
How do I bleed air from the cooling system after refilling?
Run the engine with the heater on high, remove the radiator cap when cool, and top off coolant as air escapes. Repeat until the level stabilizes and the gauge reads normal.
Bleed the system by running the engine with heat on and topping off coolant as air is purged.
Is this repair safe for a beginner DIYer?
Yes, with careful steps, the right safety gear, and following the vehicle manual. If you’re unsure, seek professional help.
It’s doable for beginners if you follow safety steps and consult your manual.
How long does a typical thermostat to radiator hose repair take?
Time varies by vehicle and accessibility, but plan for a focused session that could take a few hours to complete safely.
It can take a few hours depending on your car and access to parts.
Watch Video
What to Remember
- Inspect the thermostat to radiator hose path for leaks and wear
- Bleed air after refilling to prevent overheating
- Replace worn hoses and faulty thermostat rather than patching
- Verify all connections are tight and clean before testing
- Document the process and monitor performance after the repair