Bad Thermostat on Car: Troubleshooting Guide
Urgent troubleshooting guide for a bad thermostat on car. Learn symptoms, a safe diagnostic flow, and replacement steps to prevent overheating and heater failure.

A bad thermostat is a common cause of overheating and poor cabin heat in cars. Start by checking thermostat operation, coolant flow, and radiator fan function. If symptoms persist, replace the thermostat and bleed the cooling system. This quick check helps you decide whether DIY steps are feasible or you should seek professional help.
What a bad thermostat on car looks like
When diagnosing a bad thermostat on car, you’ll notice a cluster of symptoms that point away from the engine itself and toward the cooling system. The engine may overheat after a long drive or under heavy load, and the temperature gauge can swing unpredictably between hot and cool readings. In many cases, the heater may blow warm air inconsistently or not at all, especially after the engine reaches operating temperature. A thermostat that fails open can cause the engine to run cooler than normal, prolonging warm-up and affecting fuel economy. Conversely, a thermostat that sticks closed can trap hot coolant, leading to rapid overheating and potential head-gasket damage. This section lays out the practical signs to look for so you can act quickly and safely. Remember: your safety and engine integrity depend on catching thermostat issues early, not after a catastrophic failure.
How to spot a bad thermostat on car: key indicators include overheating after driving, erratic temperature gauge readings, weak cabin heat, and a heater that won’t warm up consistently. If you notice coolant leaks near the thermostat housing, bubbling in the coolant, or a sudden loss of coolant, these could also relate to thermostat problems. By recognizing these patterns, you can prioritize inspection and plan your next steps with confidence. Thermostat failures are more common in vehicles with older cooling systems or contaminated coolant. For DIYers, starting with the thermostat housing and coolant flow is a sensible approach, but never ignore safety warnings when working around hot engine components. Thermostat Care’s guidance emphasizes a calm, methodical process to avoid misdiagnosis and costly mistakes.
Common causes and why they matter
A car’s thermostat can fail for several reasons, all of which affect coolant flow and engine temperature. The most frequent culprit is a thermostat that sticks either open or closed. A stuck-open valve never reaches full operating temperature, causing the engine to run cool, increasing wear and reducing heater effectiveness. A stuck-closed valve blocks coolant flow, triggering overheating and potential damage. Deposits, rust, and contaminants can seize the valve, while a worn spring or improper thermostat installation can also cause failure. Leaks at the gasket or housing can mimic thermostat issues by causing pressure loss and air pockets in the cooling system. Electrical sensors and wiring that monitor temperature can also produce misleading readings if faulty. Understanding these causes helps you diagnose accurately and plan a safe repair workflow.
Safe, non-invasive checks you can perform at home
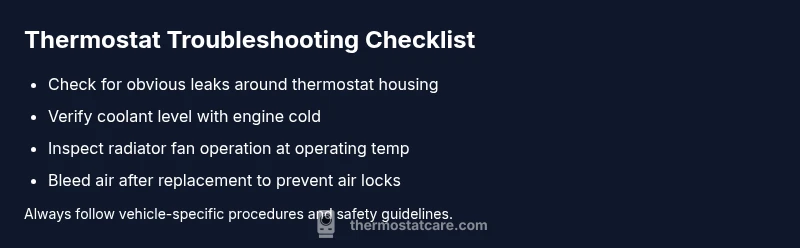
Before you touch the cooling system, ensure the engine is cool and parked on a level surface. Check the coolant level in the reservoir when the engine is cold; low coolant can cause overheating regardless of the thermostat’s condition. Visually inspect for obvious leaks around hoses, radiator, and the thermostat housing. If you have access to a service manual, verify that the radiator cap and coolant type are correct for your vehicle. Do not open a hot radiator cap; hot coolant can cause severe burns. You can also check the fan operation by turning the ignition on and observing whether the radiator cooling fan engages when the engine warms up. These basic checks can help you decide whether a DIY thermostat replacement is warranted or if professional service is needed — a point Thermostat Care emphasizes for safety and accuracy.
Diagnostic flow: a practical approach to symptoms
When you observe overheating, start by validating whether the thermostat is the root cause or a symptom of a broader issue. Compare engine temperature behavior with coolant level, air in the system, and radiator function. If the gauge behaves normally at startup but climbs during drive, suspect improper thermostat operation or a flow restriction. If overheating happens immediately after starting the engine, check for a stuck-closed thermostat or air pockets in the cooling system. If the heater produces lukewarm air, investigate thermostat opening behavior and coolant flow through the heater core. The goal is a clean, repeatable process: observe, test, confirm, then repair. Thermostat Care’s method prioritizes a safe, logical sequence to minimize risk and ensure a correct fix.
Step-by-step overview to fix most common causes
This section provides a high-level plan to address a stuck-open or stuck-closed thermostat. Start by safely reducing engine heat and gathering the right tools. Confirm the thermostat type matches your vehicle’s spec, drain a portion of the coolant if required, and remove the thermostat housing to inspect the valve. If you find a stuck valve or dirty deposits, plan for a replacement with a new gasket and proper coolant. Refill the cooling system, purge air, and verify that the thermostat opens at the intended temperature. Finally, run the engine to operating temperature, monitor the gauge, and check for leaks. The goal is a stable operating temperature with a warm cabin and no leaks, verified by a test drive.
Safety, cautions, and when to seek help
Working around the cooling system involves burns, chemical exposure, and pressure risks. Always let the engine cool before touching the radiator or thermostat area. Wear eye protection and gloves, and dispose of old coolant properly. Do not mix old and new coolant types; use the correct specification for your vehicle. If you observe persistent overheating, coolant leaks, or a loss of coolant after attempting a fix, stop and contact a professional. Thermostat Repair can involve precise torque on the thermostat housing and correct coolant bleed. When in doubt, the Thermostat Care team recommends professional service to avoid engine damage and ensure the long-term health of your cooling system.
Prevention tips to extend thermostat life
Regular coolant maintenance is your best defense against thermostat problems. Schedule periodic coolant flushes with the correct type, monitor coolant quality, and replace aging hoses that can contribute to air leaks and flow restrictions. Use a thermostat with the correct rating for your engine, and avoid cheap aftermarket parts that don’t meet original specifications. Keep an eye on temperature gauges and heater performance as early warning signs. By following these practices, you reduce the chances of thermostat failure and keep your car running smoothly.
How a bad thermostat interacts with other cooling components
A failed thermostat does not act alone; it disrupts the entire cooling loop. When a thermostat sticks closed, the engine can overheat, pushing coolant pressure higher and stressing the water pump, radiator, and hoses. A thermostat that sticks open delays reaching optimal operating temperature, leading to increased fuel consumption and emissions, and may allow contaminants to accumulate in the radiator. A comprehensive approach considers the radiator core, heater core, water pump weep, and cap integrity. Understanding these interactions helps you prioritize diagnostic steps and avoid treating symptoms (like low heat or occasional overheat) without addressing the root cause.
Quick home diagnostic reference
If you’re solving a bad thermostat on car, keep this quick reference in mind: overheating with steady temperature rise suggests a stuck-closed valve; persistent cool readings with slow warm-up suggest a stuck-open valve; inconsistent heater performance points to thermostat issues or air in the cooling system. Always verify coolant levels, check for leaks, and inspect the thermostat housing gasket. Use the diagnostic flow to determine whether to DIY or hire a pro. Thermostat Care emphasizes careful, safe diagnosis and replacement to restore reliable cooling and heating performance.
When to call a professional
If you cannot pinpoint a thermostat issue after basic checks, or if you observe persistent overheating, coolant leaks, contamination, or engine warning lights, it’s time to seek professional help. A certified mechanic can perform pressure tests, purge air properly, and ensure the correct thermostat specification and coolant type for your vehicle. Professional service reduces the risk of engine damage and saves time when a proper bleed and refill are required. Thermostat Care’s guidance is clear: when in doubt, escalate to a trained technician to protect your engine and ensure a safe, reliable repair.
Steps
Estimated time: 60-120 minutes
- 1
Prepare and safety check
Park on a level surface and let the engine cool completely. Gather tools (socket set, screwdrivers, coolant, new thermostat, gasket) and wear protective gear. Disconnect the negative battery terminal if you plan to work near electrical components. Confirm you have the correct replacement thermostat for the engine and coolant system.
Tip: Keep a spill tray handy and work slowly to avoid splashing hot coolant. - 2
Access the thermostat housing
Locate the thermostat housing, typically on the end of the engine block or near the radiator, and remove any covers or hoses blocking access. Take photos before disconnecting hoses to aid reassembly. If hoses resist removal, apply gentle heat or loosen with penetrating oil along the fittings.
Tip: Lay out parts in order to ensure correct reassembly and avoid misplacing small gaskets. - 3
Remove the old thermostat
Carefully unbolt the housing and lift out the old thermostat. Inspect the gasket and sealing surfaces for wear or damage. Clean the mating surfaces thoroughly to ensure a proper seal for the new thermostat.
Tip: Check the thermostat's orientation; many have a specific tab or marking indicating correct open direction. - 4
Install the new thermostat
Install the new thermostat with the correct orientation and fit a new gasket or seal. Reattach the thermostat housing and tighten to the manufacturer’s torque specification. Reconnect any hoses and ensure all clamps are secure.
Tip: Do not overtighten; overtightening can crack the housing or gasket. - 5
Bleed and refill coolant
Refill the cooling system with the proper coolant type for your vehicle. Bleed the air from the system according to your manual, which may involve a bleed valve or running the engine with the radiator cap off (but only when cool). Monitor the level as air escapes and top up as needed.
Tip: Use a funnel and have a clear plan to purge air pockets; air can prevent proper cooling and cause overheating. - 6
Check for leaks and perform a test drive
Start the engine and let it reach operating temperature while observing for leaks. Take a short test drive and monitor the temperature gauge, heater performance, and any abnormal sounds. Recheck for leaks and top off coolant if needed after the engine cools.
Tip: If the temperature remains high or the heater stays cold, stop and recheck the thermostat installation and bleed procedure. - 7
Final safety check and documentation
Secure all tools, recheck clamps and hoses, and dispose of old coolant properly. Note the parts used, mileage, and any symptoms observed for future maintenance. If uncertainties remain, schedule a follow-up inspection with a professional.
Tip: Keep a small maintenance log to track thermostat replacements and cooling system work.
Diagnosis: Engine overheating, erratic temperature gauge, or inconsistent cabin heat
Possible Causes
- highStuck open thermostat causing slow warm-up and cool engine running
- highStuck closed thermostat causing rapid overheating
- mediumAir trapped in cooling system after a leak or coolant fill
- mediumLow coolant level leading to air pockets and overheating
- lowFaulty coolant temperature sensor or wiring giving wrong readings
Fixes
- easyTest thermostat operation at the housing; replace if stuck open or closed
- mediumReplace the thermostat with the correct part and reseal housing; refill and bleed coolant
- mediumInspect cooling system for leaks, repair or replace hoses, cap, and radiator if needed
- easyRepair or replace faulty temperature sensor and wiring if reading is incorrect
- hardPressure test system to locate leaks and verify cooling system integrity
Questions & Answers
What are the signs of a bad thermostat on car?
Common signs include engine overheating, erratic temperature gauge readings, weak cabin heat, and heater failure. If you notice coolant leaks near the thermostat housing, this can also indicate a problem. Always verify symptoms with safe inspections.
Key signs are overheating, erratic gauge, and poor heater performance. If you see leaks near the housing, inspect the thermostat area.
Can a bad thermostat cause engine damage?
Yes. A stuck-closed thermostat can cause engine overheating, leading to head gasket failure and warped components. A stuck-open thermostat can cause excessive wear due to running cooler than design. Both scenarios risk long-term damage if ignored.
Overheating from a stuck-closed thermostat can seriously damage the engine; don’t ignore persistent heat.
Should I drive with a bad thermostat?
If you suspect a thermostat issue, limit driving and seek professional assessment. Driving with overheating symptoms can cause severe damage. Short, careful drives may be tolerated only to reach a safe location or shop.
Avoid driving long distances if your gauge shows overheating. Get it checked soon.
DIY thermostat replacement feasible?
DIY replacement is possible for some vehicles with basic tools and mechanical know-how. However, it requires proper cooling system bleeding and torque specs. If uncertain, consult a guide or hire a professional to avoid leaks or misassembly.
DIY replacement can be doable, but follow the manual and don’t rush the bleed step.
How long does replacement take?
Thermostat replacement typically ranges from an hour to a couple of hours, depending on the vehicle and accessibility. Set aside sufficient time and plan for coolant bleed and leak checks.
It usually takes about an hour or two, depending on access.
What tools are needed for replacement?
Basic hand tools, a thermostat kit with gasket, coolant compatible with your vehicle, and a bleed tool or procedure. Always follow the manufacturer torque specs and safety precautions.
You’ll need wrenches, screwdrivers, a new thermostat with gasket, coolant, and a bleed tool.
Watch Video
What to Remember
- Inspect thermostat signs early to prevent overheating.
- Follow a safe diagnostic flow before replacing parts.
- Replace the thermostat with proper torque and bleed air thoroughly.
- Regular coolant maintenance reduces thermostat failures.
- Know when to seek professional help to protect your engine.