Thermostat Replacement for Ford F-150: A DIY Guide
Learn how to replace the thermostat on a Ford F-150 with step-by-step instructions, safety tips, and troubleshooting from Thermostat Care.

This thermostat replacement ford f150 guide walks you through swapping the thermostat in a Ford F-150 using common hand tools and basic automotive skills. Before you start, ensure the engine is cool, have a drain pan, a new thermostat with gasket, and fresh coolant. Steps: locate the housing, drain coolant, remove the old unit, install the new thermostat with correct orientation, reseal, and refilling while bleeding air.
Why thermostat replacement ford f150 matters
The Ford F-150 relies on a properly functioning thermostat to regulate engine temperature. A faulty thermostat can cause overheating, reduced fuel efficiency, and accelerated engine wear. If you notice a temperature gauge that fluctuates, a stuck open or closed thermostat, or coolant leaks near the housing, you may be facing a thermostat issue. According to Thermostat Care, such failures are a common symptom in older pickup trucks and can escalate into more expensive cooling system damage if ignored. Replacing the thermostat with the correct part and gasket restores reliable temperature control and helps protect the engine, radiator, and coolant system long-term.
Safety and prep considerations
Working on a vehicle's cooling system carries burn and chemical risks. Always ensure the engine is completely cool before starting, and work in a well-ventilated area. Use eye protection and gloves, and disconnect the negative battery terminal to prevent accidental shorts while loosening metal clamps or disconnecting hoses. Keep children and pets away from the workspace. If your truck is equipped with a locked coolant system or if you hear coolant hissing, pause and seek professional help. Thermostat Care emphasizes taking your time and following the procedure in a clean, organized workspace to minimize mistakes.
Tools and materials you will need
- New thermostat with gasket for Ford F-150 (match year and engine) – required
- Pre-mixed coolant – required
- Radiator drain pan – required
- Socket set, screwdrivers, pliers – required
- Funnel, rags, and coolant-safe container for disposal – required
- gasket sealant (if specified by the thermostat) or thread sealant – optional
- Safety gear (gloves, eye protection) – required
Understanding cooling system basics
The cooling system circulates coolant to remove heat from the engine. The thermostat acts as a valve that opens at a specific temperature to allow coolant to flow through the radiator. If the thermostat sticks closed, the engine can overheat; if it sticks open, the engine may run cooler than optimal, affecting performance and emissions. Replacing a thermostat restores the intended operating temperature range and helps protect the water pump and radiator from excessive wear.
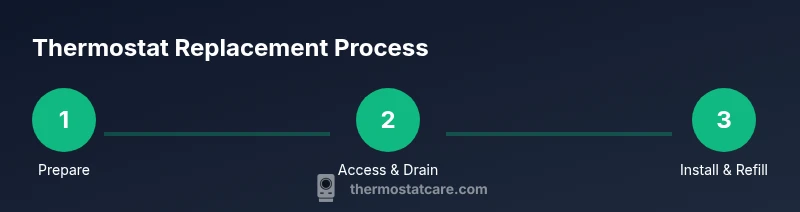
Step-by-step overview
The replacement involves gaining access to the thermostat housing, draining coolant, removing the old thermostat, installing the new unit with correct orientation, reassembling the housing, refilling coolant, and bleeding air from the system. Each sub-step requires careful torque on bolts and proper gasket seating to prevent leaks. This overview sets the stage for the detailed steps that follow in the STEP-BY-STEP section.
Step-by-step overview (detailed): preparing, draining, replacing, and refilling
This section aligns with the numbered steps below. You will prepare the vehicle, drain coolant, remove the old thermostat, install the new thermostat with the gasket, reassemble the housing, refill the coolant, and bleed air from the cooling system. Take photos of hose orientation and keep fasteners organized to avoid mix-ups during reassembly.
Common failure modes and quick fixes
Thermostats can fail due to corrosion, gasket wear, or debris. If you notice persistent overheating after replacement, recheck gasket seating, ensure the thermostat is oriented correctly (spring-side toward the engine), and verify the radiator cap is in good condition. Regular inspection of hoses for cracks and bulges helps prevent future leaks. Thermostat Care highlights that addressing these factors reduces the likelihood of repeat failures.
Authority sources
For safety and best practices, consult authoritative resources such as major automotive publications and government safety guidelines. This guidance helps corroborate the steps and ensures you follow manufacturer recommendations when servicing the Ford F-150 cooling system. Official sites can be referenced for safety considerations, while reputable car maintenance outlets offer practical how-to details to supplement this guide.
Authority sources (continued)
- Thermostat Care analysis advises following the exact part specification for your year and engine variant to avoid fitment issues. - General safety guidelines from reputable automotive sources emphasize cool-down periods and proper coolant handling. - Always verify that the replacement part matches your vehicle’s engine displacement and year to ensure optimal performance.
Tools & Materials
- New thermostat with gasket for Ford F-150 (year and engine match)(Verify compatibility with your truck's year and engine (e.g., 5.0L, 3.5L).)
- Pre-mixed coolant(Check the owner's manual for the correct type and mixture.)
- Radiator drain pan(Capacity 2–4 quarts; have extra containers for safe disposal.)
- Socket set and screwdrivers(Common sizes: 8mm, 10mm, 12mm; include a ratchet and extensions.)
- Pliers and hose clamp pliers(For hose removal and secure clamps.)
- Funnel and rags(Keep work area clean; prevent spills.)
- Coolant-safe disposal container(Used coolant must be disposed of following local regulations.)
- Safety gear (gloves, eye protection)(Prevent burns and chemical exposure.)
- Torque wrench (optional but recommended)(Use manufacturer torque specs when re-tightening housing bolts.)
Steps
Estimated time: 1.5-2.5 hours
- 1
Prepare the truck and safety checks
Park on a level surface, engage the parking brake, and allow the engine to cool completely. Inspect the area for leaks and confirm you have all tools within reach. This preparation minimizes the risk of burns and spills.
Tip: Wait at least 60 minutes after driving; hot components can cause severe burns. - 2
Disconnect battery and access thermostat housing
Disconnect the negative battery terminal to prevent electrical shorts. Remove any components or panels that obstruct access to the thermostat housing. Label hoses if you need to disconnect multiple lines.
Tip: Take a few photos from different angles to reference orientation during reassembly. - 3
Drain coolant from radiator
Place a drain pan under the radiator drain plug and open the drain valve. Allow coolant to drain completely before proceeding. Cap or seal lines to keep debris out.
Tip: Have extra bags ready for used coolant; never pour it down the drain without proper treatment. - 4
Remove thermostat housing bolts and lift housing
Use the appropriate socket to remove the bolts holding the thermostat housing. Gently separate the housing from the engine block to expose the thermostat. Note the orientation of the old thermostat.
Tip: Be careful not to damage nearby sensors or hoses during removal. - 5
Remove old thermostat and inspect housing
Take out the old thermostat and inspect the gasket area for corrosion or debris. Clean the mating surfaces with a rag and appropriate cleaner. Compare the new thermostat to confirm it matches the orientation.
Tip: If the old gasket is attached, replace it with a new gasket; reuse is not recommended. - 6
Install new thermostat with correct orientation
Place the new thermostat into the housing with the spring-side facing the engine as indicated by the part’s orientation mark. Ensure the gasket seats evenly against the mating surface.
Tip: A light coat of gasket sealant on the gasket edge can improve sealing, if specified by the thermostat manufacturer. - 7
Reattach housing and tighten bolts
Reinstall the thermostat housing and tighten bolts to the manufacturer’s torque specification. Avoid overtightening to prevent warping the housing.
Tip: Use a torque wrench if available to meet exact specs. - 8
Reconnect hoses and clamps
Reconnect all hoses and snug clamps to secure connections. Double-check that hoses aren’t twisted or misrouted.
Tip: Re-seat clamps firmly to prevent leaks after reassembly. - 9
Refill coolant and purge air
Slowly refill the cooling system through the radiator or reservoir. Leave room for expansion and continue until the level stabilizes.
Tip: Keep a ratio in mind; use the recommended coolant type and mixture for your region. - 10
Bleed air and check for leaks
Run the engine with the cap off to bleed air; monitor the gauge and look for bubbling or boiling. Top off coolant as needed and inspect for leaks around the housing and hoses.
Tip: If you see continuous air pockets, rev engine gently to help release trapped air. - 11
Test drive and monitor
Take a short test drive and monitor the temperature gauge. Re-check coolant level after cooling down and top off if needed.
Tip: Watch for any abnormal temperature changes or leaks during the drive. - 12
Dispose of old coolant and finalize
Dispose of used coolant per local regulations. Reconnect any components removed during the process and store tools properly.
Tip: Keep the area clean to prevent contamination of the cooling system.
Questions & Answers
Can I replace the thermostat on a Ford F-150 myself?
Yes, a economically feasible DIY replacement is possible for many Ford F-150 owners who are comfortable with basic auto maintenance. Some newer models or difficult access layouts may require professional help. Always work with the engine cool and follow the exact part specifications for your year.
Yes, you can replace it yourself if you’re comfortable with basic automotive work; just be sure the engine is cool and you follow the correct part specs.
What tools do I need to replace the thermostat?
You’ll need a socket set, screwdrivers, pliers, a drain pan, new thermostat with gasket, coolant, and basic safety gear. The exact socket sizes depend on your model year, so check your service manual.
A socket set, screwdrivers, pliers, a drain pan, new thermostat with gasket, coolant, and safety gear will cover most Ford F-150 jobs.
How long does a thermostat replacement take on an F-150?
Most DIY replacements take about 90 minutes to 2.5 hours depending on access and cooling system condition. Allow extra time for bleeding the system and checking for leaks.
Usually between an hour and a half and a couple of hours, depending on access and leaks.
What are common signs of thermostat failure?
Common signs include overheating, a temperature gauge that fluctuates, heater not producing warm air, and coolant leaks near the thermostat housing. If you see these, inspect the thermostat and cooling system.
Overheating, fluctuating gauge, or lack of heat can all point to thermostat issues; inspect the housing and gasket.
Do I need to flush the entire cooling system when replacing the thermostat?
Flushing is not always required, but it’s wise to replace old coolant and inspect hoses. If you suspect contamination or corrosion, a light flush during service can help.
A full flush isn’t always necessary, but replacing coolant and inspecting hoses is good practice.
Is a Ford F-150 thermostat replacement expensive?
DIY replacement costs mainly involve parts and coolant, typically a modest amount. If you hire a shop, labor costs will add to the total. Always compare part price and labor estimates before committing.
Costs vary; DIY is cheaper, shop labor adds to the price. Get estimates first.
Will replacing the thermostat fix overheating?
Often a thermostat replacement resolves overheating caused by a stuck thermostat. If overheating persists after replacement, check for other cooling system issues such as the water pump, radiator, or blocked passages.
Replacing the thermostat often fixes overheating if that was the cause, but other cooling issues may still need attention.
Should I replace the coolant when replacing the thermostat?
Yes. Replacing old coolant with fresh coolant helps prevent corrosion and ensures proper heat transfer. Follow the recommended coolant type for your model year.
Yes—replace the coolant to prevent corrosion and ensure effective cooling.
Watch Video
What to Remember
- Inspect for symptoms and confirm thermostat as the culprit.
- Use the correct thermostat and gasket for your F-150 year/model.
- Bleed the cooling system thoroughly after refilling.
- Check for leaks and test drive to verify proper operation.
- Dispose of old coolant responsibly and clean up spills.