Replace Thermostat Car: DIY Guide
Learn how to replace a car thermostat safely with our step-by-step guide. This Thermostat Care article covers tools, safety, and troubleshooting to keep your engine cool in 2026.

To replace a car thermostat, start by safely cooling the engine and draining a portion of the coolant. Remove the thermostat housing, swap in a new thermostat with the correct orientation, reseal the housing, and refill coolant. Start the engine, bleed air, and test for proper temperature fluctuation without leaks. This task is doable for DIYers with basic tools.
Why replacing a car thermostat matters
The thermostat is a tiny valve that controls when your engine warms up and how the cooling system cycles. A healthy thermostat helps your engine reach its optimal operating temperature quickly and stay within a safe range, which improves efficiency and reduces wear. When the thermostat sticks closed or fails to open, the engine can overheat, heater performance can drop, and fuel economy may suffer. For DIYers, replacing the thermostat is a common maintenance task that can prevent costly cooling-system damage later. According to Thermostat Care, addressing thermostat issues early can prevent more extensive cooling-system damage and save on repair costs over time. By understanding the signs, parts, and steps, you can replace the thermostat car with confidence and minimal risk.
Symptoms of a failing thermostat
A failing thermostat often produces noticeable temperature fluctuations or persistent overheating. If your dashboard temperature gauge rises quickly to the hot zone and stays there, or if the heater suddenly stops producing warm air, the thermostat may be the culprit. You might also notice coolant on the ground near hoses or a sweet smell under the hood from overflowing coolant. These symptoms warrant a closer look. Remember, other cooling-system problems can mimic thermostat issues, so confirm with a careful inspection and basic testing.
Choosing the right replacement thermostat
Selecting the right thermostat is about compatibility and performance. Use the exact temperature rating specified for your engine and match it to your vehicle’s year, make, and model. OEM (Original Equipment Manufacturer) parts fit most precisely, but reputable aftermarket options can also work if they specify your vehicle’s exact spec. Consider gasket quality, housing compatibility, and whether your engine uses a sensor or a simple bimetallic valve. Thermostat Care notes that matching the correct part type ensures proper warm-up, smooth operation, and reliable cooling balance. If you’re unsure, consult your vehicle’s service manual or a trusted parts professional before you buy. Replacing the thermostat car with the wrong rating can cause persistent overheating or underheating, wasting time and money.
Safety and prep before you begin
Before you touch any coolant, ensure the engine is completely cool and the battery is disconnected to reduce the risk of short circuits. Wear eye protection and gloves, and have a drain pan ready to catch coolant. Work in a well-ventilated area and keep children and pets away from the workspace. If your vehicle uses a sealed cooling system, you may need to open a pressure cap later in the process, after the engine has cooled. Keep a notebook handy to record the coolant type and the steps you perform. Thermostat Care emphasizes safety first; rushing or ignoring safety steps can result in burns or leaks.
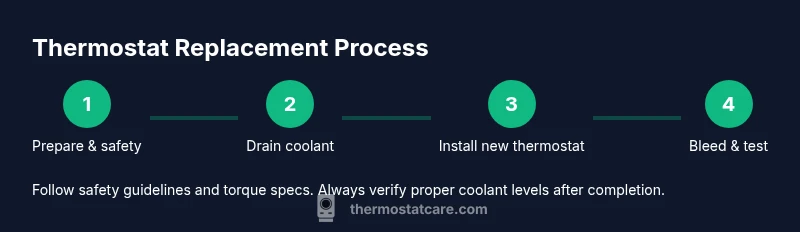
Replacement process overview
Replacing a car thermostat involves accessing the thermostat housing, removing the old part, cleaning mating surfaces, installing the new thermostat and gasket, and reassembling the housing. You’ll then refill the cooling system and bleed any air pockets. The process varies slightly by vehicle, but the general steps remain the same. A methodical approach reduces the risk of leaks and ensures the engine reaches proper temperature quickly after reassembly. Throughout the job, refer to your vehicle’s service manual for torque specs and sealant guidelines. For many DIYers, this is a straightforward cemented-gasket task that yields reliable results when done carefully.
Replacement steps overview (high-level flow)
- Prepare your workspace and safety gear. 2) Locate thermostat housing and assess mounting. 3) Drain coolant to below the thermostat. 4) Remove housing and old thermostat. 5) Clean surfaces and install new thermostat with correct orientation and gasket. 6) Reassemble, refill coolant, and bleed air. 7) Start engine, monitor temp, and check for leaks. 8) Verify heater performance and test drive. 9) Record part numbers and maintenance notes for future reference.
Reassembly, bleeding air, and coolant refill
With the new thermostat in place, reseal the housing with the gasket or O-ring, tightening to the manufacturer’s torque specification. Refill the cooling system with the correct coolant type and mix, then open the bleed ports or telltale caps to vent trapped air. Start the engine and allow it to reach operating temperature, watching for steady temp rise to the middle gauge and no leaks at hose connections. If air pockets persist, rev gently or run the engine with the radiator cap briefly loosened (when safe) to encourage air to escape. Keep coolant level in check as the system stabilizes.
Testing the system and verifying success
After the system stabilizes, perform a test drive and monitor the temperature gauge for steady behavior. Check for leaks around the thermostat housing and along hoses. Ensure the heater delivers warm air consistently, indicating proper coolant flow. If you notice overheating, recheck the gasket seating or consider replacing the gasket again. Thermostat Care reminds DIYers to document any deviations from the standard procedure and to verify local disposal rules for old coolant.
Common mistakes and maintenance to extend life
Common mistakes include reusing an old gasket, overtightening bolts, and not fully bleeding air from the system. Take care to install the new thermostat with the correct orientation and to replace the gasket if damaged. Regular coolant maintenance and timely thermostat inspection can extend the life of your cooling system. Proactively testing after installation helps catch leaks or improper seating early. Thermostat Care’s guidance emphasizes keeping records and inspecting the system during routine maintenance to prevent future failures.
Next steps and maintenance reminder
Now that you have replaced the thermostat, note the part number, supplier, and date of service for future reference. Schedule a coolant flush per your vehicle’s maintenance plan to minimize corrosion and buildup. If you encountered any issues during replacement that you couldn’t resolve, seek professional help before driving long distances. With careful installation and proper testing, you can trust your engine to maintain optimal temperature and efficiency.
Tools & Materials
- Drain pan(to capture coolant; choose a tray that can hold at least 2 quarts)
- Safety gloves(heat-resistant and chemical resistant)
- Eye protection(safety glasses or goggles)
- Ratchet set wrenches(metric sizes, typical 8mm-12mm range)
- Screwdrivers(flat and Phillips as needed for hose clamps)
- Replacement thermostat(correct temperature rating and OEM/aftermarket compatible with your car)
- Gasket or O-ring for thermostat housing(new for a proper seal)
- Coolant(the correct type for your vehicle; pre-mixed preferred)
- Torque wrench(helps reach exact spec if provided by manufacturer)
- Pliers (hose clamp)(for hose clamp removal/installation)
- Rags or shop towels(clean spills and wipe surfaces)
- Copper-brass or aluminum-safe cleaner(surface prep if needed)
- Safety jack stands or ramps(for elevated access if necessary)
- Coolant overflow bottle(to manage excess coolant during refill)
Steps
Estimated time: 60-90 minutes
- 1
Prepare and safety check
Ensure the engine is completely cool, disconnect the battery, and lay out your tools. Remove caps or covers as needed to access the thermostat housing. Check vehicle-specific torque specs and gasket guidelines. This initial step minimizes risk and prevents burns or spills.
Tip: Always work on a cool engine; hot coolant can cause severe burns. - 2
Locate thermostat housing
Find the thermostat housing, usually near the water pump or radiator. Inspect surrounding hoses for wear and note mounting bolts. Taking a quick photo can help you reassemble later.
Tip: Take a photo before disassembly to avoid confusion during reassembly. - 3
Drain coolant
Place the drain pan under the housing and carefully drain coolant to below the thermostat level. Capture as much as possible and prepare for coolant reuse or replacement according to local waste guidelines.
Tip: Dispose of old coolant at an approved facility; never pour it on the ground. - 4
Remove old thermostat and gasket
Loosen housing bolts and lift the housing to access the old thermostat. Remove the thermostat and gasket, then clean mating surfaces with a dry rag or cleaner if recommended by the manufacturer.
Tip: Do not scratch the mating surface; a clean seal is essential. - 5
Install new thermostat and gasket
Install the new thermostat in the correct orientation, followed by the gasket or O-ring. Reinstall the housing and tighten bolts to torque spec. Ensure the thermostat sits flush against the engine side.
Tip: Confirm orientation marks match the old unit or vehicle manual. - 6
Refill coolant and bleed air
Refill the cooling system with the proper coolant type and mix. Bleed air from the system by opening bleed valves or slowly running the engine with the radiator cap loose (when safe).
Tip: Bleeding prevents air pockets that cause overheating.
Questions & Answers
Can I replace a car thermostat myself?
Yes. With basic hand tools, careful safety steps, and attention to torque specs, many car owners can replace a thermostat themselves. Consult your vehicle manual and use OEM or validated aftermarket parts.
Yes, you can replace it yourself if you follow safety steps and use the right parts.
How do I know the thermostat is defective?
Common signs include overheating, fluctuating temperature gauge, and reduced heater output. A pressure test or inspection of the thermostat and housing can confirm the issue.
Look for overheating or erratic temperature readings to suspect a thermostat problem.
What risks come with improper replacement?
Leaking coolant, air pockets, or failed heat regulation can occur if the seal is not tight or the thermostat is installed backward. Always follow torque specs and use a new gasket.
If not done correctly, you can introduce leaks or overheating.
How do I bleed air after replacement?
Run the engine with the radiator cap removed or loosen the cap as you add coolant to let air escape. Replace cap when the system stabilizes.
Let the air vent out while the engine warms up.
Can I reuse the old gasket?
It’s best to replace with a new gasket to ensure a proper seal and prevent leaks.
New gasket is recommended for a reliable seal.
Do I need to disconnect the battery?
Yes. Disconnecting the negative terminal reduces the risk of short circuits during disassembly.
Yes, disconnect the battery for safety before you start.
Watch Video
What to Remember
- Verify hose clamps are secure after reassembly.
- Bleed air and monitor for overheating during first drive.
- Use the correct thermostat rating and gasket for your engine.
- Dispose of old coolant responsibly and refill with the proper coolant.
- Thermostat Care recommends maintaining documentation for easier future maintenance.