Ford F150 Thermostat Replacement: Step-by-Step Guide
Learn how to replace the thermostat on a Ford F-150 with a step-by-step, screw-tight process. Safety, tools, and tips to prevent overheating. Thermostat Care guides homeowners.

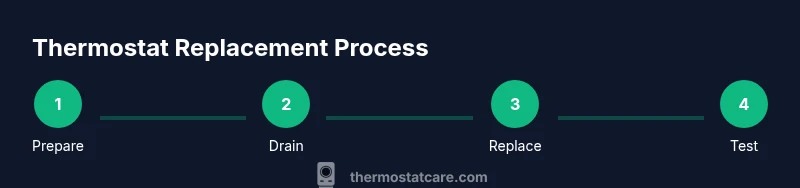
By the end of this guide, you'll confidently perform a ford f150 thermostat replacement on your Ford F-150 and restore proper engine cooling. You’ll need basic hand tools, a new thermostat kit with gasket, coolant, and replacement parts. This step-by-step process covers safety, draining, removal, installation, and leak testing. Follow the precautions to avoid overheating and engine damage.
Understanding the Ford F-150 thermostat and its role in cooling
The Ford F-150's cooling system relies on the thermostat to regulate coolant flow between the engine and radiator. When the thermostat sticks closed, the engine overheats quickly; if it sticks open, the engine may run cooler than optimal and reduce efficiency. For many owners, a ford f150 thermostat replacement becomes necessary after overheating symptoms, persistent temperature fluctuations, or coolant leaks around the thermostat housing. Replacing the thermostat restores proper flow and helps protect the engine from heat-related wear. This guide emphasizes practical steps, common pitfalls, and safe handling so a DIYer can complete the job with confidence.
Tools, parts, and safety prerequisites
Before you begin, gather the right tools and parts. A replacement thermostat kit with gasket, fresh coolant, a drain pan, rags, and basic hand tools are essential. You should wear eye protection and gloves, and ensure the vehicle is on a level surface with the parking brake engaged. Disconnecting the negative battery terminal can reduce the risk of shorts when working near electrical connectors. If your F-150 has an electronic thermostat or aluminum housing, use caution to avoid thread damage and corrosion.
Preparing the truck and draining coolant
With the engine cool, place the truck on a flat surface and disconnect the battery. Remove the lower splash shield if it blocks access to the thermostat housing. Position a drain pan under the radiator drain valve or the lower hose to catch coolant. Slowly open the drain valve or loosen the lower radiator hose clamp to let old coolant drain into the pan. Collect the coolant for proper disposal or reuse after the job, and wipe up spills to prevent slips.
Accessing and replacing the thermostat
Identify the thermostat housing on the engine side of the upper radiator hose. Remove the hose clamps and detach the upper radiator hose to expose the housing. Unscrew the housing bolts, lift off the cover, and extract the old thermostat. Clean the gasket surfaces, verify the new thermostat orientation (usually with the spring facing the engine), place the new gasket, reseal with the housing, and torque bolts to spec. Reconnect the upper hose and any electrical connections.
Refill coolant, bleed air, and test
Reinstall the radiator cap loosely, fill the reservoir with coolant, and run the engine with the heater on high to bleed air from the system. Monitor for leaks around the thermostat housing and hose clamps as the engine reaches operating temperature. Check for bubbles or pressure buildup in the radiator, then top off coolant to the recommended level. Once the engine cools, recheck the coolant level and tighten the cap.
Common mistakes and troubleshooting
Common mistakes include installing the thermostat backward, using an incorrect gasket, or neglecting to bleed air, which can cause overheating or air locks. Avoid over-tightening housing bolts and use manufacturer torque specs. If coolant leaks persist, inspect wiring near the thermostat housing for damage and consider flushing the system if contaminants are suspected. If symptoms recur, revisit the orientation and seal.
Tools & Materials
- Socket wrenches set (metric and SAE)(Include 8mm, 10mm for F-150 thermostat housing bolts)
- Screwdrivers (Phillips and flat-head)(For hose clamps and electrical connectors)
- Torque wrench(Torque thermostat housing bolts to spec)
- Drain pan(Catch coolant and prevent spills)
- Pliers(For hose clamps and clamps removal)
- Replacement thermostat kit with gasket(OEM-style gasket recommended)
- Coolant (pre-mixed or concentrate + distilled water)(Have enough to fill the system)
- Gasket sealant (optional)(Use only if gasket is not pre-formed)
- Rags and gloves(Keep the workspace clean and safe)
Steps
Estimated time: 2-3 hours
- 1
Prepare and safety check
Park the truck on a level surface, engage the parking brake, and disconnect the negative battery terminal. This prevents accidental shorts while you work near electrical components. Put on gloves and eye protection before starting any cooling system work.
Tip: Double-check that the engine is cool before touching any coolant or components. - 2
Relieve pressure and gain access
Open the hood and locate the thermostat housing near the upper radiator hose. If needed, remove any splash shield to expose the housing bolts. Relieve pressure by loosening the radiator cap only after the system is cool.
Tip: Label hoses if you remove more than one or take photos for reference. - 3
Drain coolant
Place a drain pan beneath the radiator drain valve or lower hose. Open the valve slowly or loosen the hose clamp to drain old coolant. Keep track of the coolant volume and avoid spilling onto hot components.
Tip: Collect coolant for proper disposal; never pour it down the drain. - 4
Remove the thermostat housing
Unbolt the thermostat housing, lift it clear, and inspect the old thermostat. Note its orientation; most thermostats have a marked direction. Clean the gasket surfaces on both the housing and engine to ensure a good seal with the new part.
Tip: Take a quick photo of the orientation before removal. - 5
Install the new thermostat
Place the new thermostat in the correct orientation, align the gasket, and reseal the housing. Reattach the bolts and torque to spec. Reconnect the upper radiator hose and any electrical connectors you removed.
Tip: Use a light coating of gasket sealant only if required by your kit. - 6
Refill and bleed the system
Refill the radiator with coolant to the proper level and run the engine with the heater on high to bleed air from the system. Watch for leaks around the thermostat housing and tighten bolts if necessary.
Tip: Keep the reservoir capped but loose until air is purged. - 7
Check for leaks and verify temps
After the engine reaches operating temperature, inspect for leaks and confirm the thermostat opens as the temperature rises. Refill coolant to the recommended level if needed and replace the cap securely.
Tip: Use a heat gun or infrared thermometer to verify surface temps around the housing if needed. - 8
Final checks and cleanup
Let the engine cool, then recheck coolant level and perform a short road test to confirm temperature stability. Clean up spills and dispose of old coolant per local regulations.
Tip: Document any unusual readings for future reference.
Questions & Answers
What are the common signs that my Ford F-150 needs a thermostat replacement?
Common signs include engine overheating, fluctuating temperature readings, coolant leaks around the thermostat housing, and reduced heater performance. If you notice any of these, inspect the thermostat housing and replace the thermostat if needed.
If your truck is overheating or the heater isn’t producing warm air, you may need a thermostat replacement. Check the housing for leaks and confirm correct orientation before replacing.
Can I replace the thermostat myself, or should I take it to a shop?
This is a feasible DIY project for homeowners with basic automotive tools. If you’re unsure about handling coolant or removing components, seek help to avoid leaks or damage.
Yes, you can do it at home if you’re comfortable with tools and coolant handling. If in doubt, a mechanic can ensure proper torque and sealing.
Should I flush the cooling system when replacing the thermostat?
Flushing is not always required, but it’s recommended if the system shows signs of sludge or debris. A flush helps prevent future blockages and ensures even coolant flow.
A flush is not mandatory every time, but consider it if you notice dirty coolant or reduced flow.
What tools and parts are essential for this job?
You’ll need a socket set, screwdrivers, a torque wrench, a drain pan, pliers, a new thermostat kit with gasket, and coolant. Having a camera or notes for orientation helps.
Basic hand tools, a new thermostat with gasket, and coolant are essential; keep a drain pan handy.
How long does a Ford F-150 thermostat replacement typically take?
Most DIY replacements take about 2-3 hours depending on access. A slower pace ensures correct torque and leak checks.
Usually around two to three hours for a careful replacement and testing.
Watch Video
What to Remember
- Identify the thermostat housing and orientation before removal.
- Bleed air from the cooling system to prevent overheating.
- Torque bolts to spec and ensure a clean gasket surface.
- Verify coolant level after the test drive and re-check for leaks.