Thermostat Replacement for Water Heater: A DIY Guide
Learn to safely replace a water heater thermostat with step-by-step instructions, tools, safety tips, and testing guidance from Thermostat Care.

You're going to safely replace a water heater thermostat. You'll shut off power, drain a small amount of water, remove the access panel, and install a compatible replacement thermostat, then test the setup before reassembling. Essential tools include a screwdriver, multimeter, replacement thermostat kit, wire nuts, and a towel.
Why thermostat replacement for water heater matters
According to Thermostat Care, a reliable thermostat is the control center for your water heater’s comfort and energy use. The thermostat replacement for water heater is a common maintenance task that can restore accurate temperature control, improve energy efficiency, and prevent temperature fluctuations that cause inconsistent hot water or excessive energy bills. If your hot water runs out too quickly, or you notice drastic temperature swings, the thermostat might be the culprit rather than the heating element or burner. Replacing a faulty thermostat can resolve these symptoms at a fraction of the cost of a full unit replacement. In this guide, we’ll walk through safe, practical steps for selecting a compatible thermostat, preparing your workspace, and performing the replacement with a focus on electrical safety and system testing. Thermostat Care emphasizes patience, proper labeling of wires, and verifying settings after installation to ensure reliable operation over the long term.
Signs your thermostat is failing and when to replace
A failing thermostat often gives telltale signs before it stops working entirely. If the water heater frequently runs too hot or too cold, if the thermostat won’t hold a set temperature, or if the upper and lower elements heat unevenly, these are strong indicators that replacement is warranted. Listen for rapid cycling, where the burner or elements switch on and off in short bursts; this can waste energy and shorten equipment life. Corrosion around the thermostat housing, loose wiring, or a visibly damaged dial or electronic display are physical red flags. Age is also a factor: most residential thermostats are designed for several years of reliable service, but performance degrades with time. In the context of thermostat replacement for water heater, decide to replace when calibration drift, frequent recalibration, or inconsistent recovery times occur, as these issues often point to worn sensors or faulty contacts rather than the heater’s tank.
Safety considerations and prerequisites
Safety first is non-negotiable when working on a water heater. Electric water heaters pose a shock risk; gas units add combustion hazards. Before you start, shut off power at the breaker panel (and gas supply if you have a gas water heater). If you are unsure about wiring or have older components, consult a licensed professional. Never work on live circuits; always verify no voltage with a non-contact tester before touching wires. Expect water leakage and possible hot surfaces; place towels and a shallow pan to catch drips. Finally, confirm the replacement thermostat is compatible with your unit’s voltage, wattage, and mounting arrangement. Using the wrong thermostat can create safety hazards or damage the control system.
Understanding thermostat types for water heaters
Most electric water heaters use one or two dial-style or digital thermostats mounted on the side of the tank. Gas water heaters often have a gas-controlled thermostat integrated into the burner assembly; in many cases, this component is not user-serviceable. For thermostat replacement for water heater, you will typically replace the entire thermostat assembly rather than just a dial if the internal sensors or contacts are worn. Be mindful of temperature calibration: setting temperatures too high wastes energy and risks scalding, while too low can leave you with cold or lukewarm water. Compare manufacturers’ specs to ensure an exact match for your model and climate needs.
Preparing for replacement: tools, parts, and plan
Begin by gathering the right tools and replacement parts to minimize delays: a screwdriver set (Phillips and flathead), a multimeter or voltage tester, needle-nose pliers, wire nuts, electrical tape, and a compatible thermostat kit designed for water heaters. Have towels and a small bucket ready to catch water. Review your unit’s model number and confirm compatibility with the replacement thermostat. Sketch a quick wiring map or take photos of existing connections before you disconnect anything; this simple step saves time and reduces mistakes. Finally, turn off power and water as required by your model, and check the local code requirements—some jurisdictions require a licensed professional for electrical work on hot water systems.
The replacement plan: what to expect during the process
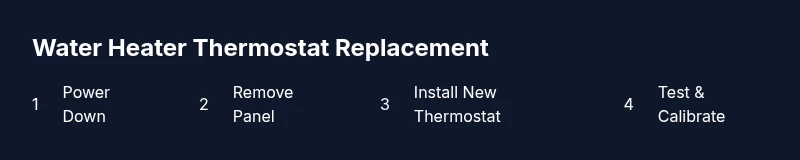
Below is a high-level overview of the process so you can plan accordingly. First, power down the circuit and drain a small amount of water to reduce splash risk. Next, remove the access panel and the thermostat cover, then document or label each wire. Disconnect the old thermostat, install the new mounting plate if needed, and connect wires to the correct terminals. Reassemble the panel, restore power, and run the water heater through several heating cycles while monitoring for proper operation and leaks. If your unit is a two-element model, test both upper and lower thermostats to ensure even heat delivery. After confirming stable operation, reset the temperature to your preferred setting and monitor for the next 24 hours. In all cases, refer to the thermostat’s installation instructions and your water heater’s manual for model-specific steps.
Tools & Materials
- Screwdriver set (Phillips and flathead)(Assorted sizes; 1/4 inch and 3/8 inch commonly needed)
- Non-contact voltage tester(To verify power is off)
- Multimeter(For testing electrical resistance and continuity)
- Replacement thermostat kit for water heater(Match model: check part number; includes gasket and mounting hardware)
- Wire nuts and electrical tape(For safe wire connections)
- Needle-nose pliers(Helpful for handling small terminals)
- Bucket and towels(For catching water and cleanup)
- Flashlight or headlamp(Better visibility inside panel)
Steps
Estimated time: 45-60 minutes
- 1
Power down and isolate
Turn off the circuit breaker that feeds the water heater and, if applicable, shut off the gas supply. Confirm there is no voltage using a non-contact tester. This step prevents electrical shock and gas ignition hazards during the replacement.
Tip: Double-check the correct breaker; a mislabeled panel is a common source of errors. - 2
Access the thermostat
Remove the outer access panel and insulation to expose the thermostat assembly. Use a flashlight to clearly see wiring and mounting screws. Avoid touching exposed terminals with bare skin.
Tip: Label wires with tape before disconnecting so reconnecting is effortless. - 3
Document and disconnect wiring
Take a photo or sketch the wiring layout. Carefully disconnect wires from the old thermostat, noting which wire goes to which terminal. Do not mix up upper vs lower thermostat connections on two-element models.
Tip: If a wire is stubborn, use needle-nose pliers gently to avoid damaging terminals. - 4
Install the new thermostat
Mount the new thermostat or thermostat kit in the same position as the old unit. Connect wires to the correct terminals according to the included wiring diagram. Re-secure the cover and insulation.
Tip: Ensure mounts are snug and terminals are clean to avoid loose connections. - 5
Restore power and test
Reattach the access panel, restore power (and gas if applicable), and set the thermostat to a modest temperature. Allow the heater to run through several heat cycles and observe for correct operation and any leaks.
Tip: Monitor the first few cycles closely for unusual noises or temperature spikes. - 6
Final checks and calibration
Calibrate the temperature to your preference, typically around 120°F (49°C) for safety and efficiency. Verify both safety limits are functioning, and document any service notes for future reference.
Tip: Keep a quick-reference note near the heater for future maintenance.
Questions & Answers
Do I need to drain the tank before replacing the thermostat?
In most electric water heater thermostat replacements, a full tank drain is not required. You may drain a small amount to reduce splash when disconnecting wires, but check your model's guidance first.
Usually you don't drain the full tank; just remove a small amount to reduce splash and follow your model’s instructions.
Can I replace a thermostat on a gas water heater?
Gas water heaters often have thermostats integrated with the gas valve and may not be user-serviceable. If you suspect a thermostat issue on a gas unit, consult a pro.
Gas units often aren’t serviceable for thermostat replacement. Consider professional help if you suspect this issue.
What tools are essential for thermostat replacement for water heater?
Common essentials include a screwdriver set, non-contact voltage tester, multimeter, and a compatible thermostat kit. Having wire nuts and tape helps for safe connections.
You’ll need basic hand tools, a tester, and a matching thermostat kit for the job.
What are signs of a faulty thermostat besides temperature drift?
Along with temperature drift, look for frequent cycling, inconsistent recovery times, or signs of wear on the thermostat housing. These can indicate worn sensors or contacts.
Look for erratic heating, rapid cycling, or visible damage as signs of a bad thermostat.
Is DIY thermostat replacement safe for homeowners?
DIY replacement can be safe if you follow proper shutdown procedures, use the right parts, and test carefully. If you’re unsure about wiring or gas connections, hire a licensed pro.
DIY can be safe if you follow steps carefully; otherwise, get a professional.
How long does a thermostat replacement typically take?
Most installations take 30-60 minutes depending on unit type and access. Complex gas valves or hard-to-reach panels may extend the time.
Most replacements take about an hour, but it can vary with the setup.
Watch Video
What to Remember
- Shut off power and water before starting.
- Use compatible thermostat parts matched to your unit.
- Document wiring and test thoroughly after installation.
- Follow safety tips to avoid shocks and leaks.
- If in doubt, consult a pro rather than risking damage.