Why Is My Car Overheating After Thermostat Change
Discover why your car overheats after thermostat replacement and follow a proven troubleshooting flow to diagnose, fix safely, and prevent repeats. Thermostat Care guides you through common causes and safe steps.

Most often overheating after a thermostat change is caused by an improper install, air trapped in the cooling system, or using the wrong thermostat model. Start by confirming the part matches your vehicle, bleeding air from the system, and checking for coolant leaks. If the gauge continues to rise, stop driving and seek professional help.
Why is my car overheating after changing thermostat
When you replace a thermostat, the engine’s cooling path is momentarily disrupted and air can become trapped in the cooling system. This air pocket can prevent coolant from circulating properly, causing the temperature gauge to climb even if the thermostat is new. Additionally, using the wrong thermostat (wrong temperature rating or fit) can keep the coolant from flowing freely. The Thermostat Care team notes that many overheating events after thermostat replacement stem from installation errors or air pockets, not from the vehicle’s core cooling components. By verifying the correct part and ensuring a proper bleed, you set the system up for a stable operating temperature and prevent future incidents.
Common causes to check first after a thermostat change
- Incorrect thermostat part: verify part number, model, and temperature rating match the vehicle’s requirements.
- Improper gasket seating: a mis-seated gasket can cause leaks or restrict flow.
- Air in the cooling system: air pockets block circulation and cause overheating until bled.
- Coolant leaks or low level: check hoses and the radiator for signs of dripping or low coolant.
- Faulty radiator fan or sensor: if the fan never engages, coolant cannot be cooled effectively.
- Bleed procedure skipped: many modern systems require a specific bleed order to purge air.
If any of these are present, address them first before pursuing more advanced fixes. According to Thermostat Care analysis, most overheating events during thermostat work are caused by air pockets and installation mistakes rather than a failed engine cooling system.
How the cooling system interacts with a new thermostat
A thermostat controls coolant flow based on engine temperature. When a replacement is done, the system must be purged of air and refilled to the correct level. If air remains, coolant flow becomes inconsistent, triggering hot spots and overheating. The pump must push coolant through the radiator, heater core, and engine block evenly. A misfit or air lock disrupts this balance. The result can be a rising temperature gauge, reduced heater performance, and in worst cases, overheating that damages head gaskets or warped components. Understanding this interaction helps you diagnose issues beyond a stuck thermostat.
Symptoms to look for and how to interpret signals
- Temperature gauge rising quickly with a steady RPM: likely air pockets or restricted flow.
- Low coolant warning light or visible leaks: confirm coolant level and inspect for leaks.
- Steam from under the hood after shutdown: possible overheat or coolant loss.
- Heater temperature not warm: poor coolant flow through the heater core.
- Unusual smells or gurgling sounds: air pockets escaping or air in an empty system.
Record when these signs appear and cross-check with the bleed steps and pressure tests to narrow down the cause quickly.
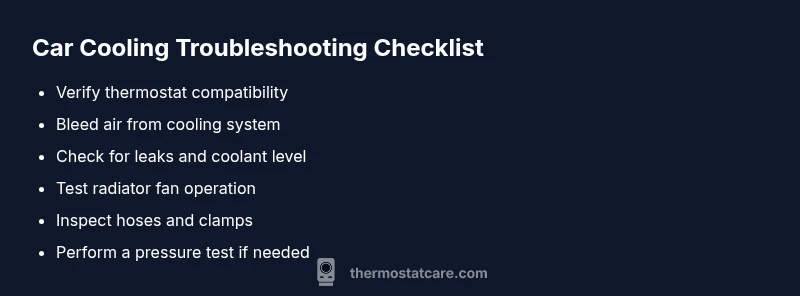
Step-by-step quick checks you can perform safely
- Confirm you have the correct thermostat for your vehicle model; review the parts diagram.
- Recheck the thermostat installation: gasket seating, orientation, and secure housing.
- Bleed the cooling system to remove air pockets as per your vehicle’s service manual.
- Inspect coolant level and top up with the correct mix if needed; never open a hot cooling system.
- Inspect radiator fans and fuses; ensure fans engage at the correct temperatures.
- Look for signs of leaks around hoses, clamps, and the thermostat housing.
If you complete these steps and the problem persists, move to the professional-check plan. Remember: do not operate the vehicle if the coolant level is critically low or the engine is hot.
Safety, professional help, and prevention tips
- Never opening a hot radiator cap; allow the engine to cool and release pressure slowly if instructed by the manual.
- Use proper PPE and work in a vented area when bleeding air and handling coolant.
- If the overheating continues after basic checks, contact a professional to avoid head gasket or piston issues.
- Maintain coolant level and replace coolant according to the manufacturer’s schedule.
- Keep a spare thermostat, gasket, and bleeding kit in your toolkit as part of a proactive maintenance plan.
A systematic approach reduces the risk of repeat incidents and extends your cooling system’s life.
Safety notes and common mistakes to avoid
- Avoid using the wrong coolant type or miscalculating the mix ratio; incorrect coolant can corrode passages and reduce heat transfer.
- Do not run the engine with a known leak or an empty reservoir.
- Do not force air pockets out with the radiator cap off; use the correct bleeding sequence for your vehicle.
- Do not ignore warning lights; overheating can quickly warp engine components.
- Always work with the ignition off and the engine cool when performing any bleed or top-up.
Following these safety practices helps ensure your DIY work doesn’t turn into a costly repair bill.
Steps
Estimated time: 1-2 hours
- 1
Verify part compatibility
Cross-check the thermostat part number, temperature rating, and mounting style against the vehicle’s service data. Confirm you used the correct gasket and that the new thermostat is oriented correctly before reassembly.
Tip: Double-check the part with the vehicle’s VIN and service bulletin. - 2
Refill and bleed
With the engine cool, open the reservoir and radiator cap (only if safe per manual). Top off coolant gradually while watching for air pockets, using a bleed valve if present. Run the engine to operating temperature and re-check levels.
Tip: Follow the manufacturer’s bleed procedure to avoid air locks. - 3
Check for leaks
Inspect all hose clamps, the thermostat housing, and the radiator for signs of coolant loss after initial start-up. Tighten clamps gently and replace any damaged hoses.
Tip: Look for wet spots and dried coolant residue as indicators. - 4
Test fan operation
Turn on the AC or observe fan operation at mid-range temperature to ensure the cooling fan engages. If not, inspect the relay, fuse, and temperature sensor for faults.
Tip: You should hear the fan engage around normal operating temperature. - 5
Road-test carefully
Drive at a safe speed with steady acceleration and monitor the gauge. If it climbs again under load, stop and let the engine cool before re-testing.
Tip: Carry a coolant and a basic toolkit for on-the-road checks.
Diagnosis: Car overheating after thermostat change
Possible Causes
- highAir pockets in cooling system
- highIncorrect thermostat installed
- mediumCoolant leak or low coolant level
- mediumNon-functional radiator fan or faulty sensor
- lowBlocked radiator or clogged passages
Fixes
- easyBleed the cooling system to remove air pockets and refill to proper level
- easyVerify thermostat part number and orientation; reseat with new gasket if needed
- easyInspect for leaks and top up coolant; repair any hose or housing leaks
- mediumCheck radiator fan operation and related fuses/sensors; replace faulty parts
- hardPressure-test the cooling system to locate hidden leaks and flow restrictions
Questions & Answers
What is the most common cause of overheating after thermostat replacement?
Air pockets and incorrect thermostat fit are the most frequent culprits. Bleed the system and confirm the part is correct before deeper diagnostics.
Air pockets and wrong part fit are the most common causes. Bleed the system and verify the part first.
Can a new thermostat cause overheating even if installed correctly?
Yes, if the thermostat is defective or not rated for your engine, it can restrict flow and cause overheating despite correct installation.
A defective or mismatched thermostat can still overheat even if installed correctly.
When should I seek professional help?
If the temperature remains high after bleeding, or you notice leaks, coolant loss, or abnormal noises, consult a professional to avoid engine damage.
If overheating persists after bleeding or you see leaks, get professional help.
Is it safe to drive with a warming engine following a thermostat replacement?
No. Driving with overheating can warp head gaskets. Stop driving as soon as you notice rising temps and diagnose the issue.
Don’t drive if the engine is overheating; stop and diagnose.
What maintenance reduces future overheating risks?
Regular coolant changes, proper bleed procedures after any cooling system work, and checking the radiator and fans before long trips reduce risks.
Keep up with coolant changes and proper bleeding after work.
Can airlocks happen after other cooling system repairs?
Yes, any repair in the cooling loop can introduce air. Bleed as part of the repair procedure and recheck the system.
Airlocks can happen after any cooling work; bleed and recheck.
Watch Video
What to Remember
- Identify air pockets and correct part fit first
- Bleed the system before any road test
- Inspect fans, sensors, and leaks as a group
- Stop driving if overheating persists to prevent engine damage