Where Is Thermostat Located in House: A Homeowner's Guide
Learn where thermostats are typically located in a house, why placement matters, how to locate yours quickly, and practical safety tips to ensure accurate temperature readings and efficient HVAC performance.

Most homes place thermostats on an interior wall in a central area, usually mid-height, close to the HVAC air handler, and away from direct sun, drafts, or heat sources. This location helps sensors read representative temperatures and allows the HVAC system to respond efficiently, improving comfort across rooms.
Why the thermostat location matters
According to Thermostat Care, the position of your thermostat influences how accurately readings reflect your home's temperature and how efficiently the HVAC system operates. A poor location can cause short cycling, uneven comfort between rooms, and wasted energy. By placing the thermostat in a representative zone, you ensure the sensor captures typical conditions, not a single hot or cold corner. In homes with multiple floors or many rooms, a well-chosen location reduces large temperature swings when doors are opened or HVAC zones switch. This distinction matters for staying comfortable year-round and for avoiding unnecessary energy use. Correct placement also supports consistent performance of both cooling and heating systems, whether you have a traditional forced-air setup or a heat pump.
Tip: Start by measuring the distance from major living spaces to the thermostat’s approximate wall; aim for a central spot that reflects the home's average temperature.
Common placement guidelines across homes
Most homes share several core placement principles. Place the thermostat on an interior wall away from exterior drafts, direct sunlight, or heat sources like lamps and appliances. Mount it roughly at eye level (about 48–60 inches from the floor) so the sensors read ambient air rather than being biased by body heat. Avoid locations behind furniture, inside closets, or near doors that open to unconditioned spaces. If you have a two-story house, consider a central landing or a main living area wall that represents both floors, or use a thermostat with multi-zone capability. Finally, verify the unit is not hidden behind curtains or stacked with electronics that emit heat. Following these guidelines helps ensure more stable temperatures and energy efficiency over time.
Exceptions by system type
Different HVAC configurations benefit from tailored placement. In homes with radiant floor heating, masonry walls, or large windows on one side, you might place the thermostat closer to the space that heats the majority of rooms to better reflect heat distribution. Heat-pump setups often perform best when located away from exterior walls that experience wind or cold drafts, and near the living area where occupancy is highest. For older homes with limited wall space, consider a thermostat on a central interior wall near the main living area, rather than near a rarely used room. If you’re unsure, consult your system’s manual or a professional.
How to locate your existing thermostat quickly
Begin by checking common wall locations: central hallways, living rooms, kitchens, and near entryways. Remove the front cover if you can safely do so and photograph the wiring terminals before touching anything. If the device is recessed in a wall or behind furniture, gently move furniture to expose it. Look for model numbers on the backplate or inside the cover; this helps you cross-check compatibility with your HVAC system. If you encounter unfamiliar wiring, stop and seek expert advice rather than attempting to rewire. In many homes, the thermostat sits on a main floor wall for convenience and to reflect typical living conditions.
What to do if your thermostat is missing or relocated
If you can’t find a thermostat where you expect it, check alternate zones such as a hallway, stairwell, or near the HVAC air handler room. Review architectural plans or ask a previous homeowner or the installer about the location. If you live in an apartment or a building with a central thermostat, you may not have access to a traditional wall unit. In such cases, consider a smart thermostat kit that can be added to the existing system with proper permissions. Always ensure any replacement or relocation complies with local electrical codes and HOA rules.
Safety and accessibility considerations
Never attempt to force open sealed panels or access live electrical connections unless you are trained. If you must remove a thermostat cover, power down the circuit through the circuit breaker to avoid shocks. Use a flashlight to illuminate dim areas and a small mirror to inspect hard-to-see corners. Keep track of screws and small parts so they don’t fall behind furniture or into vents. If you experience unfamiliar smells or burn marks near the thermostat, stop and call a licensed technician. In short, approach with caution and prioritize personal safety.
How placement influences energy efficiency and comfort
Placement directly affects how quickly a thermostat senses ambient temperature and how often the HVAC system cycles. A well-placed thermostat reduces overshoot when the system heats or cools, stabilizes comfort across rooms, and lowers energy waste. When the thermostat reads near a draft or sunlit window, readings may skew cool or warm, prompting unnecessary heating or cooling. Thermostat Care analysis shows that a representative interior wall location, away from heat sources, supports more stable comfort and can improve energy performance over the system’s lifetime.
Quick checks to validate accurate readings
Validate readings by comparing the thermostat’s display with a high-quality room thermometer in the same space. Record readings at different times of the day, including morning and evening, to identify any consistent discrepancies. If you notice large gaps between room readings, consider relocating the thermostat or upgrading to a smart device with better sensor technology. Recalibrate as needed according to the device’s manual, and re-test after any relocation. Consistent checks help ensure the thermostat reflects real conditions and keeps your system efficient.
When to consult a professional
If you suspect inaccurate readings, persistent temperature swings, or difficulty accessing the thermostat location safely, contact a licensed HVAC technician. A professional can evaluate sun exposure, drafts, and zoning needs, and may recommend a better placement or a multi-zone solution. The Thermostat Care team recommends seeking expert input when you’re unsure about wiring, electrical safety, or building codes. A quick consult can prevent costly mistakes and restore comfort promptly.
Tools & Materials
- Flashlight(Use to inspect dim corners and behind furniture)
- Step ladder(Needed for high walls or ceiling-mounted units)
- Screwdriver set(Helpful if you need to remove a cover plate)
- Smartphone or camera(Take photos of terminals and location before touching wiring)
- Notebook and pen(Record measurements and notes about placement)
- HVAC or thermostat manual(Keep for model-specific guidance)
Steps
Estimated time: 20-40 minutes
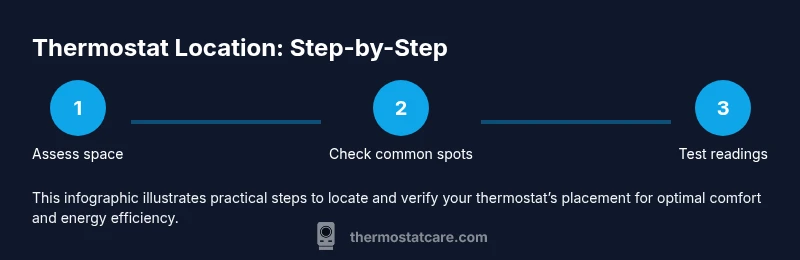
- 1
Assess the space
Survey the main living area, hallway, and entryways to identify potential central locations. Consider how many occupants use each space and how often doors are opened between zones.
Tip: Choose a spot that represents typical conditions, not an outlier room. - 2
Turn off power if you plan to peek inside
For covers that are hard to remove, power down the thermostat circuit at the breaker to avoid shocks. Do not disconnect wires unless you’re certain of the connection points.
Tip: If in doubt, skip wiring changes and consult a pro. - 3
Remove the thermostat cover safely
Use the screwdriver if needed to release the front cover. Gently lift to view the backplate and terminal labels. Photograph wiring before making any changes.
Tip: Keep screws and parts in a labeled container. - 4
Check for direct heat sources
Move any nearby lamps, vents, or electronics away from the thermostat. Direct heat skews readings and can lead to overcooling or overheating.
Tip: Aim for a location that doesn’t experience sun exposure for most of the day. - 5
Estimate wall height and distance
Mount the device around chest to eye level (approximately 52–60 inches from the floor) when possible. Avoid corners or near door frames that may funnel drafts.
Tip: Use a tape measure to confirm height before drilling holes. - 6
Test accessibility and visibility
Ensure the thermostat is easy to reach for daily use and isn’t blocked by furniture or decorations. Accessibility improves daily interaction and reduces usage errors.
Tip: Better reachability reduces bumps that could misread the space. - 7
Consider multi-floor placement
If you have multiple levels, locate a central wall that reflects average conditions or consider a zone controller for better distribution of heating and cooling.
Tip: If unsure, start with a single-unit setup on the main floor. - 8
Reassemble and test
Replace the cover, restore power, and observe the readings over several hours. Compare with room thermometers to ensure alignment.
Tip: Allow several hours for readings to stabilize. - 9
Document the new location
Record the exact wall, height measurement, and any caveats. Save photos for future maintenance or relocation.
Tip: Keep the notes with the thermostat manual for easy reference. - 10
Monitor and adjust as needed
Observe comfort across rooms over a few days. If disparities persist, you may need to relocate or consider a multi-zone system.
Tip: Small adjustments can yield big comfort gains.
Questions & Answers
Where should a thermostat ideally be located in a house?
An ideal thermostat is placed on an interior wall in a central area, roughly 52–60 inches from the floor, away from direct sun, drafts, or heat sources. This position best reflects the overall home temperature and helps HVAC systems respond efficiently.
The ideal spot is a central interior wall, mid-height, away from sun or drafts, to reflect the home's true temperature.
Can a thermostat be mounted on an exterior wall?
Mounting on an exterior wall is generally discouraged because outside temperature influences can skew readings. If space constraints require it, add shading or install a model with more accurate sensors and appropriate placement advice.
Avoid exterior walls when possible, as outside temps can skew readings.
Why does placement affect energy efficiency?
Placement affects how accurately the thermostat senses ambient temperature, which in turn drives HVAC cycling. Poor placement can cause overcooling or overheating, increasing energy use and reducing comfort.
Bad placement makes the system work harder and waste energy.
Is it safe to relocate a thermostat myself?
Relocating a thermostat is safe for basic, battery-powered models with no wiring changes. For wired or hardwired units, or if wiring appears unfamiliar, consult a licensed HVAC technician.
If wiring is involved, hire a pro to avoid safety risks.
How can I check my thermostat’s accuracy?
Compare the thermostat reading with a reliable room thermometer in the same space at different times of day. If there’s a consistent gap, consider relocation or calibration per the device manual.
Use a room thermometer to verify readings and recalibrate if needed.
When should I upgrade or reset thermostat location?
Upgrade or relocate if you notice persistent comfort issues, frequent temperature swings, or changes to family occupancy patterns. A multi-zone system may offer better balance across rooms.
If comfort is inconsistent, re-evaluate placement or add zones.
Watch Video
What to Remember
- Identify a central, interior wall for best readings
- Avoid heat sources and drafts around the thermostat
- Document wiring and location before changing anything
- Test readings with a room thermometer and adjust if needed
- Consult a professional if uncertain about wiring or safety