Where to Put Your Thermostat: A Practical Placement Guide
A homeowner-friendly guide on thermostat placement for accurate sensing, comfort, and energy efficiency, with tips for common layouts, smart thermostats, and maintenance.

You should place a thermostat on an interior wall away from heat sources, direct sunlight, and drafts. Aim for a central location about chest height to reflect typical living areas. Proper placement improves sensing accuracy, comfort, and energy efficiency, reducing waste and uneven heating. Follow these basics to start: keep the thermostat out of direct sun, away from cooking appliances, and not on exterior walls.
Why placement matters for comfort and energy efficiency
According to Thermostat Care, the location of your thermostat directly affects how accurately your system reads room temperature and how evenly it heats or cools. If sensors are biased by heat sources or drafts, the HVAC responds to the wrong conditions, wasting energy and creating hot or cold spots. The goal of thermostat placement is to minimize sources of error and maximize comfort across living spaces. When you place the thermostat where people actually spend time, you get a truer reading of occupied rooms, which improves both comfort and efficiency. Thermostat Care’s guidance emphasizes that even small shifts in location can yield noticeable improvements in performance, especially in homes with varied layouts or multiple zones.
- Use observations from daily routines (where you sit most, where you notice temperature swings) to guide placement.
- Consider future changes in furniture layout, door openings, and register placements that could affect airflow.
By focusing on accurate sensing and representative conditions, you reduce the need for extreme temperature adjustments and prolonged cycling. This helps you achieve steadier comfort and lower energy bills over the heating season and cooling months.
noteFlag اولین_strictness_flavor: null,
Tools & Materials
- Screwdriver (Phillips #2 or flathead, depending on plate)(Have a magnetic tip on hand to keep screws from dropping into wall cavity.)
- Drill with 3/16-inch bit(Only if mounting on drywall without a stud behind the mounting plate.)
- Stud finder(Mark studs to ensure solid mounting for the backplate.)
- Level(Ensure the mounting plate is perfectly vertical for proper sensor alignment.)
- Pencil(Mark precise placement points on the wall.)
- Screws and wall anchors(Use appropriate anchors for drywall or plaster.)
- Wire stripper/cliers(Use if you’re wiring a hardwired model and need to trim wires.)
- Voltage tester(Safety check if you’re unsure about line voltage near the mounting area.)
- Smart thermostat (optional)(If upgrading, ensure compatibility with your HVAC system.)
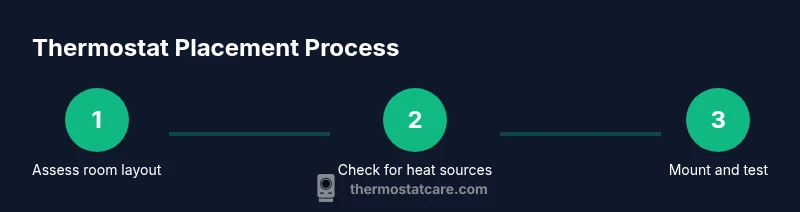
Steps
Estimated time: 45-60 minutes
- 1
Plan your location
Evaluate rooms where you spend the most time and identify central, unobstructed interior walls away from direct heat and drafts. Consider future furniture changes and doorways that affect airflow. Mark a few candidate spots with a pencil to compare visibility and comfort impact.
Tip: Aim for a location that reflects typical occupancy and has minimal sun exposure. - 2
Power down the HVAC system
Turn off the circuit breaker or power at the furnace to avoid shocks while you mount or rewire. This ensures safety while you work with the thermostat wiring or backplate.
Tip: Double-check the power is off with a tester before handling wires. - 3
Remove the old cover and inspect wiring
Gently remove the existing thermostat cover and take a photo of the wiring for reference. Label each wire by terminal so you can reconnect correctly if you’re upgrading or replacing.
Tip: If wiring is unfamiliar, stop and seek guidance to avoid miswiring. - 4
Mount the backplate at the chosen spot
Hold the backplate level against the wall, mark the screw holes, drill pilot holes, and secure the plate with screws. Ensure the base is flush and level so the face plate sits evenly.
Tip: Use a stud finder to locate a solid anchor or use wall anchors where needed. - 5
Connect wires or install wireless adapter
If wiring, connect wires to their corresponding terminals as labeled. If upgrading to a wireless/mini-sensor model, install the battery or receiver per the manufacturer’s instructions.
Tip: Keep a copy of the original wiring photo handy to verify connections. - 6
Attach the thermostat faceplate and power on
Place the thermostat body onto the backplate, secure it, and restore power. Follow the device’s on-screen prompts to configure location, units, and preferences.
Tip: If the device prompts for room identification, choose the zone that corresponds to the majority of occupied space. - 7
Calibrate sensor and verify readings
Allow the thermostat to run through a few cycle periods to stabilize. Verify that room readings align with actual temperature by comparing with a separate thermometer.
Tip: Give the system 15–30 minutes to settle before adjusting settings. - 8
Finalize settings and monitor performance
Complete scheduling, occupancy features, and any smart-home integrations. Monitor for a full cycle and adjust as needed to balance comfort with efficiency.
Tip: Keep a log of changes to track what improves comfort and energy use.
Questions & Answers
What is the best height for a thermostat?
Most experts recommend mounting on an interior wall roughly 52-60 inches from the floor for general comfort and sensor accuracy. Specific rooms or occupants may benefit from slight adjustments within this range.
Mount your thermostat on an interior wall about chest height, typically around five feet off the floor, to get reliable temperature readings.
Can I place a thermostat on an exterior wall?
Avoid exterior walls since they are prone to temperature fluctuations from outdoor conditions. This can lead to inaccurate readings and poor comfort. Choose interior walls that represent the main living zones instead.
No—choose interior walls to keep readings stable and reliable.
Should I mount a thermostat near vents or windows?
Avoid direct exposure to vents or windows, which can create localized heating or cooling bias. This skews readings and can cause unnecessary HVAC cycling.
Keep it away from vents and windows for consistent readings.
Is relocation safe for a DIY install?
Relocating a thermostat is generally safe if you follow electrical safety steps, label wires, and power down before working. If the unit is wired to HVAC equipment, ensure you understand the wiring diagram.
Yes, with caution—power down and follow wiring guidelines closely.
Do smart thermostats require different placement?
Smart thermostats share the same basic placement rules but may include additional considerations for sensors, geofencing, and home automation compatibility. Ensure the chosen location supports sensor accuracy and signal reliability.
Smart models still need a stable sensor reading, so placement follows the same rules plus your home automation setup.
What should I do after relocating the thermostat?
Test various setpoints, check energy usage, and adjust schedules. If readings still seem off, verify wiring and allow time for recalibration.
Test and monitor after relocation to confirm comfort and efficiency.
Watch Video
What to Remember
- Place the thermostat on an interior, central wall for accurate sensing
- Avoid heat sources, drafts, and direct sun to prevent skewed readings
- Label wires and photograph wiring before removing an old unit
- Calibrate and monitor after relocation to maximize comfort and efficiency