What to Do with Nest Thermostat When Moving
Learn step-by-step how to move a Nest thermostat safely, whether you’re taking it to a new home or leaving it behind. Uninstall, reset, pack, and reinstall with confidence using Thermostat Care’s expert guidance.

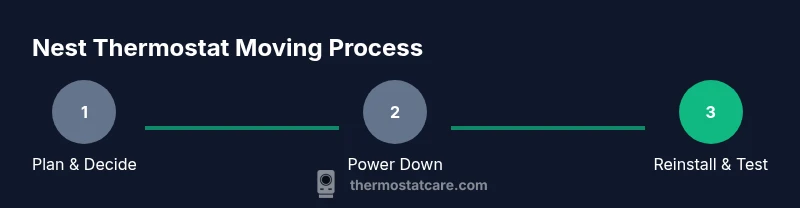
Moving with a Nest thermostat requires planning: either reuse it in your new home or leave it behind for the next occupant. Uninstalling, factory resetting if reusing, and packing it securely are essential steps. Always cut power at the breaker before handling wires, and decide on reinstallation location ahead of time to simplify setup.
Planning the move: decide what to take and what to leave behind with your Nest thermostat
According to Thermostat Care, successful moving starts with a clear plan. Decide early whether you will reuse the Nest thermostat in your new home or hand it off to the new occupant. If you’re moving a short distance, you may take the unit with you and reuse it, provided your HVAC system is compatible and the wiring is unchanged. For long moves, you might prefer to leave the device behind, especially if local service availability or the existing setup makes reinstallation more complex. Create a simple checklist that covers power-off steps, mounting considerations, and any required reconfiguration. This planning phase helps prevent last-minute scrambling and reduces the risk of damaged equipment.
In all cases, confirm whether the thermostat’s features (like remote sensing, energy reports, or smart scheduling) will be beneficial in your new home. If you’re selling or renting the property, consider the expectations of the new owner and whether to supply original wiring diagrams or a clean installation. Thermostat Care notes that planning for both reuse and transfer improves outcomes and reduces move-day stress.
Safety first: Power down, disconnect, and handle wiring safely
Before you touch any wires or mounting hardware, switch off power at the household breaker to avoid shock or equipment damage. Do not rely on plugging and unplugging the thermostat while the circuit is live. With power off, remove the thermostat from the wall slowly, keeping hands clear of built-in components. Use a digital camera or smartphone to capture wiring orientation and terminal labels so you can recreate the setup accurately in your new home.
Keep screws and small parts in a labeled container to prevent misplacement. If you’re unsure about any exposed wires, pause and consult a professional. The goal is to prevent damage to the thermostat and the HVAC system, while avoiding injury. Thermostat Care’s guidance emphasizes deliberate, measured steps over rushing through installation tasks.
Factory reset vs. deactivation: What to do before moving
If you plan to reuse the Nest thermostat in a new home, a factory reset is often the cleanest option to remove your account and personal data. If you’re handing the device off to a new occupant or a property manager, you may opt for a deactivation rather than a full reset, depending on your privacy preferences and local policies. A factory reset restores default settings, erasing Wi‑Fi credentials and stored configurations, which makes the device ready for fresh setup. If you’re unsure which path to take, start with a reset to avoid leaving personal information on the device.
Document any significant HVAC details (like system type and wire color mappings) so you can reconfigure quickly when the thermostat returns to use. After resetting, you’ll have a clean slate for rearranging schedules, temperatures, and automation in the new home.
Dismantling the Nest thermostat: step-by-step removal
Begin by removing the faceplate gently and setting it aside. Then unscrew the mounting plate from the wall and detach the thermostat base. As you disconnect wires, label each wire with a short note that matches the terminal it connected to. Photograph the wiring map from multiple angles to serve as a reliable reference during reassembly. Place all screws and small components in a labeled bag to avoid loss.
Handling the device with care protects both the thermostat and the wall, reducing the risk of damage. If any wire comes loose or the display is stubborn, pause and re-check the labels and photos before continuing. This careful approach minimizes surprises when you reinstall later.
Packing and transporting the thermostat securely
Pack the thermostat in its original box if available, or wrap it in soft, protective material and place it in a small crush-proof container. Use bubble wrap or foam to cushion the unit and its mounting plate, ensuring there are no loose parts that could rattle during transit. Include the mounting hardware in the same labeled bag and seal the bag inside the box with anti-static padding. Label the box clearly as fragile and indicate “Nest thermostat – moving.”
If you’re moving a long distance, consider adding a desiccant pack to reduce moisture exposure and protect electronics. Keep the unit in a climate-controlled portion of the vehicle to prevent temperature fluctuations that could affect the device’s internals. This careful packing approach helps prevent damage and keeps installation time minimal on arrival.
Reinstalling in a new home: setup and integration
When you reach the new home, begin by verifying that the HVAC system wiring in the new space matches the previous configuration. Mount the thermostat base onto the wall, attach the wires to their corresponding terminals, and reattach the faceplate. Restore power at the breaker and follow the on-screen prompts to connect to Wi‑Fi and link the device to your Nest account. If the HVAC system has changed (for example, a different blower type or shared ductwork), you may need to adjust settings for heat, cool, and fan operations to ensure smooth operation.
Test basic functions first: heating and cooling activation, temperature adjustment, and any scheduled programs. If you encounter a non-responsive screen or a failure to connect to Wi‑Fi, refer to the reset option or consult a technician. Thermostat Care notes that a deliberate reconfiguration after moving often yields the best long-term results.
What to tell the new homeowner or property manager
Provide a concise handover that includes a brief description of the thermostat’s setup, its current wiring orientation, and any known quirks. Include tips on how to adjust schedules for seasonal changes and how to access key features like energy reports and remote access if applicable. If you left the original settings intact for the new occupant, consider exporting a backup of your schedules and preferences so they can adapt quickly. Clear communication reduces the risk of misconfigurations and ensures the new resident can optimize comfort and energy use from day one.
Offer to share a quick troubleshooting guide for common issues (like Wi‑Fi drops or scheduling conflicts) and provide contact information for the HVAC pro if professional help is needed. A thoughtful handoff demonstrates consideration and reduces the probability of post-move service calls.
Environmentally responsible disposal or donation when you don’t take it
If you’re not taking the Nest thermostat, consider donating it to a community organization or recycling it through an electronics program. Many components can be recycled, and proper disposal helps minimize e-waste. Do not simply toss electronic devices in the trash, as they may contain materials requiring special handling. Check local regulations for electronics recycling and consider whether a refurbished unit could benefit someone else.
Before disposal, perform a final reset to protect personal data and remove any linked accounts. If the device is still functional, a user-friendly disassembly and recycling process will ensure the device’s materials are reclaimed responsibly. Thermostat Care emphasizes that eco-conscious disposal is part of responsible moving.
Common move-day scenarios and troubleshooting
Move day can involve a few unexpected scenarios: the HVAC system might be slightly different in the new home, or the thermostat could fail to connect to Wi‑Fi after installation. Begin with a quick power cycle and re-check wiring connections. If the thermostat won’t respond, confirm power is on at the breaker and review the wiring labels. If necessary, re-run the initial setup steps and re-establish the Nest account pairing. For persistent issues, consult a qualified HVAC technician.
Troubleshooting tips include verifying that the thermostat is receiving power, ensuring the C-wire is connected if required, and confirming that the Wi‑Fi network is stable. Keeping a simple diagnostic checklist handy will help you resolve most issues quickly and reduce downtime in the new home.
Quick move checklist: a practical at-a-glance guide
- Decide whether to reuse or leave behind the Nest thermostat.
- Power down at the breaker and remove the device safely.
- Label wires, take photos, and store small parts in a labeled bag.
- Pack securely in original box or with protective material.
- Reinstall in the new home and run the setup, or reset and hand off to new occupants.
- Inform the new homeowner or property manager with a concise summary.
- Consider eco-friendly disposal if not taking the device.
- Keep a simple troubleshooting plan for move-day issues.
Authoritative sources and further reading
For deeper guidance on safe handling of smart thermostats and home wiring, consult established resources such as government and university publications:
- Energy.gov: Heating, ventilation, and air conditioning safety and efficiency tips
- NIST.gov: Electronic device handling and grounded electrical practices
- FTC.gov: Consumer privacy and device account management
Authoritative sources and further reading (continued)
- If you need more formal guidance, refer to your local electrical codes and HVAC guidelines for safe disconnection and reinstallation practices. Keeping up with industry standards helps ensure long-term reliability and safety when moving devices like the Nest thermostat.
Tools & Materials
- Screwdriver (Phillips #1 or #2)(Needed to remove mounting screws)
- Labeling supplies (masking tape or wire labels)(Label wires with terminals for reassembly)
- Camera or smartphone(Capture wiring layout before disconnecting)
- Small labeled bag for screws(Keep mounting screws organized)
- Bubble wrap or anti-static packing(Protect the thermostat during transit)
- Original Nest packaging (if available)(Best protection; use if available)
- Desiccant packs(Moisture protection for long moves)
Steps
Estimated time: 90-150 minutes
- 1
Power down and prep wiring
Turn off power at the main breaker to prevent electric shock and equipment damage. Verify absence of power with a tester if available. This step ensures you can handle wires safely and preserves the integrity of the thermostat and HVAC system.
Tip: Always double-check that the breaker is off before touching any wires. - 2
Remove the faceplate
Gently detach the Nest faceplate from the mounting base. Set the faceplate aside where it won’t be scratched. This step exposes the mounting plate without risking damage to the display.
Tip: Take a photo of the faceplate alignment for accurate reattachment later. - 3
Document wiring with photos
Use your camera to capture each wire’s terminal and color. Label each conductor with its corresponding terminal so reassembly is straightforward. This documentation saves time and helps avoid wiring mistakes in the new home.
Tip: Create a quick wire-map with colors and letters on a sticky note near the thermostat. - 4
Disconnect the mounting plate and remove thermostat
Unfasten the mounting plate screws and gently pull the thermostat away from the wall. Keep wires connected only if you plan to reuse; otherwise, disconnect them securely. Handle with care to prevent wall damage or broken connectors.
Tip: If a wire is stubborn, re-check label alignment before forcing a disconnect. - 5
Store screws and components
Place all screws and small parts in a labeled bag and store with the thermostat. Keeping these together prevents misplacement and speeds up reinstallation at the new home.
Tip: Use a temporary container labeled 'Nest kit' to keep everything organized. - 6
Pack the unit securely
Wrap the thermostat and mounting plate in bubble wrap, and place them in a protective box. Add extra padding to prevent movement inside the box during transit. Clearly label the box as fragile and include care instructions.
Tip: Consider the nest’s exposure to temperature changes; keep packing in a climate-controlled space during travel. - 7
Transport and arrive ready to reinstall
Move the box to your new home, keeping it in a cool, dry area until you’re ready to install. Upon arrival, inspect for any damage before you open. This reduces the risk of attempting a compromised installation.
Tip: Do not reassemble in uncontrolled environments; a calm workspace improves accuracy. - 8
Reinstall and set up in the new home
Mount the base, reconnect wires to their labeled terminals, and reattach the faceplate. Power on at the breaker and follow the on-screen prompts to set up Wi-Fi and return to normal operation. Confirm that HVAC control responds to temperature changes.
Tip: If the system doesn’t respond, re-check wire placement against your photos. - 9
Factory reset and account management
If you’re not transferring ownership, perform a factory reset to remove your account data and credentials. If you’re keeping the device, set up a new account or re-link to your existing Nest ecosystem, then tailor schedules to the new home.
Tip: Always reset if you’re handing the device to someone else to protect your data.
Questions & Answers
Should I remove my Nest thermostat before moving?
Yes. Removing and packing reduces the risk of damage and protects your data. If you’re reusing it, reset before reinstalling.
Yes—it's best to remove and pack it, and reset if you’re reusing it.
Can I reuse the Nest thermostat in my new home?
Yes, provided the HVAC wiring is compatible. Reconnect wires to their labeled terminals and complete the setup in the new space.
Yes, you can reuse it if the wiring and HVAC compatibility are good.
Do I need to factory reset before moving?
Factory reset is recommended for privacy and clean setup in the new home. It removes your account and saved data.
Factory reset is recommended when moving to protect your data.
What about wires and the C-wire?
Label wires and note their terminals. Check whether a C-wire is needed in the new home and reconnect accordingly.
Label wires, check if you need the C-wire, and reconnect correctly.
What should I tell the new homeowner?
Provide a brief setup guide, any notable quirks, and the HVAC system details to help them acclimate quickly.
Share a quick setup guide and HVAC info with the new owner.
Are there safety concerns during moving?
Always cut power at the breaker before handling wires and avoid touching live components.
Safety first: turn power off and handle wiring carefully.
Watch Video
What to Remember
- Plan reuse or transfer before moving day.
- Power down and label wires for safe reinstallation.
- Pack the thermostat securely to prevent damage.
- Reset and reconfigure in the new home for best results.