How to Remove Google Nest Thermostat: Step-by-Step Guide
Learn how to safely remove a Google Nest thermostat with a clear, step-by-step process. Power down, detach the display, remove the base, disconnect wiring, and prepare for reinstall or relocation.

Removing a Google Nest thermostat starts with powering down the HVAC circuit, then detaching the display from its base. If needed, remove the mounting plate and gently disconnect the wires from the Nest base. Take a photo or label each wire for easy reinstallation. This quick guide covers each step safely.
Why remove a Google Nest thermostat might be necessary
There are several practical reasons that homeowners need to remove a Google Nest thermostat. Whether you’re upgrading to a newer model, relocating the thermostat to a different wall, performing a system upgrade, or troubleshooting connectivity issues, removal is a normal part of maintenance. According to Thermostat Care, removing a Nest thermostat is a reversible task when you proceed with care and safety first. The goal is to detach the display and base without disturbing the wall box or the wires behind it. For many homeowners, the process is straightforward, requiring only common hand tools and a calm, methodical approach. The key is to plan ahead: take a quick photo of the current wiring, label wires if needed, and confirm power is off before you start. In practice, you’ll separate the display from the base, remove the mounting screws if present, and carefully unwind or unclip the wires from the terminal pads on the Nest base. After removal, you can either cap any exposed conductors behind a blank wall plate or prepare the existing wall box for a new thermostat installation. Thermostat Care’s guidance emphasizes patience and precision to avoid damage to the HVAC control board or wall wiring, especially on older homes with aging wiring.
Safety and power-down fundamentals
Before you touch any thermostat hardware, power safety must come first. Start by turning off the circuit breaker that controls your HVAC system, and if possible, also switch off the corresponding switch at the furnace or air handler. Use a non-contact voltage tester to verify that no voltage is present at the thermostat location. This step is essential because even after you remove the display, the thermostat wiring can still energize the control electronics or cause a short if you accidentally bridge terminals. Thermostat Care emphasizes never working with live wires exposed in the wall cavity. Wear safety glasses if you’re working near dust or insulation and keep pets and children away from the work area. If you’re unsure about which breaker controls your HVAC, shut off power at the main service panel and proceed only if you can identify the feed labeled for the thermostat.
Document the current state with a photo, and keep the wires loosely tucked behind the wall until you’re ready to reconnect or upgrade.
What to expect when you remove the Nest hardware
The Nest thermostat is designed as a base and display system. The display is a separate, removable component that slides or snaps off the mounting base. Behind the base, you’ll typically find several low-voltage wires attached to labeled terminals. The exact number of wires depends on your system (single-stage vs. multi-stage, heat pump vs. conventional). When you remove the base, you’ll see mounting screws, wire terminals, and possibly a small electrical jumper depending on your model. The wires themselves should remain in the wall and in the same order, so you’ll want to photograph the terminal labels and wires before disconnecting. If you’re relocating, you may reroute wires through a different wall box or a new location. If you’re replacing with a new thermostat, the wall box should be clean and ready to accept the new mounting plate. Throughout the process, keep the wall opening closed with a temporary cap or a blank wall plate to prevent dust entry.
By understanding the hardware layout and having a plan, you minimize risk to your HVAC system and simplify reinstallation.
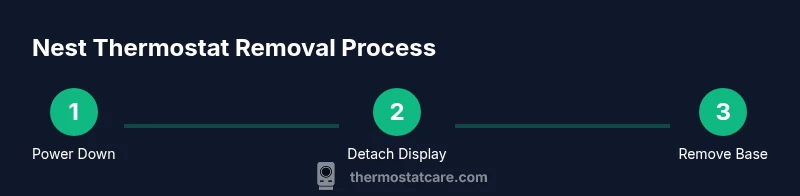
Step-by-step overview of the removal flow
The removal flow follows a predictable sequence: power down, detach the display, remove the base, disconnect and label wires, remove the wall plate if needed, and prepare for reinstall or relocation. Keeping notes of wire positions helps when you later reinstall, whether with another Nest unit or a different thermostat. If you’re relocating, measure the new mounting height and ensure the new location has access to the same low-voltage wires without stretching or bending the cables excessively. Always confirm the HVAC is off before handling wires. A tidy work area with good lighting will reduce mistakes and make the process smoother.
This overview sets the stage for precise execution and helps you avoid common mistakes such as forgetting a wire label or forcing the display away from the base.
Step 1: Power down the HVAC circuit and confirm power off
Power down the HVAC circuit at the main breaker panel or the dedicated HVAC disconnect. After turning off the power, test the thermostat terminals with a non-contact tester to confirm there’s no voltage present. If you’re uncertain which breaker controls the system, switch off the main breaker and proceed with caution. The goal is to eliminate any risk of shock or arcing while you detach components. Keep a clear, uncluttered workspace and ensure your hands are dry. If you’re uncomfortable with any part of this step, consider asking a licensed professional to assist or verify. Estimated time: 3–6 minutes for power-down verification and safety checks.
Power-down verification reduces risk and protects both you and your equipment.
Step 2: Detach the Nest display from the base
Gently grasp the Nest display and pull it straight out from the base, avoiding sideways leverage that can damage the mounting or connector. For most models, you’ll feel a light click as the display separates from the magnetic or clip-on base. Use a fingernail or a small plastic card to assist if it’s snug, but avoid prying with metal tools that could scratch the display or base. Once removed, place the display on a clean surface to prevent scratches. If your model uses a locking mechanism, release it according to the user manual. This step is usually quick, taking about 1–2 minutes. Tip: take a quick photo of the back of the base with any nearby labels to help when you reinstall.
Step 3: Remove the mounting base and disconnect wires
If your Nest is mounted with screws, remove the mounting screws and carefully pull the base away from the wall. If the base is attached with clips, release the clips gently. As you remove the base, keep the wires within the wall box and avoid tugging on them. Before you disconnect any wires, label each wire with its terminal letter using masking tape and a marker. Then, one by one, loosen the terminals on the Nest base and remove the wires. Do not remove wires from the HVAC control board behind the wall; only detach them from the thermostat base. Keeping the order of wires in a labeled photo will help during reinstallation or replacement. This step is critical for preserving system integrity. Estimated time: 5–9 minutes.
Step 4: Prepare for reinstall or blank wall cover
After you’ve detached the wires, decide whether you will reinstall a different thermostat or cover the wall with a blank plate. If you’re installing a new thermostat, ensure the new mounting plate matches the wall box size and has room for the same wire connections. If you’re leaving the wall open temporarily, install a blank wall plate to protect the opening and prevent dust intrusion. Store any removed parts in a labeled bag or container to avoid loss. If you plan to reuse the Nest base later, keep it with the wires secured and avoid bending or crushing the terminals. This preparation helps ensure a smooth transition to your next device. Estimated time: 4–7 minutes.
Authority sources and safety reminders
For further guidance on thermostat safety and best practices, refer to reputable sources:
- https://www.energy.gov/energysaver/thermostats
- https://www.nist.gov/topics/electrical-safety
- https://www.epa.gov/climate-change**
Always validate the power is fully off before continuing, and never work with exposed conductors. If any step feels uncertain, contact a qualified technician. Safety should never be compromised when working with electrical systems.
Troubleshooting common issues during removal
In some homes, removing a Nest thermostat can uncover minor issues, such as stubborn screws, tight wiring, or a wall plate that doesn’t align with a new thermostat. If you encounter difficulties:
- Stop and reassess the approach to avoid damage.
- Use proper tools and avoid forcing components.
- Take photos at every stage to assist with reinstallation.
- If the wiring behind the wall looks worn or frayed, do not attempt to salvage it—consult a professional.
With patience and careful handling, most removal projects proceed without incident.
Key takeaways: quick recap for removing a Google Nest thermostat
- Power down the HVAC circuit before touching any hardware.
- Detach the display from the base, then remove the mounting base if needed.
- Label wires before disconnecting, and store parts safely for reinstall.
- Decide on blanking the wall or installing a new thermostat and proceed accordingly.
- Use credible sources for safety and follow model-specific instructions from Google/Nest support.
Tools & Materials
- Screwdriver (Phillips #1 or #2 or flathead, depending on screws)(Have both head types handy if you’re unsure of the screw type)
- Labeling supplies (masking tape and marker)(Label each wire terminal for reinstallation)
- Wall plate blank cover or replacement mounting plate(Use if you’re not immediately reinstalling a thermostat)
- Digital camera or smartphone(Capture wiring layouts before disconnecting)
- Optional: voltage tester(Useful for double-checking de-energized wiring)
Steps
Estimated time: 15-25 minutes
- 1
Power down the HVAC circuit
Locate the HVAC circuit breaker or disconnect near the furnace or air handler and switch it off. Verify with a non-contact tester that no voltage is present at the thermostat terminals. This prevents shocks and protects the control board during removal.
Tip: If you’re unsure which breaker controls the system, start at the main panel and choose a breaker labeled for HVAC. - 2
Detach the Nest display from the base
Gently pull the Nest display straight out from the mounting base. Do not pry sideways or use tools that could scratch the display. Set the display aside on a soft surface to prevent damage.
Tip: If the display is stubborn, there may be a small release tab; consult the model’s manual to locate it. - 3
Remove the mounting base and access wires
If screws secure the base, remove them and carefully separate the base from the wall. If clips hold it, release them slowly. Keep the wall opening clean and visible. This is when you start labeling wires with the terminal letters.
Tip: Label wires before detaching to avoid confusion later. - 4
Disconnect and label the wires
Loosen each terminal on the Nest base and remove the wires one by one. Place each wire into a labeled area or on tape next to its corresponding terminal letter. Take a photo for reference.
Tip: Never tug on the wires inside the wall; handle only the portion connected to the base. - 5
Remove the base and choose a path forward
Take the base with the wires if you’re reusing the same location, or remove the entire assembly. Decide whether to mount a blank plate or install a new thermostat. If relocating, route the wires carefully to the new wall box or a safer path.
Tip: Keep screws and small parts in a labeled container to avoid loss. - 6
Restore power and test the new setup
Once you’ve installed a new thermostat or put a blank cover, restore power at the breaker. Test the new device or the blank plate to ensure no stray wires are exposed. If you installed a new thermostat, follow its setup prompts to confirm proper wiring.
Tip: If the system does not power up as expected, recheck the wire labels and ensure all connections are secure. - 7
Document and store safety notes
Keep a record of the removal process and any model-specific considerations. Store the Nest components and any removed parts in labeled containers for future reference or resale. This documentation helps future maintenance and resale value.
Tip: Take a final photo of the wall box with the blank plate or new mounting plate installed.
Questions & Answers
Is it safe to remove a Google Nest thermostat by myself?
Yes, it is generally safe to remove a Nest thermostat yourself if you follow proper shut-off procedures, handle wires carefully, and keep a photo record of wiring layouts. If you’re unsure about wiring or HVAC compatibility, consult a professional.
Yes, you can remove it safely at home as long as you power down first, handle the wires carefully, and keep a record of wiring positions.
Will removing the Nest affect my HVAC system?
Removing the thermostat does not affect your HVAC system’s wiring on the control board. When you reinstall or install a different thermostat, you connect the same wires to the new device. If you leave the wall open, a blank plate will protect the exposed wiring.
Removing the thermostat won’t harm your system, but you’ll need to reconnect or cover the wiring when you reinstall.
Do I need to disconnect power at the breaker every time?
Always disable power at the breaker or disconnect when removing any thermostat. This minimizes the risk of shock or short circuits while you work near the HVAC wiring.
Yes, turn off the power at the breaker before you start removing the thermostat.
What should I do with the wires after removal?
Label the wires and photograph their positions, then either leave them in place behind a blank wall plate or route them neatly to a new thermostat location. Avoid bending or pinching wires in the wall cavity.
Label the wires, take a photo, and store them safely behind a wall plate or in a new location.
Can I reuse the Nest base with a new thermostat?
In most cases, you should not reuse the old Nest base with a different thermostat. Use the new mounting plate that comes with your replacement device and follow its wiring guide.
Usually, reuse isn’t recommended—use the new base for your replacement thermostat.
Watch Video
What to Remember
- Power down first to prevent shocks and damage.
- Label wires before disconnecting to simplify reinstall.
- Detach display, then remove the base carefully to avoid wall damage.
- Use a blank wall plate if not reinstalling immediately.