Can You Move a Thermostat? A Homeowner's Guide
Learn how to safely move a thermostat, with planning, wiring checks, and post-move testing. This educational guide covers safety, mounting, power, and troubleshooting for relocation to improve comfort and energy efficiency.

Yes, you can move a thermostat in many homes, but it requires careful planning around power, wiring, and HVAC compatibility. Before you start, switch off the circuit at the breaker and confirm the new location has an accessible wall cavity and a safe, unobstructed wire run. This quick answer outlines safety checks and the core steps for relocation.
Can you move a thermostat safely?
According to Thermostat Care, relocating a thermostat is a practical option when done safely and with proper checks. Before you touch anything, understand your power source, wire layout, and the HVAC system type. This section lays the groundwork for a safe relocation, covering power shutoff, site evaluation, and environmental factors that influence a successful move. By the end, you’ll know when a relocation makes sense and what to prepare for.
When is moving a thermostat a good idea?
Relocating a thermostat is advantageous when the current spot is biased by sun, drafts, or nearby heat sources that skew readings. If a hallway or living area offers better reach and visibility, relocation can improve comfort. In many homes with open floor plans, moving the thermostat away from a kitchen vent or direct sun ensures more accurate temperature readings. However, think about the distance to the control wiring and the potential need for a C-wire or a power adapter. If your system is older or uses unconventional equipment, reevaluating the thermostat’s compatibility is essential.
Safety and power: what you need to check before you touch anything
Power safety is non-negotiable. Start by turning off the thermostat circuit at the main breaker and use a non-contact tester to confirm the absence of voltage on the wires. Never assume power is off based on a previous test. Inspect the existing cable path for signs of damage, and note any nearby plumbing or gas lines that could complicate wall work. If the thermostat is wired to a humid environment or near heat sources, consider additional clearance. Finally, verify that the new location remains accessible for future maintenance and panel access.
Tools and environment: what you need on hand
Before you dive in, assemble essential tools and a clean workspace. A screwdriver set (Phillips and flathead), wire stripper, electrical tape, a voltage tester, a stud finder, a pencil, label stickers, and a camera or notebook to document wiring are all you’ll need. Keep a small container for screws and a flashlight for dim corners. Work in a dry, well-lit area away from moisture or direct heat. Having a tidy workspace reduces the risk of losing screws or mixing up wires.
Wiring basics you should understand before moving
Most residential thermostats rely on a dedicated 24-volt power supply, carried on a wire circuit that includes a C-wire for constant power. If your new location lacks a C-wire, you’ll need to explore options such as wiring a C-wire from the furnace control board, using a power extender kit, or installing a compatible adapter. Remember that improper wiring can lead to control failures or HVAC damage. If you’re unsure about the color codes or terminal labels (R, C, W, Y, G), refer to the thermostat’s installation guide and your HVAC manual.
Mounting considerations and wall compatibility
Assess both old and new wall cavities. Drywall thickness, stud location, and box depth determine how cleanly the thermostat will mount. If the new location lacks a stud or has limited space, you may need a different mounting box or an extended back box. Always align the thermostat with your eye level for comfortable viewing and button access. If old wiring is a tight fit, do not crimp or pinch; consider running new cable through a safe, code-compliant path.
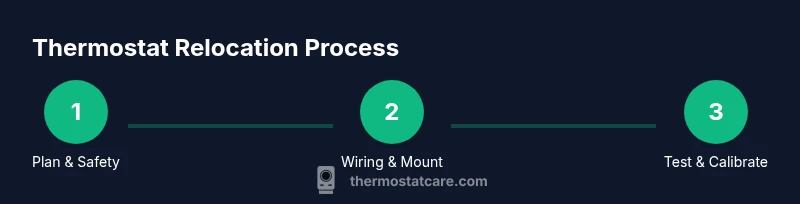
Step-by-step relocation overview (high-level)
This high-level overview emphasizes planning, careful labeling, and safe testing. It’s designed to help you think through the move before doing any disassembly. You’ll rely on the detailed STEP-BY-STEP block for precise actions, but a clear plan reduces mistakes and makes the process smoother.
Temperature readings and calibration after relocation
Once the thermostat is mounted in the new spot, restore power and let the system stabilize for several minutes. Check that the HVAC responds to temperature changes and that the readings align with the actual room temperature. If you notice drift, recalibrate the sensor, adjust the placement away from drafts, and verify that the sensor does not sit behind a vent or behind a door.
Common mistakes and how to avoid them
Common errors include mismatched wire labels, skipping a required C-wire, or forcing wires through a wall without proper wall furring. Avoid moves that place the thermostat in direct sunlight or near heat sources like space heaters. Do not ignore safety warnings: if you smell burning insulation or hear arcing, cut power immediately and seek professional help.
When to call a pro vs. DIY
For simple relocations with standard single-stage systems and accessible wiring, a confident DIYer can complete the task. If the system uses a heat pump, multi-zone setup, or lacks a C-wire at the new location, professional help is recommended. A licensed technician can ensure code compliance and verify that the wiring and equipment will operate reliably after relocation.
Authoritative sources and further reading
For deeper guidance, consult trusted sources on electrical safety and thermostat installations. Energy.gov provides official guidance on thermostats and energy efficiency, while OSHA outlines electrical safety basics for homeowners and technicians. National Institute of Standards and Technology (NIST) resources on building energy efficiency can also offer context for proper placement and performance.
Tools & Materials
- Voltage tester(Non-contact preferred)
- Screwdriver set(Flathead and Phillips, assorted sizes)
- Wire labels(Label each wire as you disconnect)
- Mounting plate/spacer(If the new wall depth differs)
- Stud finder(To locate studs for mounting)
- Camera or notebook(Document existing wiring)
- Electrical tape(Secure wire connections)
Steps
Estimated time: 45-75 minutes
- 1
Power off and verify safety
Shut off the thermostat circuit at the main breaker and use a voltage tester to confirm there is no potential on the wires. Double-check the area for moisture or signs of damage before touching any components.
Tip: Always assume wiring is live until tested; a quick test prevents shocks. - 2
Plan the relocation path
Measure the distance to the new location and note any obstacles or wall features. Confirm the new spot provides easy access to controls and is within reach of the existing wire length or plan for a safe extension.
Tip: Label the planned wire path on the wall to avoid later confusion. - 3
Label and disconnect wires
Carefully remove the thermostat and detach wires one by one, labeling each with its terminal letter. Take a photo of the wiring at the old location for reference during reassembly.
Tip: Keep the screws and wires organized in labeled bags or containers. - 4
Remove mounting plate
Take off the old mounting plate and inspect the wall box for depth and integrity. If the current box won’t accommodate the new location, plan for a new box or spacer.
Tip: Store mounting screws safely to prevent loss. - 5
Prepare the new location
Mark the stud locations, install or adjust the mounting box, and confirm wall depth. Ensure there is enough room for the thermostat base and wiring clearance, avoiding heat sources or vents.
Tip: Use a level to ensure the unit sits straight after mounting. - 6
Run or extend wiring as needed
If the existing cable cannot reach, extend wiring using appropriately rated cable and connectors. Do not mix cable types or bypass safety devices; ensure any new wiring complies with local codes.
Tip: Avoid stretching cables or bending conductors sharply. - 7
Connect wires to the new thermostat
Attach wires to their corresponding terminals at the new location and secure all connections. Re-check the C-wire presence and verify that all labeled wires match the old configuration.
Tip: Reconfirm polarity and terminal integrity before powering up. - 8
Test and calibrate after relocation
Restore power and run a quick test cycle. Check readings, HVAC response, and sensor placement. If readings drift, recalibrate the sensor or adjust the placement away from direct heat sources.
Tip: Test multiple setpoints to ensure stable operation.
Questions & Answers
Can I move a thermostat myself, or should I hire a pro?
For simple relocations with accessible wiring, a confident DIYer can manage. If you’re unsure about wiring, C-wire, or safety, it’s wise to hire a licensed technician.
You can move it yourself if you’re confident with wiring, but if you’re unsure, it’s safer to hire a professional.
Will relocating affect energy efficiency?
A well-placed thermostat can improve energy efficiency by providing accurate readings and faster HVAC control. Poor placement may cause longer cycling or inaccurate temperature readings.
A good relocation can save energy, but a poor placement may waste energy.
What if there’s no C-wire at the new location?
If a C-wire isn’t available, you’ll need to run one from the furnace control board, install a power extender kit, or use a compatible adapter. Each option has implications for warranty and compatibility.
If there’s no C-wire, you’ll need to adjust wiring or use a kit, which may affect warranty.
Can moving a thermostat void the warranty?
Relocating may affect warranty terms depending on the manufacturer and installation method. Check your device documentation and HVAC supplier policies before proceeding.
Check the warranty terms before moving; some moves can affect coverage.
What tools do I need for the move?
Basic tools include a screwdriver set, voltage tester, labels, wire cutters/strippers, a stud finder, and a camera for reference.
You’ll need screwdrivers, a tester, labels, and a stud finder at minimum.
How do I know the new location is safe and accessible?
Choose a spot at eye level, away from direct sunlight, vents, and moisture. Ensure the area remains accessible for future maintenance and button operation.
Pick a spot that’s easy to reach and away from heat or drafts.
Watch Video
What to Remember
- Plan location and power checks before touching wires
- Label wires and document current configuration
- Ensure C-wire availability or an approved alternative
- Test system thoroughly after relocation