Thermostat Sensor Location: Find the Sensor Fast
A practical, homeowner-friendly guide to locating the thermostat sensor, understanding how placement affects readings, and safe steps for testing and adjusting sensor positions to improve comfort and efficiency.

Locating the thermostat sensor starts with identifying your model, removing the front cover, and inspecting the small sensor module positioned near the airflow path or behind the display. Most thermostats place this sensor close to the vent area, tucked inside the housing. A careful peek with the unit powered down will reveal whether the sensor sits behind the screen, to the side, or near an air intake.
Why the thermostat sensor location matters
The thermostat sensor is the tiny device that reads room temperature and informs heating or cooling cycles. Knowing where it sits helps you understand why readings drift and how to correct them. According to Thermostat Care, sensor placement greatly influences reading accuracy and home comfort. If the sensor sits behind curtains, near a heat source, or in a drafty corner, readings can skew high or low, causing your system to cycle more often than needed. In practice, most homeowners notice mismatches when a thermostat sits on an interior wall, far from the living space, or near a sunny window. Understanding the basics of sensor location gives you a reliable starting point for diagnosis and optimization. By the end, you’ll be prepared to check your own thermostat and decide if adjustments are warranted, all while keeping safety top of mind.
How the sensor works in different thermostat types
Thermostat sensors come in several flavors depending on the model. Traditional, non-digital units often rely on a single ambient reading; digital and smart thermostats add calibration features to improve accuracy. Some devices use an internal ambient sensor, while others support external sensors for multi-room readings. In all cases, the sensor’s job is to reflect near-room temperature, not the temperature at a distant wall or sunny window. This matters because placement can dramatically affect comfort and energy use. If you notice frequent temperature swings, review sensor location as a first diagnostic step, then consider calibration or sensor replacement if needed. For 2026, smart thermostats increasingly pair internal sensors with optional remote sensors for better zoning and comfort across living spaces.
Common sensor placements you’ll see in most models
In most thermostats, the sensor sits behind the front panel or near the display for quick access. Some models tuck the sensor behind a vent or within the air intake to probe the room air rather than the wall itself. If your thermostat is mounted on a heat-prone wall (near a radiator, oven vent, or direct sun), the sensor may read artificially warm values, signaling the system to cool more than necessary. Conversely, drafts from open windows or corners can cause under-reading, prompting overly aggressive heating. The exact location varies by brand and model, but the goal remains the same: a representative sample of the room’s air temperature, not the temperature of a nearby heat source.
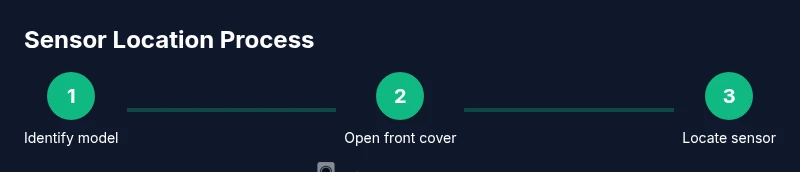
How to safely locate the sensor: step-by-step inspection
Identifying the sensor’s exact spot is easiest after turning off power and removing the front cover. Look for a small bead or film-like element mounted on a plastic holder near the airflow path. Some units place the sensor behind the display, while others position it on the side wall of the housing. Inspect for signs of damage, such as loose wiring or discoloration. If you see any, stop and consult the manual or a professional to avoid electrical hazards. Confirm whether the sensor is clearly accessible and not blocked by dust, fabric, or cabinetry. A clean, unobstructed path around the sensor helps maintain accurate readings over time.
Testing the sensor without causing damage
To test without disassembly, compare the thermostat’s reading with a reliable household thermometer in the same room. Allow a few minutes for stabilization and note any discrepancy. When you access the sensor, gently remove debris with a microfiber cloth and avoid applying liquids near electronic components. If readings are consistently off by more than a few degrees, consider recalibrating if your model supports it, or replacing the sensor if the unit has a dedicated serviceable component. Always refer to the user manual for model-specific calibration guidance and warranty terms.
When to relocate or replace a sensor and what to expect
Relocating a sensor is not a decision to take lightly. If readings remain inconsistent after adjusting placement, you may need a replacement sensor or a different mounting approach recommended by the manufacturer. Expect some models to require professional service for sensor replacement, wiring reassessment, or firmware updates that affect sensing accuracy. In contrast, many homeowners can achieve meaningful improvements by moving the sensor away from heat sources, toward the center of the living space, and ensuring it isn’t blocked by furniture. Always document changes and test readings over several days to confirm stability.
Tools & Materials
- Flashlight(Bright beam to inspect inside the unit)
- Flat-head screwdriver (if needed)(Only use if your cover is screwed; otherwise skip)
- Phillips-head screwdriver(As per model screws)
- Microfiber cloth(Use to gently remove dust from sensors)
- Gloves (optional)(Better grip and protection when handling components)
- Digital thermometer or room thermometer(For quick in-room temperature comparison)
Steps
Estimated time: 15-30 minutes
- 1
Identify model and safety
Power off the thermostat and, if possible, switch off the circuit breaker serving the unit. This minimizes the risk of electrical shock while you inspect the cover. Locate the front cover screws or latches and prepare a clean workspace.
Tip: Taking a quick photo of wiring before you touch anything helps you reassemble accurately. - 2
Remove the front cover
Carefully remove the cover or panel to expose the sensor area. If there are delicate ribbons or connectors, disconnect only what’s necessary and label wires if you must unplug anything.
Tip: Work slowly and avoid prying; damaged connectors can cause calibration issues. - 3
Locate the sensor housing
Find the small bead or film sensor mounted on a plastic holder near the airflow path. Check for dust or obstruction that could affect readings and assess whether the sensor sits in an area representative of the room air.
Tip: If dust is present, gently wipe with a microfiber cloth; never use liquids on electronic components. - 4
Check alignment with airflow
Ensure the sensor faces an opening or is positioned away from direct air streams that could create artificial readings. Move it slightly if the unit allows, keeping the sensor flush with its mounting to avoid wobble.
Tip: Small positional shifts can noticeably impact readings—document any changes. - 5
Reassemble and restore power
Reattach the cover, reconnect any wires you removed, and power the unit back on at the breaker. Give the thermostat a few minutes to recalibrate and reach stability before testing.
Tip: Check that all panels click securely to protect against dust and drafts. - 6
Test readings and observe changes
Compare the thermostat’s readings with a room thermometer after stabilization. If values still diverge, revisit placement or calibration settings per the manufacturer’s guidelines.
Tip: Keep a short log of readings across several hours to confirm consistency.
Questions & Answers
Where is the sensor typically located in a thermostat?
Most thermostats house the sensor near the display or inside the front cover, often along the airflow path. Some models use an external or remote sensor for multi-room readings. Check your manual for the exact position.
Typically near the display or inside the front cover along the airflow path; some models use remote sensors.
How can I test whether the sensor is reading accurately?
Compare the thermostat reading with a reliable room thermometer placed in the same space and allow a few minutes for stabilization. If the numbers don’t align, recalibration or sensor replacement may be needed.
Compare to a room thermometer and let it stabilize; adjust if needed.
Is it safe to relocate a thermostat sensor?
Relocating should be done only if the manufacturer approves exact sensor placement. Improper relocation can affect readings and may void warranties. Consider professional help if you’re unsure.
Relocating can affect performance and warranties—consult the manual or a pro.
Do all thermostats have internal sensors?
Most thermostats have an internal ambient sensor; some models support external sensors for better zoning. Always verify with your model’s documentation.
Most have an internal sensor; some models offer external sensors.
What should I do if readings are inconsistent after moving the sensor?
Revert to a known good placement, check calibration, and consider replacing the sensor or contacting support if readings remain off. Document changes for reference.
If readings stay off, revert placement, check calibration, and seek support if needed.
Watch Video
What to Remember
- Identify sensor position and model before inspection
- Blocked or sun-exposed placements skew readings
- Safe testing uses room thermometer comparison
- Small sensor moves can improve accuracy