Thermostat Stuck Closed Quick Fix: A Practical DIY Guide
Learn a safe, practical thermostat stuck closed quick fix with step-by-step guidance from Thermostat Care. Diagnose causes, gather tools, and decide when to replace today.

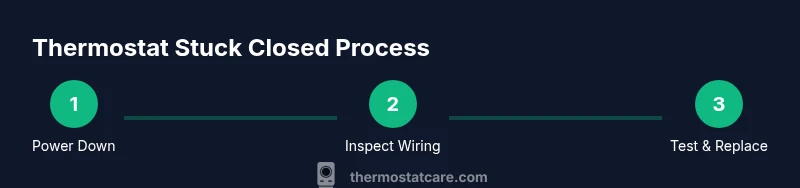
By safely diagnosing and addressing a thermostat stuck closed, you can restore heating control without costly service calls. Start by powering down all HVAC circuits, inspecting wiring connections, and testing the switch with basic tools. This quick guide walks you through a safe, practical thermostat stuck closed quick fix. Follow the steps, verify results, and know when to replace instead of repair.
What 'thermostat stuck closed' means and why it happens
A thermostat that is described as stuck closed typically refers to the switching contact or internal lever failing to open when heat or cooling is needed. In practical terms, a closed contact can keep the HVAC system energized even when the user has not demanded heat, leading to continuous operation, energy waste, and potential wear on equipment. A thermostat stuck closed quick fix is often possible with basic troubleshooting and careful power-down procedures. According to Thermostat Care, most cases come down to three categories: a simple mechanical jam, a wiring fault, or a failed sensing element. These causes are common across many brands, so the same approach—power down, inspect, test, and replace if needed—applies regardless of model.
In many homes, you’ll notice signs before a complete failure: the furnace cycles too frequently, the home becomes warm unevenly, or the thermostat display behaves erratically. If you catch the issue early, you can often solve it without replacing the entire thermostat.
Safety first: power off, lockout, and precautions
Safety is non-negotiable when working with electrical components. Before touching any thermostat or furnace wiring, cut power to the HVAC system at the main service panel and, if possible, at the thermostat itself. Use a non-contact voltage tester to confirm there is no live voltage on any exposed conductors. Do not rely on a single test—double-check and keep the power disconnected during inspection. If you smell burning, see melted insulation, or notice scorch marks, stop immediately and call a licensed electrician or HVAC pro. Personal protective equipment like safety glasses and insulated gloves is recommended, and keep the work area dry. Thermostat work in damp basements or humid garages carries extra risk and should be handled with extra caution.
As you proceed, maintain clear notes of wire positions and take photos before disconnecting anything. This habit helps ensure you can reconnect correctly even if you are new to wiring diagrams. The Thermostat Care team emphasizes that reduced risk comes from a controlled, deliberate approach rather than rushing through the steps.
Common causes of a thermostat stuck closed
There are several reasons a thermostat might become stuck closed. A simple mechanical jam inside the thermostat body can keep the contact closed. Loose or corroded wiring can cause the switch to stay energized. A damaged sensor, damaged terminal blocks, or a burnt contact on the control board can also produce a stuck condition. Debris, dust, or pet hair inside the wall cavity can physically obstruct a lever orswitch, especially in older models. Finally, a faulty relay on the HVAC control board can create a condition that looks like the thermostat is stuck closed from the user’s perspective. Identifying the most likely cause helps you decide whether you can safely fix it or should seek professional help.
Tools and materials you may need (and what to gather first)
Before you begin, assemble essential tools to avoid mid-task trips to the hardware store. Having these at hand will keep you organized and reduce the risk of mistakes:
- Non-contact voltage tester (essential for confirming power-off state)
- Screwdrivers (Phillips and flathead; essential for panel removal and terminal work)
- Multimeter (useful for testing voltage and continuity; optional if you lack one)
- Replacement thermostat (only if testing shows the thermostat is faulty)
- Camera or smartphone (to document wiring positions before disconnecting)
- Electrical tape or wire nuts (for safe reconnection and insulation)
- Safety gear (glasses and insulated gloves if available)
If you’re unsure about any tool or step, err on the side of safety and proceed with professional help. The goal is to avoid creating additional hazards as you troubleshoot a stuck thermostat.
Step-by-step overview before you dive in
A structured plan helps you diagnose a thermostat stuck closed efficiently. Start with verifying power is off and confirming no voltage on conductors. Then inspect the thermostat’s faceplate and wiring, looking for loose connections or damaged insulation. If the device uses a mechanical switch or lever, test its motion and ensure no obstruction exists. If you find damaged components or dubious readings after testing, replacement is the safest next step. Finally, reassemble, restore power, and verify the system responds to temperature changes as expected. This overview sets the stage for the detailed steps that follow.
Step-by-step: detailed actions (one clear action per step)
-
Cut power and verify safety: Turn off the HVAC circuit at the main breaker and the thermostat if possible. Use the non-contact tester to confirm no live voltage on exposed conductors. Leave power off while you inspect and remove the thermostat faceplate. Pro tip: label wires with small tape or a photo to ensure correct reassembly. Estimated time: 5-10 minutes.
-
Remove cover and inspect wiring: Gently remove the thermostat cover and check that each wire is firmly seated in its correct terminal. Look for loose screws, frayed insulation, or corroded terminals. If you find a loose connection, reseat it securely and take a photo of the terminal layout. Pro tip: never force a wire; if it won’t seat, there may be a damaged terminal. Time: 5-15 minutes.
-
Check the mechanical switch/levers (if present): Some thermostats include a manual heat/cool switch or lever. Make sure it moves freely and is not stuck in a closed position. If the lever is sticky, operate it gently with insulated pliers or a screwdriver handle edge. Pro tip: a stuck lever may indicate a worn internal part that needs replacement. Time: 5-10 minutes.
-
Test power and continuity with a meter (optional): If you have a multimeter, measure the voltage between R and C (or R and W) when the thermostat is in a call state and when it is idle. A lack of proper voltage or a shorted path can point to a faulty control board or wiring issue. Pro tip: if you’re unsure how to read a meter, stop and consult a professional. Time: 10-20 minutes.
-
Clean and reseat components: Remove any visible dust or debris around terminals and carefully reinsert wires. If you find signs of corrosion, replace the affected terminal or wiring as needed. Pro tip: use a small brush and avoid applying liquids near electrical contacts. Time: 5-15 minutes.
-
Decide on replacement vs repair: If the thermostat or control board shows obvious damage or if testing suggests a failure beyond the thermostat body, replacement is the prudent choice. Ensure you choose a model compatible with your HVAC system and wiring. Pro tip: keep a photo and model number handy for purchasing the right unit. Time: 10-20 minutes.
-
Restore power and test: Reconnect all connections, replace the faceplate, and turn the power back on at the main breaker. Let the system respond to a temperature demand and observe for normal cycling. Pro tip: test both heat and cool calls to ensure full functionality. Time: 5-10 minutes.
How to troubleshoot: when to replace vs repair
Not every thermostat issue can be repaired—some symptoms point to a faulty sensor, worn contacts, or a damaged control board. If you observe burnt smells, visible scorching on wiring, persistent erratic behavior after reassembly, or if voltage readings are outside expected ranges, replacement is the safer choice. Replacing with a modern, compatible thermostat can enhance reliability and energy savings. In contrast, if the issue is isolated to a loose wire, a simple reseat and cleaning may restore function without a full replacement. The key is to document symptoms and test results so you can make an informed decision.
Aftercare: testing, verification, and documentation
After completing the fix or replacement, test the system comprehensively. Run a heat cycle and a cool cycle, observe the thermostat’s display, and listen for any unusual noise from the HVAC unit. Confirm that the temperature setpoint is respected and that the system responds promptly to changes. If you have a smart thermostat, verify connectivity and app status as part of aftercare. Document the steps you took, the parts replaced, and any readings you recorded for future reference. Ongoing monitoring for the next 24-48 hours helps catch intermittent issues early.
Warranty, guarantees, and when to call a pro
If your thermostat is under warranty, consult the manufacturer’s terms before performing any DIY work. Some warranties require professional installation or servicing to remain valid. If you encounter conflicting wiring colors, a non-standard HVAC setup, or you’re uncomfortable working with live circuits, it’s wise to call a licensed HVAC technician. Thermostat Care suggests using a professional in cases of high risk, such as older homes with unknown wire configurations or when the control board is suspected to be the fault.
Tools & Materials
- Non-contact voltage tester(Verify power is truly off before touching wires)
- Screwdrivers (Phillips and flathead)(For panel removal and terminal work)
- Multimeter(Testing voltage and continuity (optional if not available))
- Replacement thermostat(Only if tests indicate thermostat fault)
- Camera or smartphone(Document wiring positions before disassembly)
- Electrical tape or wire nuts(For safe reconnection and insulation)
- Safety gear (glasses, insulated gloves)(Personal protection during work)
- User manual or wiring diagram(Reference for model-specific terminals)
Steps
Estimated time: 60-90 minutes
- 1
Cut power and verify safety
Turn off the HVAC circuit at the main breaker and at the thermostat if possible. Use a non-contact tester to confirm no live voltage on exposed conductors. Keep power off while inspecting and removing the thermostat faceplate.
Tip: Label wires as you disconnect so you can reconnect correctly. - 2
Remove cover and inspect wiring
Gently remove the thermostat cover and check all wires are firmly seated in their terminals. Look for loose screws, frayed insulation, or signs of corrosion on terminals.
Tip: Take a photo of terminal layout before disconnecting anything. - 3
Check the mechanical switch/levers
If your model has a heat/cool switch or lever, ensure it moves freely and is not stuck in a single position. Clean gently if needed and reseat.
Tip: Use insulated tool handles to avoid contact with metal parts. - 4
Test power and continuity (optional)
With a multimeter, measure voltage between R and C (or R and W) when calling for heat/cool and when idle. Look for expected voltage and continuity ranges according to your wiring diagram.
Tip: If unsure about readings, seek professional help. - 5
Clean and reseat components
Wipe away dust near terminals and reseat wires firmly. If you see corrosion, replace the affected terminal or wiring as needed.
Tip: Avoid liquids near electrical contacts. - 6
Decide on replacement vs repair
If you see obvious damage or readings indicate a fault beyond the thermostat body, replacement is safer and often more reliable long-term.
Tip: Choose a model compatible with your HVAC system and wiring. - 7
Restore power and test
Reconnect everything, replace the faceplate, and restore power at the main breaker. Test heat and cool calls to confirm normal operation.
Tip: Allow a few minutes for the system to settle and monitor for anomalies.
Questions & Answers
Is it dangerous to fix a thermostat stuck closed myself?
DIY work on a thermostat can pose electrical hazards if power is not fully disconnected. Always shut off power at the main breaker and use safe tools. If unsure, contact a professional.
Power off the system and use the right tools. If you're unsure, it's safer to call a professional.
Can a thermostat stuck closed damage my HVAC system?
Yes, continuous energizing of the furnace can cause overheating or wear on components. Safe troubleshooting with power-off steps helps prevent damage. If unsure, seek professional help.
Continuous energizing can risk damage; stop and seek help if uncertain.
Should I replace the thermostat or call a pro?
If tests indicate the thermostat itself is faulty, replacement is often the simplest fix. If wiring or control board shows damage, a pro is advisable.
Replace the thermostat if it’s faulty; otherwise call a professional for wiring issues.
What tools do I need for a thermostat stuck closed fix?
Common essentials are a voltage tester, screwdrivers, and a multimeter. A replacement thermostat is optional unless you’ve diagnosed a fault.
You’ll usually need a tester, screwdrivers, and possibly a multimeter.
How long does a thermostat stuck closed fix take?
Most DIY fixes take 45-90 minutes depending on model and access to wiring. Replacements may extend the timeline by another 30-60 minutes.
Expect around one to two hours for a typical fix.
When should I stop and call a pro?
If you encounter burnt wiring, melted insulation, or if readings indicate a faulty control board, stop and contact a licensed technician.
If you see burning or suspect a board fault, call a pro.
Watch Video
What to Remember
- Power off before any inspection or disassembly
- Document wiring positions to ensure correct reassembly
- Dirt, corrosion, or loose connections are common culprits
- Replace the thermostat if testing shows fault or damage
- Test both heat and cooling calls after reassembly