How to Fix Thermostat Stuck Open: A Homeowner's Guide
Learn how to diagnose and fix a thermostat stuck open. This practical, step-by-step guide covers safety, wiring checks, calibration, and replacement options for homeowners.

Goal: fix a thermostat stuck open by safely diagnosing power, wiring, and calibration issues, then restoring normal operation. You’ll need basic tools, a spare thermostat or sensor, and a multimeter. This step-by-step guide helps homeowners troubleshoot common causes, verify safe operation, and decide when replacement is best.
Understanding a Thermostat Stuck Open
When a thermostat is stuck open, the control circuit remains open and the heating system may fail to start, leaving spaces cold and wasting energy. This situation differs from a thermostat stuck closed, where the system runs continuously. For homeowners, a stuck-open condition is a sign that the thermostat either isn’t calling for heat properly or isn’t communicating correctly with the furnace or boiler. Common symptoms include little or no heat coming from vents when a call for heat is made, longer cycle times without reaching setpoint, and a persistent cold room even after thermostat adjustments. The root causes can be electrical (loose wires or a failing transformer), sensor-related (drift or damage), or software/calibration issues. According to Thermostat Care, a misbehaving thermostat can usually be tackled by careful, safety-conscious checks rather than immediately replacing equipment. The goal of this guide is to help you identify whether the problem is a simple fix or if a replacement is warranted, saving time and avoiding unnecessary service calls.
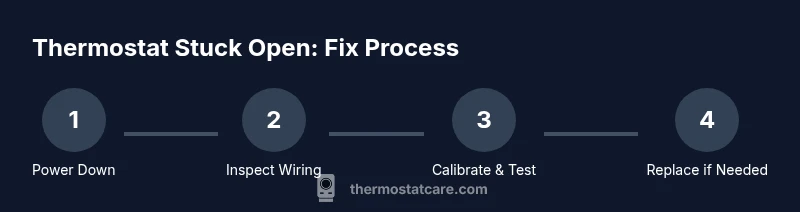
To set expectations: you’ll work step by step through safety checks, wiring inspection, sensor calibration, and a decision point about replacement. By the end, you should know the likely cause and whether you can safely complete the repair yourself or if professional help is the smarter option.
Safety First: Power Down and Precautions
Before touching any thermostat wiring or components, power down the system completely. Start by turning off the circuit breaker that feeds both the thermostat and the furnace or boiler. If your system uses a gas furnace, consider shutting off the gas supply as an extra precaution, though this is often unnecessary for basic thermostat work. Never assume power is off; verify with a non-contact voltage tester on exposed terminals to confirm zero energy at the thermostat. Safety cannot be overstated: working on live wiring can result in electric shock, equipment damage, or fire risk. Keep pets and children away from the work area, use a headlamp or flashlight if lighting is poor, and work on a dry, clean surface. If you smell gas, hear popping noises, or see sparks, leave the area immediately and call a professional. Once power is confirmed off, proceed with the inspection using the proper tools and protective gear.
To stay organized, gather the necessary tools and a camera or phone to document wiring positions before you disconnect anything. This becomes a valuable reference if you need to reassemble the wiring later.
Tools and Materials You’ll Need (and Why)
Having the right toolkit not only speeds things up but also reduces the risk of miswiring. You’ll use these items to inspect, verify, and safely reset or replace components. Start with essential tools and then add optional items as needed:
- Screwdriver set (Phillips and flathead) — Required. Used to remove the thermostat faceplate and terminal screws for wiring inspection.
- Multimeter — Required. Essential for checking voltage and continuity to rule out power issues or sensor faults.
- New thermostat (compatible with your HVAC system) — Required. If the existing unit is faulty or out of date, a replacement is the most reliable fix.
- Wire nuts and electrical tape — Required. Used to safely cap and tidy any exposed conductors if you need to disconnect a wire temporarily.
- Non-contact voltage tester — Optional. Helpful for quick power checks without touching wires.
- Safety gloves — Optional. Provides grip and protection when handling metal components or sharp edges.
Having these items on hand lets you work efficiently and safely, reducing the chance of damage to equipment or personal injury. If you lack a key tool (for example, a multimeter), consider borrowing from a neighbor or purchasing a basic model from a hardware store for the job.
If you’re unsure about any step of this process, consider pausing and consulting a professional. The goal is to fix the thermostat without compromising safety or the heating system.
Diagnostic Pathway: Five Common Causes of a Thermostat Stuck Open
To diagnose a stuck-open thermostat, think about power, sensors, and wiring. Here are the five most common root causes, ranked from easiest to most complex to verify:
- Dead or weak battery (for non-wired thermostats) and sensor drift. A digital thermostat depends on proper power; a failing battery or sensor drift can cause incorrect readings and miscalls for heat. If the battery is old, replace it and monitor performance.
- Loose, corroded, or damaged wiring. Wires that aren’t seated firmly in terminal screws can cause intermittent contact or no call for heat. Inspect all terminals, reseat each wire, and ensure screws are tight.
- Incorrect calibration or programmed hold settings. Many thermostats contain hold or setback features that can prevent heat from engaging at the expected time. Check schedules and reset to the manufacturer’s defaults if you’re unsure.
- Faulty 24V power supply or transformer issues. The furnace and thermostat rely on a stable 24-volt supply. If the transformer is weak or failing, the thermostat may not receive enough power to call for heat.
- Faulty thermostat control board or internal sensor. When other checks fail, the problem may lie within the thermostat’s internal circuitry. Replacing the thermostat is often the simplest solution in this scenario.
If you identify any of these conditions during your inspection, you’ll know where to focus your next steps and how to prioritize replacement versus repair. Thermostat Care emphasizes a cautious approach: start with safe, reversible checks, then move to component-level tests as needed.
Testing the Wiring and Power: Safe Checks and Steps
Testing wiring and power is where you translate theory into a practical diagnosis. Start with the simplest checks before touching terminals that could energize critical components. First, ensure the thermostat’s wires are clean, undamaged, and properly inserted. Remove the faceplate, unplug the wiring harness if present, and visually inspect for bent pins or corroded connectors. Re-seat connections firmly and consider replacing any damaged wires or screws. After reseating, reattach the faceplate and power the system back on to observe whether the heat call is restored.
Next, verify the 24V power supply by measuring between R and C with the system powered. A healthy circuit should show a stable voltage in the expected range for your unit (check the thermostat manual). If the voltage is low or fluctuating, the issue may lie with the transformer or the furnace’s control board rather than the thermostat itself. Use your multimeter for this check, and document the readings for future reference. If you cannot obtain consistent readings, or if you smell burning or see smoke, shut everything down and call a professional immediately. By confirming or refuting power supply issues, you can narrow the list of potential causes dramatically.
Finally, test for continuity across critical wires (R to W, R to Y, etc.) only after power is safely removed. This step helps identify broken conductors or damaged insulation that could create an open circuit. If continuity fails, replace the affected wire or the entire thermostat cable. By combining these tests, you gain a clear picture of whether the stuck-open symptom originates in the thermostat, the wiring, or the furnace control system.
Calibrating, Testing, and Re-Verification
Calibration and testing ensure that the thermostat’s temperature readings reflect the actual room conditions and that heat is called for at the right times. If your thermostat offers self-calibration or an auto-diagnose feature, run it after wiring checks. Manually calibrate the temperature setting by placing a thermometer in the living space and comparing it with the thermostat’s reading. If there’s a mismatch, adjust the thermostat’s calibration until the setpoint and actual ambient temperature align. After calibration, place the system in a controlled heating cycle and observe whether the furnace engages and maintains a comfortable temperature.
During this phase, monitor for any signs that the thermostat is still not calling for heat when the setpoint is higher than the room temperature. If the system fails to respond, check the hold settings again and ensure that the mode (heat/can be auto) is correctly selected. If you notice erratic behavior or error codes, consult the manual for code definitions or seek expert assistance. The goal is to establish a consistent, reliable call for heat rather than a temporary workaround.
If, after calibration and testing, the system still does not function as intended, you may be facing a hardware-level issue in the thermostat or the furnace control circuit. In this case, replacing the thermostat with a compatible model is often the most efficient and reliable fix.
When to Replace vs Repair: Making the Right Call
Deciding between repair and replacement can be challenging, especially if the thermostat is older or has a history of faults. If the unit is outdated, frequently malfunctions, or requires multiple component replacements, replacement with a newer model often offers better reliability and efficiency. On the other hand, if the cost of a replacement is high relative to a simple component fix, and the current unit is in good overall condition, a careful repair may be warranted.
Consider factors such as compatibility with your HVAC system, the available wiring (C-wire presence), and the potential for future issues. If the thermostat is a smart model, replacing with the latest version could deliver energy savings and improved control features. Always weigh the total cost of ownership, ongoing maintenance, and the expected lifespan of the unit. Thermostat Care advises homeowners to document each issue, including symptoms, tests performed, and results before deciding on replacement, as this information will be invaluable when discussing options with a technician.
If you choose replacement, ensure the new thermostat is compatible with your heating system, has a suitable power source (batteries vs. power from the HVAC circuit), and supports your preferred features, such as remote scheduling or smart-home integration. A well-matched thermostat can provide long-term reliability and energy efficiency.
Preventative Maintenance to Avoid Sticking Issues
Prevention is simpler than repair. Implement a lightweight maintenance routine that reduces the odds of future sticking problems. Regularly check the thermostat’s mounting location to ensure good air circulation and prevent dust buildup from interfering with sensors. Replace batteries on time in non-wired models, and keep the thermostat free of moisture, grease, or condensation that can corrode terminals. Periodically inspect the wiring connections at the furnace and at the thermostat to catch loose or damaged wires early. Finally, run a quick heat call every few weeks during mild weather to verify that the system responds promptly when called. Small, proactive steps can help maintain reliability and comfort with minimal effort over time.
Real-World Scenarios: What Worked for Homeowners
Most homeowners who faced a thermostat stuck open found success by starting with power-down checks, reseating wires, and replacing the thermostat’s batteries. In several cases, calibrating the temperature reading resolved the mismatch between room temperature and the thermostat’s setpoint, eliminating the confusion that previously led to missed heat calls. In other situations, a failing transformer or damaged wire required replacing the affected component or rerouting a new circuit, after which the thermostat functioned normally. While these examples illustrate common patterns, every home’s HVAC configuration is unique, and your results may vary. The key is a careful, documented process that isolates the fault without taking unnecessary risks.
Next Steps and Quick Start Tips
If you’re comfortable with the steps outlined above, start with the safest, most reversible actions: power down, reseat wiring, and swap batteries if applicable. Keep a written log of what you observe and the steps you take. If at any point you feel uncertain or encounter unfamiliar codes, pause and consult the thermostat’s manual or contact a licensed HVAC technician. A deliberate, patient approach reduces the chance of causing more damage and increases the likelihood of a successful fix on the first try.
Tools & Materials
- Screwdriver set (Phillips and flathead)(Magnetic tip preferred; ensure sizes #1 and #2)
- Multimeter(Set to measure AC voltage or resistance; 2000 ohms or higher)
- New thermostat (compatible with your HVAC system)(Check for C-wire compatibility and platform features)
- Wire nuts and electrical tape(For safe wire terminations and insulation)
- Non-contact voltage tester(Optional safety check before touching wires)
- Safety gloves(Grip and protection when handling metal terminals)
Steps
Estimated time: 45-90 minutes
- 1
Power down and verify safety
Turn off the thermostat at the wall and switch off the furnace circuit at the breaker panel. If you can access the furnace area, shut the power to the unit as an extra precaution. Use a non-contact tester to confirm no voltage is present at exposed terminals before touching anything.
Tip: Double-check with the tester before touching wires; one small spark is enough to cause injury. - 2
Remove the faceplate and document connections
Carefully remove the thermostat cover and note which wires connect to which terminals. Take a photo with your phone for reference. If any wire is loose, gently reseat it in its terminal and tighten the screw snugly without over-tightening.
Tip: Label wires with tape if you’re rearranging terminals to avoid mismatches later. - 3
Inspect and reseat wires
Look for loose, frayed, or corroded wires. Re-seat each wire firmly and replace or trim any damaged conductors. Ensure the R and C wires are intact for proper power delivery, and check that all ground or shield connections are secure as applicable.
Tip: If you see damaged insulation, replace the affected wire rather than tape over the issue. - 4
Check batteries and sensor calibration
If your thermostat uses batteries, replace them with fresh alkaline cells. Calibrate the sensor if your model supports it, aligning the temperature reading with an accurate room thermometer. Confirm that the thermostat’s hold or schedule settings are not inadvertently keeping heat from calling.
Tip: Use a separate room thermometer to verify temperature accuracy during calibration. - 5
Verify 24V power and transformer health
With power off, use the multimeter to check the 24V supply between R and C at the furnace control board if accessible. A weak or fluctuating supply can prevent the thermostat from calling for heat. If the supply looks unstable, inspect the transformer and related wiring or contact a professional.
Tip: Document readings and compare them against the thermostat’s manual or specs. - 6
Test heat call and observe furnace response
Power the system back on and select a heating call. Listen for the furnace ignition or burner activation, and monitor for proper warmth at vents after a few minutes. If there’s no heat, revisit calibration, wiring, and the hold settings; check for error codes on the thermostat display.
Tip: If you hear unusual noises or smell burning, power down immediately and call a pro. - 7
Decide on repair or replacement
If the unit is old or repeatedly failing, replacement may be more cost-effective than repeated repairs. If the issue is limited to a faulty sensor, wiring, or a control board inside the thermostat, replacement of the unit is often straightforward and reliable.
Tip: Keep a log of symptoms, tests performed, and outcomes to guide future decisions.
Questions & Answers
What does a thermostat stuck open mean for my heating system?
A thermostat stuck open generally means the control circuit isn’t calling for heat, so the furnace doesn’t start. This can be caused by wiring issues, a faulty sensor, or calibration problems. Start with power-down checks, then inspect wiring and sensors to locate the fault.
A thermostat stuck open means your furnace may not start when you want heat. Start by safety checks, then inspect wiring and sensors to find the fault.
Can I fix a thermostat stuck open myself, or should I hire a pro?
Many homeowners can perform safe, basic diagnostics like power-down, wiring reseating, and battery replacement. If you encounter 24V issues, gas furnace concerns, or persistent faults, it’s wise to consult a licensed HVAC technician.
DIY fixes work for simple checks, but for 24-volt or gas-related issues, call a professional.
Is it safe to work on a thermostat if I’m not comfortable with electrical work?
If you’re uncomfortable with electrical work, stop and seek professional help. Working on HVAC wiring can be dangerous, especially around 24V circuits and gas appliances.
If you’re not comfortable with electrical work, don’t DIY—get a pro to handle it safely.
When should I replace my thermostat instead of repairing it?
Consider replacement if the unit is old, frequently faults recur, or modern features (like smart controls) offer energy savings. A newer model may be more reliable and efficient in the long run.
If the thermostat is old or keeps failing, replacing with a newer model is often the better choice.
What maintenance helps prevent thermostat sticking in the future?
Regularly replace batteries (for non-wired models), clean dust from the unit, check wiring connections, and run a heating cycle periodically to verify proper operation. Keep the control area dry and dust-free.
Keep it clean, check the wiring, and run a quick heat call now and then to stay ahead of issues.
What should I do if my thermostat display shows a code?
Refer to the thermostat manual for code definitions and recommended actions. If codes persist after basic checks, contact support or a technician for a precise diagnosis.
Check the manual for any codes and call a pro if the issue persists after basic checks.
Watch Video
What to Remember
- Identify power and wiring issues before considering replacement
- Calibrate and test readings to ensure accuracy
- Document symptoms and tests to guide decisions
- Choose replacement when reliability and efficiency justify it
- Regular maintenance reduces future sticking problems