How to Get a Thermostat Unstuck: A Step-by-Step Fix Guide
Learn to safely unstick a thermostat with a practical, DIY-friendly guide covering dial, digital, and smart models. Power-down, inspect wiring, reset, and test—All with clear safety precautions and expert tips.

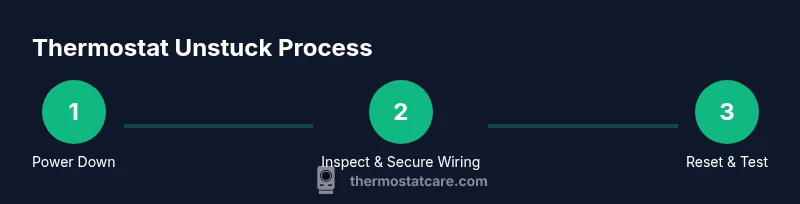
According to Thermostat Care, a stuck thermostat often stems from power issues, calibration drift, or physical jams. This quick guide helps you safely diagnose the cause and follow a proven sequence to unstuck it without damaging wiring. Whether you’re dealing with a traditional dial, a digital screen, or a smart thermostat, start with power-down, then perform a controlled reset, reassembly, and test to restore normal operation. Always follow safety precautions at all times.
Why thermostats get stuck
Thermostats can appear stuck for several reasons, including power interruptions, calibration drift, or mechanical binding. In many homes, aging components or dusty contacts contribute to intermittent behavior that makes it feel like the device is frozen. According to Thermostat Care analysis, most stuck scenarios improve when you isolate the problem source—power, wiring, or the control element—and follow a methodical sequence to reestablish contact and function.
In practice, you’ll separate power, inspect connections, and test the unit in a controlled manner. This approach minimizes risk to the HVAC system and reduces the chance of creating an unsafe condition. It also helps distinguish a simple reset from a full replacement, saving time and money where possible.
Safety first: power down and protect yourself
Before touching any thermostat hardware, shut power to the thermostat at the circuit breaker. This is essential to prevent shock, short circuits, or accidental startup of the HVAC system while you’re inspecting wiring or faceplates. If you’re unsure which breaker controls the thermostat, switch off the main panel and verify the thermostat cannot power on by testing its screen or display after reassembly.
Wear non-conductive gloves if you’re working near exposed terminals, and keep liquids away from electrical components. If you must use tools, use insulated handles and never work with live wires exposed. These precautions protect you and your equipment during the troubleshooting process.
Mechanical dial thermostats: jam sources and fixes
For traditional dial thermostats, common jams arise from debris on the bimetallic strip, a rough adjustment wheel, or a loosely mounted wall plate restricting movement. Gently remove the faceplate without forcing it. Inspect for bent parts or visible debris, then carefully re-seat the dial while rotating slowly to feel for any stiffness. Do not lubricate internal components; many models rely on clean, dry contacts for proper operation.
If you detect a loose screw or mounting plate, tighten it to restore alignment and ensure the mechanism moves freely. If resistance persists after reassembly, set the dial to a mid-range temperature and observe whether the system responds to commanded changes. Persistent stiffness may indicate mechanical wear that warrants replacement.
Digital and smart thermostats: screen freeze and connectivity issues
Digital and smart models can freeze due to corrupted settings, insufficient power, or poor battery connections. Start by removing the thermostat from the wall plate or opening the back panel to access batteries if applicable. Reinsert fresh batteries and reseat the battery contacts to ensure a solid connection. If your unit relies on Wi-Fi, temporarily disconnect and reconnect the network after a reset.
For touch-enabled screens, a long press of a reset or power button often clears a frozen state. If the device shows an error code, refer to the user manual for code-specific steps before attempting a full factory reset. Avoid multiple rapid resets, which can confuse the device’s memory.
Power, wiring, and grounding: ensure connections are solid
A loose wire or a partially disconnected C-wire can cause an apparent unresponsiveness. With power off, remove the thermostat from the wall and inspect the wire terminals for corrosion, fraying, or loose screws. Reseat wires firmly, ensuring each conductor is under its respective terminal clamp. If you’re using a common wire (C-wire), verify it’s connected to the correct C terminal and the HVAC control board.
If you observe any damaged wires, replace them with appropriately rated conductors and re-tighten the terminal screws. Do not wrap wires around screws or use tape as a substitute for a secure connection. After securing wiring, reattach the thermostat, restore power, and test button responses and temperature changes.
Resetting, reassembly, and testing after reattachment
Resetting can resolve calibration drift and memory quirks that make a thermostat seem stuck. Begin by powering down, removing the device, and waiting 30 seconds before reconnecting. Reinstall the faceplate, restore power, and run a basic test: set a target temperature, wait for the HVAC to respond, and observe cycle times. If the unit does not react within a couple of minutes, perform a controlled factory reset if your model supports it.
During testing, note the fan and compressor behavior, along with any unusual noises or delays. If you observe the HVAC system cycling abnormally, stop and reassess wiring, or contact a professional. A measured, patience-based approach reduces the risk of misdiagnosis.
When to call a pro and what to expect
If you can’t resolve the sticking issue after a thorough power-down, wiring check, and reset, or if you smell burning insulation, hear sizzling sounds, or detect scorch marks, stop and seek professional help. A licensed technician can diagnose hidden faults in the control board, relay, or wiring harness that aren’t easily visible. Many manufacturers provide service windows and diagnostic steps; ask your technician to verify compatibility with your current thermostat model and HVAC system.
Document the symptoms you observed, including any error codes and the steps you took, to help the technician diagnose quickly. This reduces callback time and improves the chances of a first-visit resolution.
Quick checks you can perform before replacing components
Before replacing major components, perform a few non-destructive checks that can save time and money. Confirm the thermostat’s mounting screws are tight and that the unit sits flush against the wall. Verify that the interior wiring is correctly terminated and that no bare conductors are exposed. If you have a spare, test with a known-good thermostat to determine whether the issue lies with the original unit or the HVAC system.
Tools & Materials
- Non-conductive plastic trim tool(For prying off thermostat faces without damage)
- Flathead screwdriver(Used to remove mounting screws or terminal covers)
- Phillips screwdriver(Alternative screwdriver for screws on some units)
- Replacement batteries(If the model uses disposables; check battery type in manual)
- Digital multimeter (optional)(For checking voltage at circuits or thermostat terminals)
- Electrical tape and wire strippers (optional)(If wiring needs to be inspected and trimmed safely)
Steps
Estimated time: 30-60 minutes
- 1
Power down and remove the thermostat
Turn off power at the breaker that controls the thermostat. Then carefully remove the thermostat from the wall plate to access wiring and mounting screws. This prevents shocks and makes it safe to inspect components.
Tip: Double-check the breaker with a non-contact tester before touching wires. - 2
Inspect for obvious issues
Look for loose wires, corroded terminals, or damaged insulation. Tighten clamps and reseat any loose connections. With mechanical units, check that the dial or slider moves freely without sticking.
Tip: If a wire is loose, press the terminal screw firmly but do not overtighten. - 3
Address mechanical jams on dial units
For traditional dials, remove the faceplate and inspect the mechanism for debris. Gently rotate the dial while watching for smooth movement. Do not lubricate internal parts unless the manufacturer recommends it. Reassemble and test.
Tip: Avoid using oil; it can attract dust and cause future sticking. - 4
Reset digital/smart thermostats
If the display is frozen, reseat batteries (if present) and perform a soft reset according to the model’s instructions. Reconnect to the HVAC system after the reset and observe whether the screen responds and the system cycles correctly.
Tip: Limit resets to one or two attempts in a row to avoid memory conflicts. - 5
Reattach and test
Reinstall the thermostat on the wall plate, restore power, and run a few test cycles. Change the temperature, turn on cooling or heating, and listen for normal operation. If it remains unresponsive, proceed to a factory reset if supported.
Tip: Keep a log of observed behaviors and times for future reference. - 6
Decide on next steps
If issues persist, evaluate whether a replacement unit is more cost-effective than repair, especially for older models. Consult manufacturer guidance for compatibility with your HVAC system.
Tip: Bring the unit and model number to a replacement decision if needed.
Questions & Answers
What causes a thermostat to appear stuck?
Common causes include power interruptions, loose wiring, mechanical jams, and software glitches in digital models. Identifying the root cause guides the correct fix without unnecessary replacements.
Stuck thermostats usually come from power or wiring issues, or a jam in the dial. Start by powering down, then inspect connections and test the device.
Is it safe to DIY if the thermostat is hardwired to power?
DIY can be safe if you shut off power at the breaker and follow step-by-step inspection guidelines. If you’re unsure about wiring, consult a professional to avoid electrical hazards.
Yes, but make sure the power is fully off and you know which wires go where.
Can a weak battery cause a thermostat to appear stuck?
Yes, in battery-powered or hybrid models a weak or corroded battery can prevent proper operation. Replace or reseat batteries and test responsiveness.
A dying battery can make the thermostat seem stuck, so check and replace batteries if needed.
What should I do if the screen stays frozen after a reset?
If a soft reset doesn’t clear the freeze, perform a factory reset if supported, or contact support for further diagnostics. Make note of error codes.
If the screen stays frozen after resetting, try a factory reset or check error codes with the manual.
How long should the thermostat take to respond after a reset?
Response times vary by model, but most thermostats should react within a couple of minutes after a reset and reattachment of wiring.
Most thermostats respond within a few minutes after a reset and reconnection.
When should I replace instead of repairing a thermostat?
If the unit is very old, repeatedly malfunctioning, or no longer compatible with your HVAC system, replacement may be more cost-effective than repair.
If it’s old and keeps failing, replacement is often wiser than repair.
Watch Video
What to Remember
- Power down before touching wiring
- Inspect wiring and terminals for secure connections
- Dial units require careful, debris-free inspections
- Digital thermostats often fix with battery reset and soft reset
- Reattach and test after reassembly for proper operation
- Call a pro if no improvement after resets